ADDITIONAL ACCESSORIES
• CLEARVU7 (LCD Monitor) | • CVW62 (60 ft. Camera Extension Cable) | • |
For more information or accessories please visit: www.svat.com
BUTTONS & CONNECTIONS
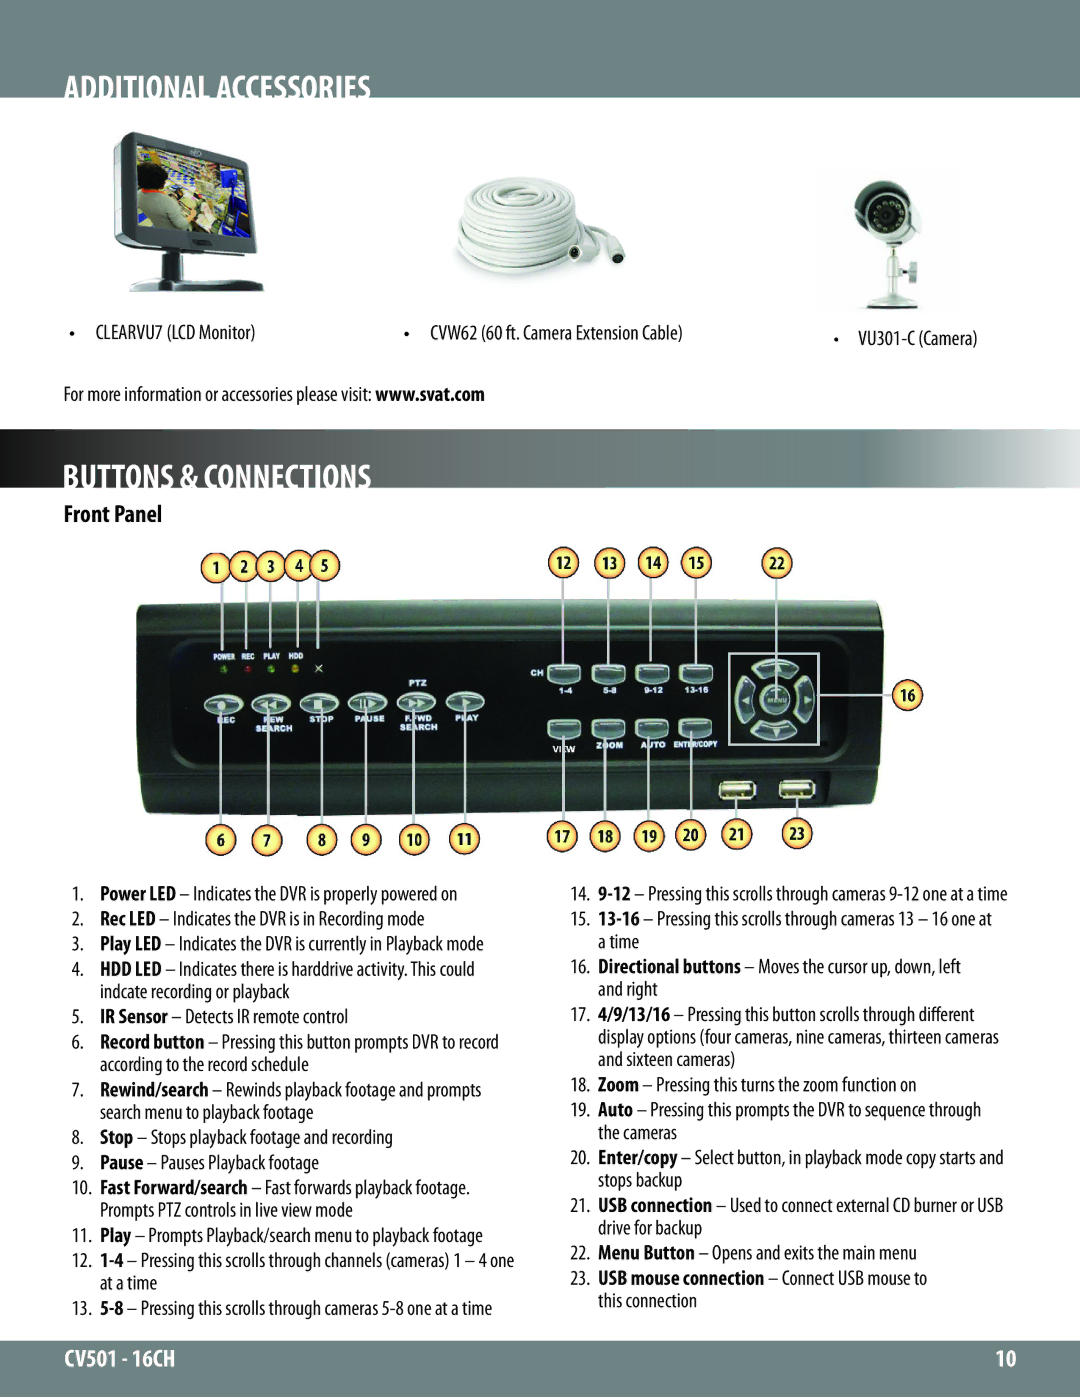
Front Panel
1.Power LED – Indicates the DVR is properly powered on
2.Rec LED – Indicates the DVR is in Recording mode
3.Play LED – Indicates the DVR is currently in Playback mode
4.HDD LED – Indicates there is harddrive activity. This could indcate recording or playback
5.IR Sensor – Detects IR remote control
6.Record button – Pressing this button prompts DVR to record according to the record schedule
7.Rewind/search – Rewinds playback footage and prompts search menu to playback footage
8.Stop – Stops playback footage and recording
9.Pause – Pauses Playback footage
10.Fast Forward/search – Fast forwards playback footage. Prompts PTZ controls in live view mode
11.Play – Prompts Playback/search menu to playback footage
12.
13.
14.
15.
16.Directional buttons – Moves the cursor up, down, left and right
17.4/9/13/16 – Pressing this button scrolls through different display options (four cameras, nine cameras, thirteen cameras and sixteen cameras)
18.Zoom – Pressing this turns the zoom function on
19.Auto – Pressing this prompts the DVR to sequence through the cameras
20.Enter/copy – Select button, in playback mode copy starts and stops backup
21.USB connection – Used to connect external CD burner or USB drive for backup
22.Menu Button – Opens and exits the main menu
23.USB mouse connection – Connect USB mouse to this connection
CV501 - 16CH | 10 |
|
|
