NETWORK GUIDE...continued
Method 2:
1.Open up Internet Explorer.
2.Click on TOOLS.
3.Click on INTERNET OPTIONS.
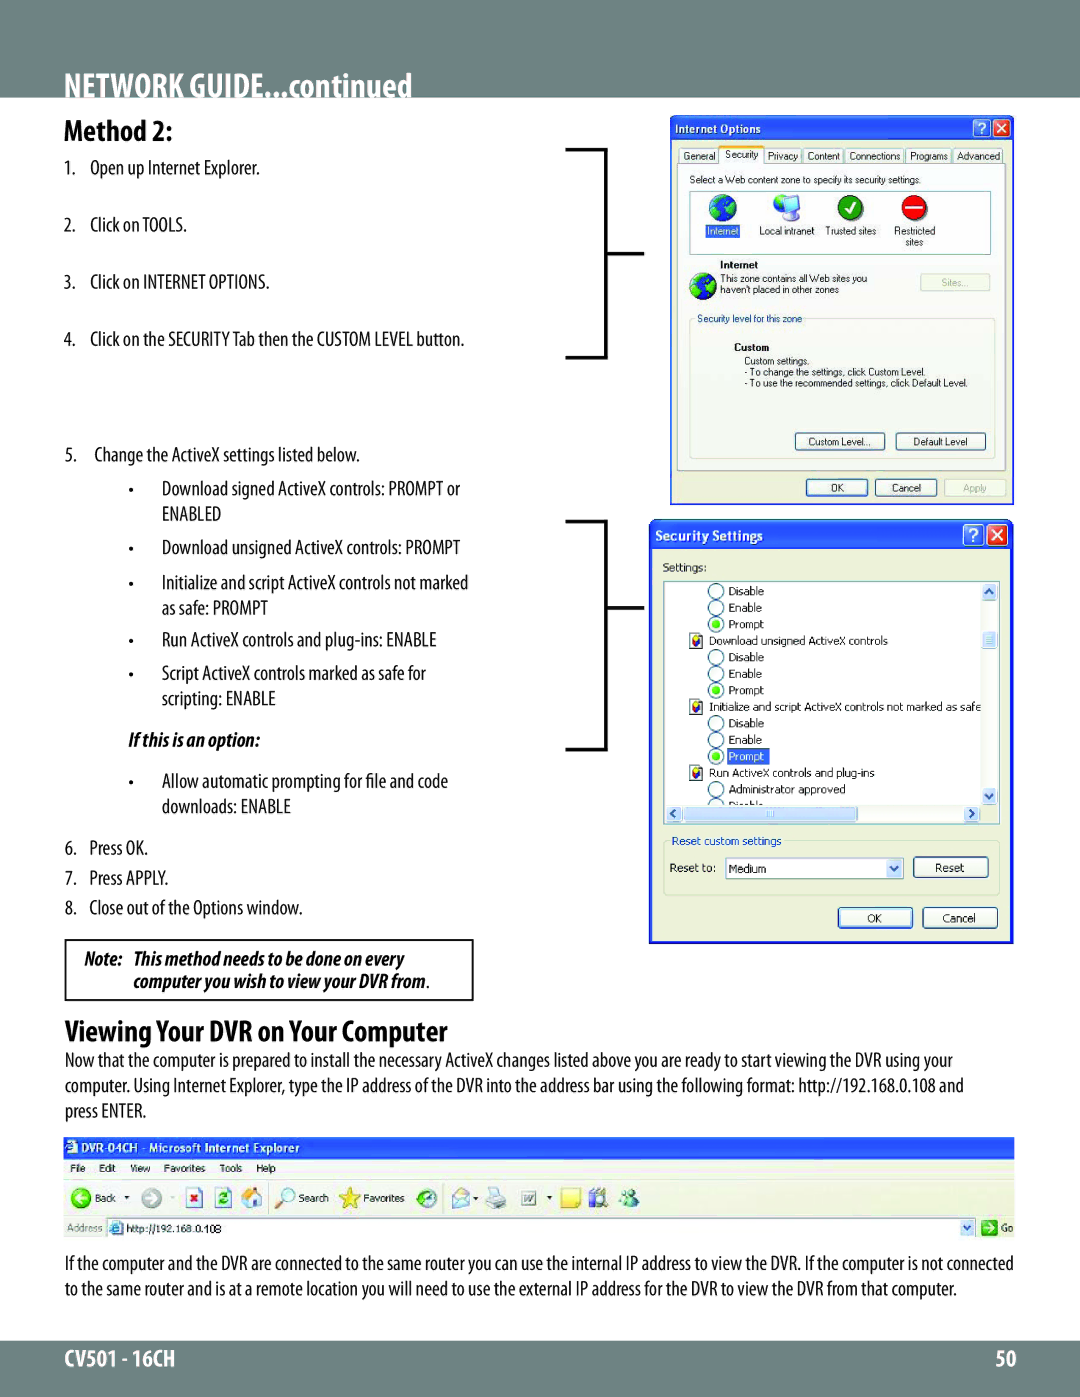
4.Click on the SECURITY Tab then the CUSTOM LEVEL button.
5.Change the ActiveX settings listed below.
•Download signed ActiveX controls: PROMPT or
ENABLED
•Download unsigned ActiveX controls: PROMPT
•Initialize and script ActiveX controls not marked as safe: PROMPT
•Run ActiveX controls and
•Script ActiveX controls marked as safe for scripting: ENABLE
If this is an option:
•Allow automatic prompting for file and code downloads: ENABLE
6.Press OK.
7.Press APPLY.
8.Close out of the Options window.
Note: This method needs to be done on every computer you wish to view your DVR from.
Viewing Your DVR on Your Computer
Now that the computer is prepared to install the necessary ActiveX changes listed above you are ready to start viewing the DVR using your computer. Using Internet Explorer, type the IP address of the DVR into the address bar using the following format: http://192.168.0.108 and press ENTER.
If the computer and the DVR are connected to the same router you can use the internal IP address to view the DVR. If the computer is not connected to the same router and is at a remote location you will need to use the external IP address for the DVR to view the DVR from that computer.
CV501 - 16CH | 50 |
|
|
