MAINTENANCE
MAINTENANCE
REVERSING MOWER ROTATION OF SIDE FLAIL MOWERS
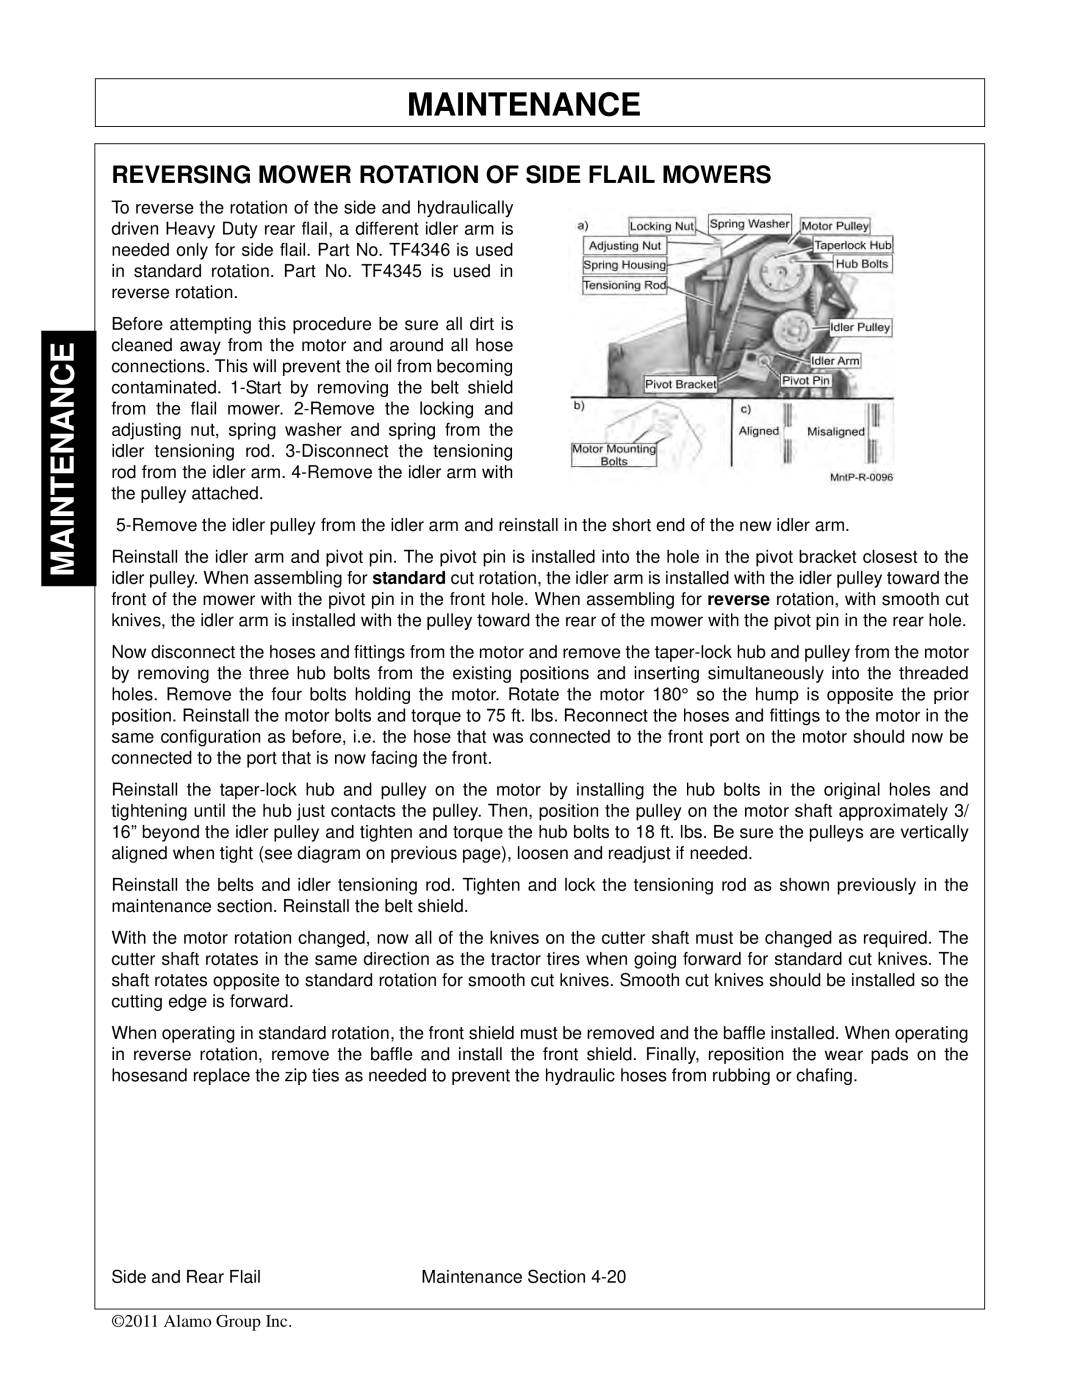
To reverse the rotation of the side and hydraulically driven Heavy Duty rear flail, a different idler arm is needed only for side flail. Part No. TF4346 is used in standard rotation. Part No. TF4345 is used in reverse rotation.
Before attempting this procedure be sure all dirt is cleaned away from the motor and around all hose connections. This will prevent the oil from becoming contaminated.
Reinstall the idler arm and pivot pin. The pivot pin is installed into the hole in the pivot bracket closest to the idler pulley. When assembling for standard cut rotation, the idler arm is installed with the idler pulley toward the front of the mower with the pivot pin in the front hole. When assembling for reverse rotation, with smooth cut knives, the idler arm is installed with the pulley toward the rear of the mower with the pivot pin in the rear hole.
Now disconnect the hoses and fittings from the motor and remove the
Reinstall the
Reinstall the belts and idler tensioning rod. Tighten and lock the tensioning rod as shown previously in the maintenance section. Reinstall the belt shield.
With the motor rotation changed, now all of the knives on the cutter shaft must be changed as required. The cutter shaft rotates in the same direction as the tractor tires when going forward for standard cut knives. The shaft rotates opposite to standard rotation for smooth cut knives. Smooth cut knives should be installed so the cutting edge is forward.
When operating in standard rotation, the front shield must be removed and the baffle installed. When operating in reverse rotation, remove the baffle and install the front shield. Finally, reposition the wear pads on the hosesand replace the zip ties as needed to prevent the hydraulic hoses from rubbing or chafing.
Side and Rear Flail | Maintenance Section |
©2011 Alamo Group Inc.
