2 PRINTING FROM WINDOWS
Print options
This section describes print options in each tab of the printer driver. This section will help you to find the description of specific print options, or understand the functions of each print option.
How to display:
1 Click the [Start] menu, [Control Panel], [Hardware and Sound] and select [Printer]. The Printers folder appears.
yFor Windows XP or Windows Server 2003
Click the [Start] menu and select [Printers and Faxes].
yFor Windows 2000
Click the [Start] menu, [Settings] and select [Printers].
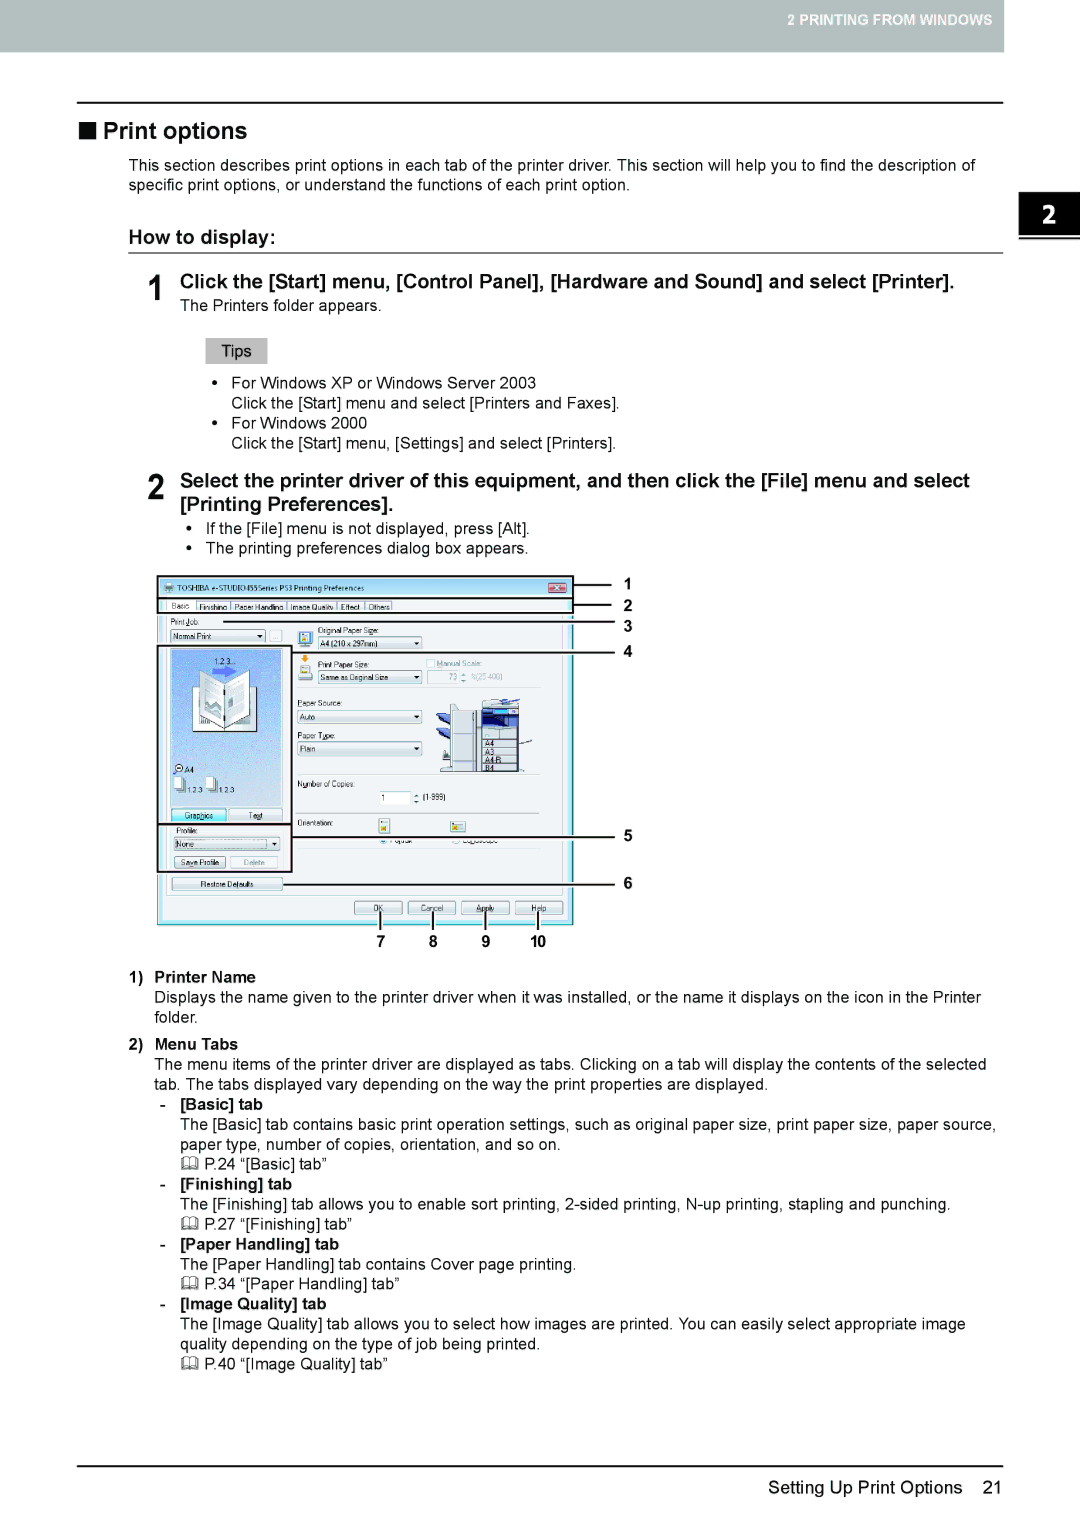
2 Select the printer driver of this equipment, and then click the [File] menu and select [Printing Preferences].
yIf the [File] menu is not displayed, press [Alt].
yThe printing preferences dialog box appears.
1
2
3
4
5
6
7 8 9 10
1)Printer Name
Displays the name given to the printer driver when it was installed, or the name it displays on the icon in the Printer folder.
2)Menu Tabs
The menu items of the printer driver are displayed as tabs. Clicking on a tab will display the contents of the selected tab. The tabs displayed vary depending on the way the print properties are displayed.
-[Basic] tab
The [Basic] tab contains basic print operation settings, such as original paper size, print paper size, paper source, paper type, number of copies, orientation, and so on.
P.24 “[Basic] tab”
-[Finishing] tab
The [Finishing] tab allows you to enable sort printing,
-[Paper Handling] tab
The [Paper Handling] tab contains Cover page printing. P.34 “[Paper Handling] tab”
-[Image Quality] tab
The [Image Quality] tab allows you to select how images are printed. You can easily select appropriate image quality depending on the type of job being printed.
P.40 “[Image Quality] tab”