System Administration | 57 |
2.Depending on whether you select Manual FTP Information or Use DHCP Server’s FTP Options complete one of the following:
•If you selected Manual FTP Information, enter the IP address of the FTP server along with the path to the MSI package that installs the Addon (the MSI package on the FTP server must be accompanied by a Params.ini file in the same path or the installation will fail).
•If you selected Use DHCP Server’s FTP Options, the FTP Path box is disabled and displays the FTP server name and path derived from the DHCP server (DHCP Options 161 - FTP server list and 162 - Root path to the FTP files must be configured as described in "Using FTP File Servers").
3.Enter the credentials to connect to the FTP server (default User name is anonymous and the default Password is Wyse).
4.Select Save Password to allow FTP server login without entering credentials.
5.(Optional) Click Settings to open and use the Network Configurable Settings dialog box to set connection retry attempts and intervals between attempts.
6.Click the Upgrade button to download the Addon from the FTP server.
Note
When you click the Upgrade button, the thin client reboots to disable the Write Filter. The reboot process takes approximately five seconds. Following the installation, the thin client reboots to enable the Write Filter.
Automatically Installing and Upgrading Addons
Use the following guidelines:
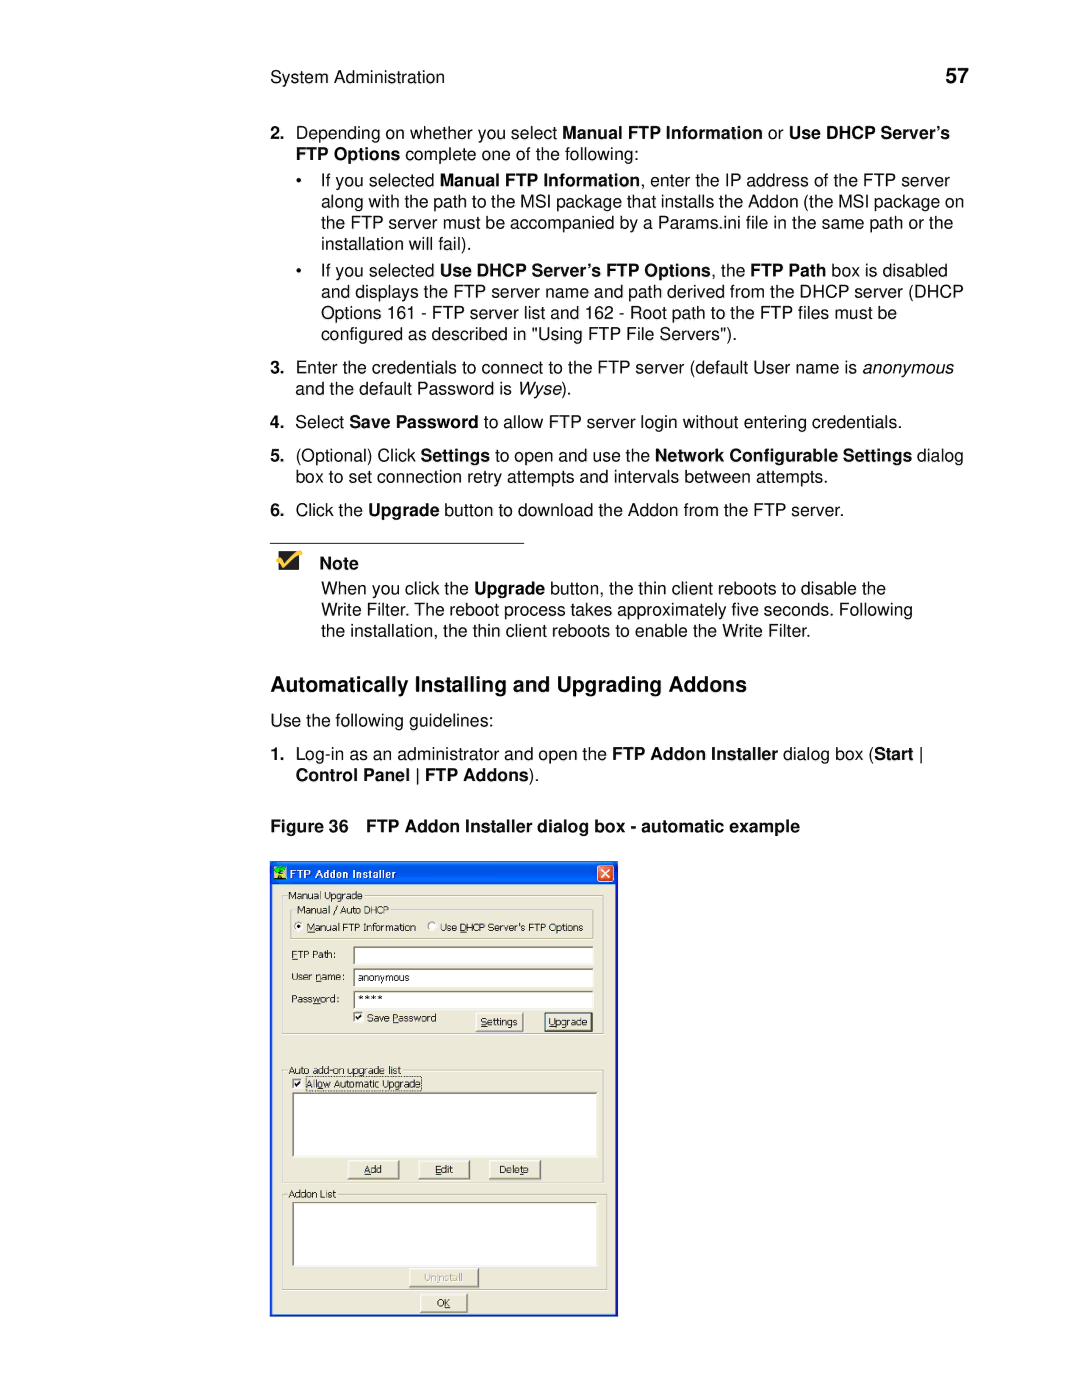
1.