Freedom SW 3000 Inverter/Charger Features
1 | 2 |
FREEDOM | SW |
|
| |
|
|
| ||
|
| 3000 |
| |
Xanbus In |
|
|
|
|
terface | R | I |
|
|
|
| eset nvert |
|
|
|
| Enableer |
|
|
|
| In |
|
|
|
| verter |
|
|
|
| On | AC/ |
|
|
|
| Charge | Fault |
|
| FREEDOM | ||
|
| SW | ||
|
|
|
| |
|
|
|
| 3000 |
8 | 7 | 6 | 5 | 4 | 3 |
Item | Description |
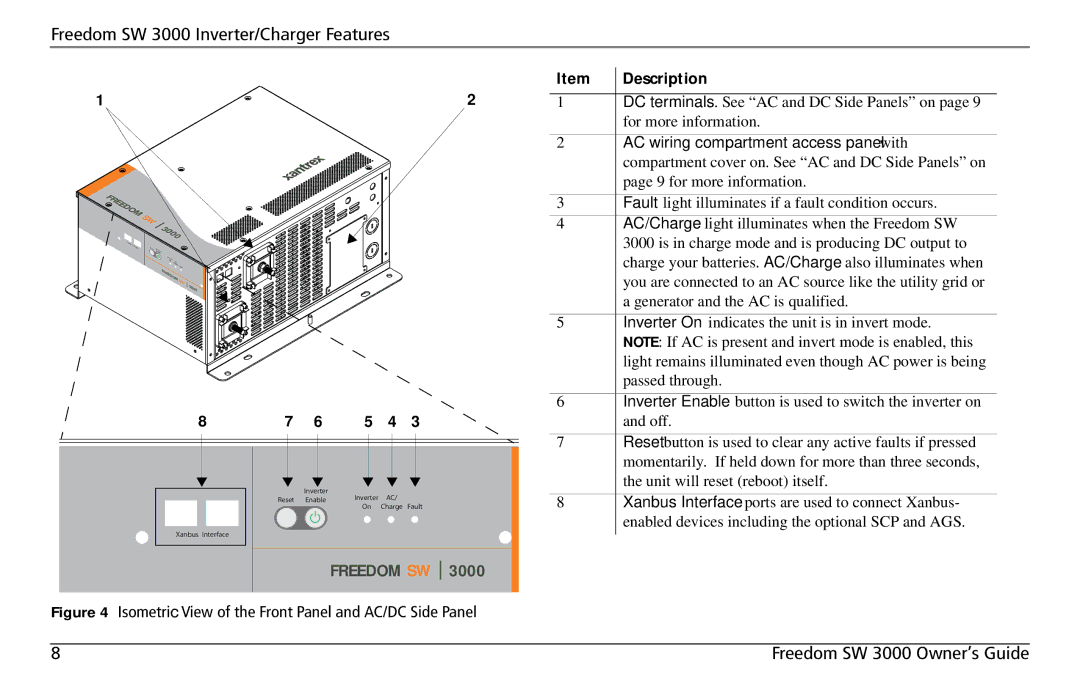
1 | DC terminals. See “AC and DC Side Panels” on page 9 |
| for more information. |
2 | AC wiring compartment access panel with |
| compartment cover on. See “AC and DC Side Panels” on |
| page 9 for more information. |
|
|
3 | Fault light illuminates if a fault condition occurs. |
4 | AC/Charge light illuminates when the Freedom SW |
| 3000 is in charge mode and is producing DC output to |
| charge your batteries. AC/Charge also illuminates when |
| you are connected to an AC source like the utility grid or |
| a generator and the AC is qualified. |
5 | Inverter On indicates the unit is in invert mode. |
| NOTE: If AC is present and invert mode is enabled, this |
| light remains illuminated even though AC power is being |
| passed through. |
6 | Inverter Enable button is used to switch the inverter on |
| and off. |
|
|
7 | Reset button is used to clear any active faults if pressed |
| momentarily. If held down for more than three seconds, |
| the unit will reset (reboot) itself. |
Xanbus Interface
|
|
|
| Inverter | Inverter | AC/ | |||||
Reset Enable | |||||||||||
On | Charge Fault | ||||||||||
|
|
|
|
|
|
|
|
| |||
|
|
|
|
|
|
|
|
|
|
| |
FREEDOM SW 
 3000
3000
8 | Xanbus Interface ports are used to connect Xanbus- |
| enabled devices including the optional SCP and AGS. |
Figure 4 Isometric View of the Front Panel and AC/DC Side Panel
8 | Freedom SW 3000 Owner’s Guide |