Xerox 490/980 Color Continuous Feed Printing System |
Set Up Imposition Files
This section explains how to import either a simplex or duplex imposition file from the [Color Calibration Resources] directory copied to the Windows Desktop in Chapter 3, and how to manipulate the imported simplex or duplex imposition file to accommodate whatever paper size you are using. There are different procedures for manipulating the imposition file depending on if it is for a simplex or duplex system.
Import Simplex/Duplex Imposition Files
The purpose of this procedure is to ensure proper placement of the density test pattern on the paper. This imposition file has already been created for you. The following procedure will describe how to import it onto the
1.On the
2.Select the [System Resource] tab.
3.In the Media/Directory
Note
In the following step, if the [Color Calibration Resources] does not appear, the directory structure must be refreshed. Refresh the directory structure by selecting [System Directory] and then [Local PC] in the Media/Directory
4.Browse to [Local Disk (C:)\Documents and Settings\[Current Logged in Windows XP Profile]\Desktop\Color Calibration Resources\Imposition Files].
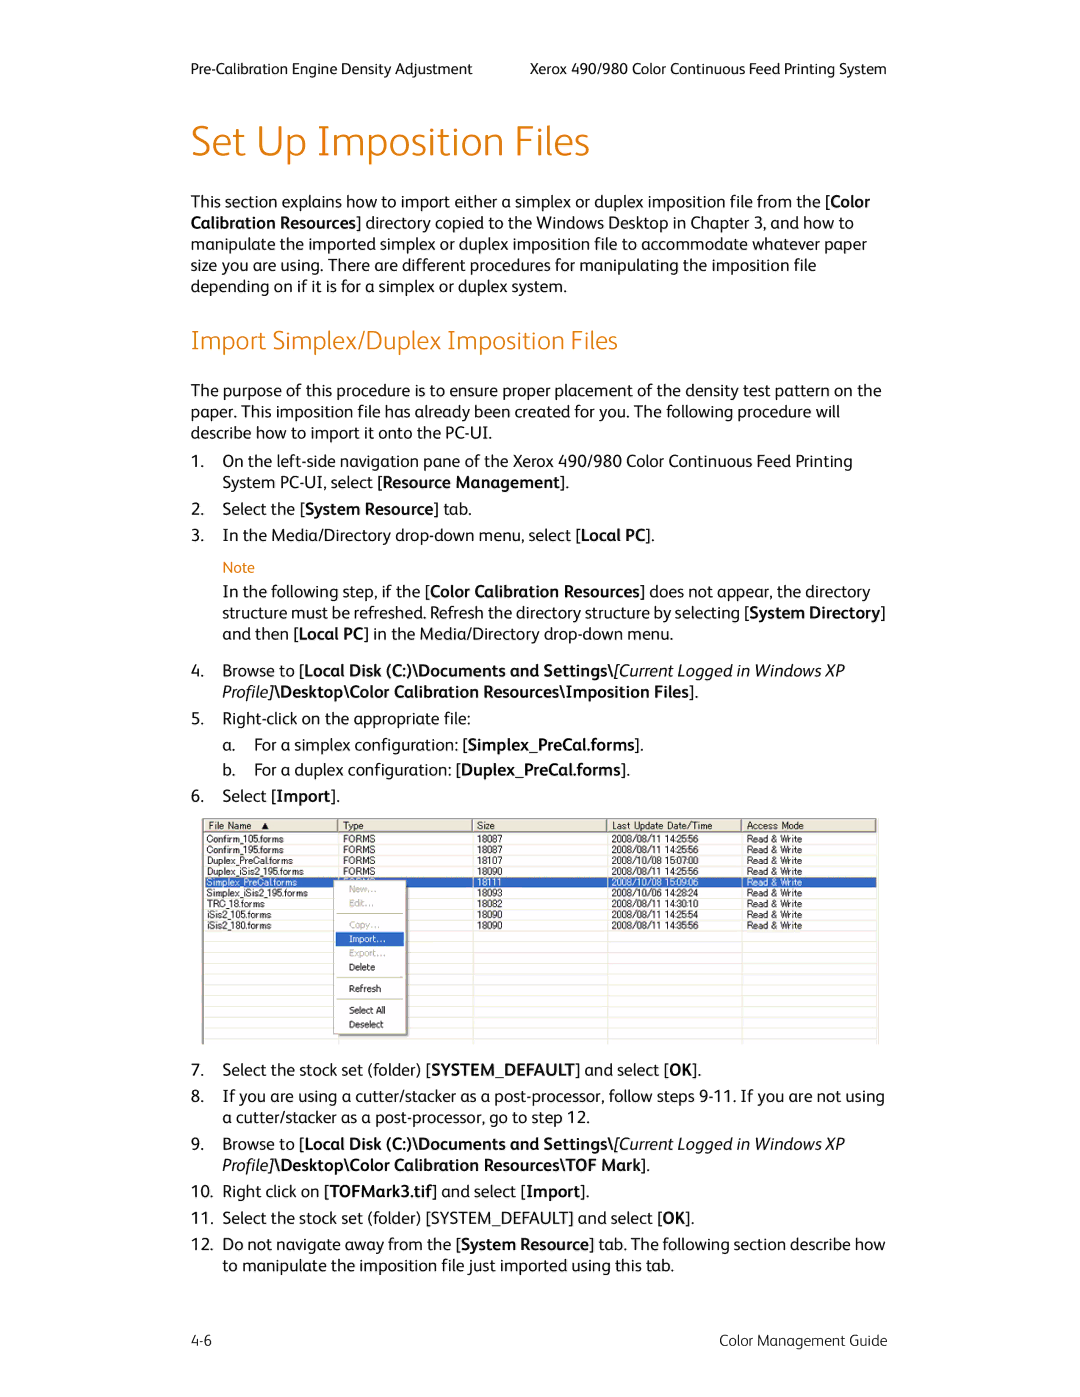
5.
a.For a simplex configuration: [Simplex_PreCal.forms].
b.For a duplex configuration: [Duplex_PreCal.forms].
6.Select [Import].
7.Select the stock set (folder) [SYSTEM_DEFAULT] and select [OK].
8.If you are using a cutter/stacker as a
9.Browse to [Local Disk (C:)\Documents and Settings\[Current Logged in Windows XP Profile]\Desktop\Color Calibration Resources\TOF Mark].
10.Right click on [TOFMark3.tif] and select [Import].
11.Select the stock set (folder) [SYSTEM_DEFAULT] and select [OK].
12.Do not navigate away from the [System Resource] tab. The following section describe how to manipulate the imposition file just imported using this tab.
Color Management Guide |
