Manuals
/
Xerox
/
Computer Equipment
/
Switch
Xerox
KS-801
operation manual
Models:
KS-801
1
51
63
63
Download
63 pages
48.76 Kb
48
49
50
51
52
53
54
55
Specification
Install
Restore Default Values
LED Indicators
Login
Administrator
Manual Configuration
MDI-X and MDI RJ-45 Connectors
Duplex Mode Setting
Update Firmware
Page 51
Image 51
-51-
Page 50
Page 52
Page 51
Image 51
Page 50
Page 52
Contents
10/100 Fast Ethernet Managed Switch with Fiber Connectivity
Trademarks
Table of Contents
Web Management
Console & Telnet Management
Introduction
Features
Page
Specifications
Packing List
Installing the Switch
Panels
Desktop Mounting
Mounting the Switches
Install Rack Mount Brackets
Install the Switch into a 19-inch Rack
Making Network Connections
Network Switched Ports
MDI-X and MDI RJ-45 Connectors
10/100BASE-TX Fast Ethernet Switched Ports
Auto-speed-sensing
Manual Configuration
10/100BASE-TX Fast Ethernet Ports
Auto-negotiation Capable
Flow Control
UTP Cable Connections
Straight-through and Crossover UTP Cable
Fast Ethernet Fiber Slot
Module Connector type Fiber cable Maximum length
Module Outline
Fiber Module Top view Fiber Jumper Setting
Duplex Mode Setting
Specifications
Module Installation
Making Trunk Connections
Switch supports the following trunk configurations
Page
Sniffer Port
When doing sniffer, configure
Making Sniffer
Monitored Ports
LED Indicators
LED Panels
Interpretation
Management Support
Performing Network Management
Management objects
Login Port Status
Console Management
Setting IP Address
Telnet Management
Console port does not support modem connection
Refer to for more information
Support
Snmp Management
Console & Telnet Management
Select 2 from main menu to view IP status
Set IP Address
IP Status
Select 1 from main menu to set IP address
Port status definitions are
View Port Status
View Port Counters
View STP Status
Page
Restore Default Values
Console Sftp Utility
Update Firmware
\WINDOWSSFTP
Prompts shown on DOS screen are as follows
Processing messages shown on console screen are
Remote Boot System
Web Browser
Set IP Address for the Switch
Web Management
Start Browser Software and Making Connection
Login to the Switch
Login
Factory default Username Admin Factory default Password
Page
Port Status
Port Statistics
Administrator
Basic
Click Basic to view or modify the following settings
IP Address
IP Address settings are
Snmp Entries
Use scroll bar to view all settings as follows
Snmp settings are
Click Advanced in menu to perform
Advanced
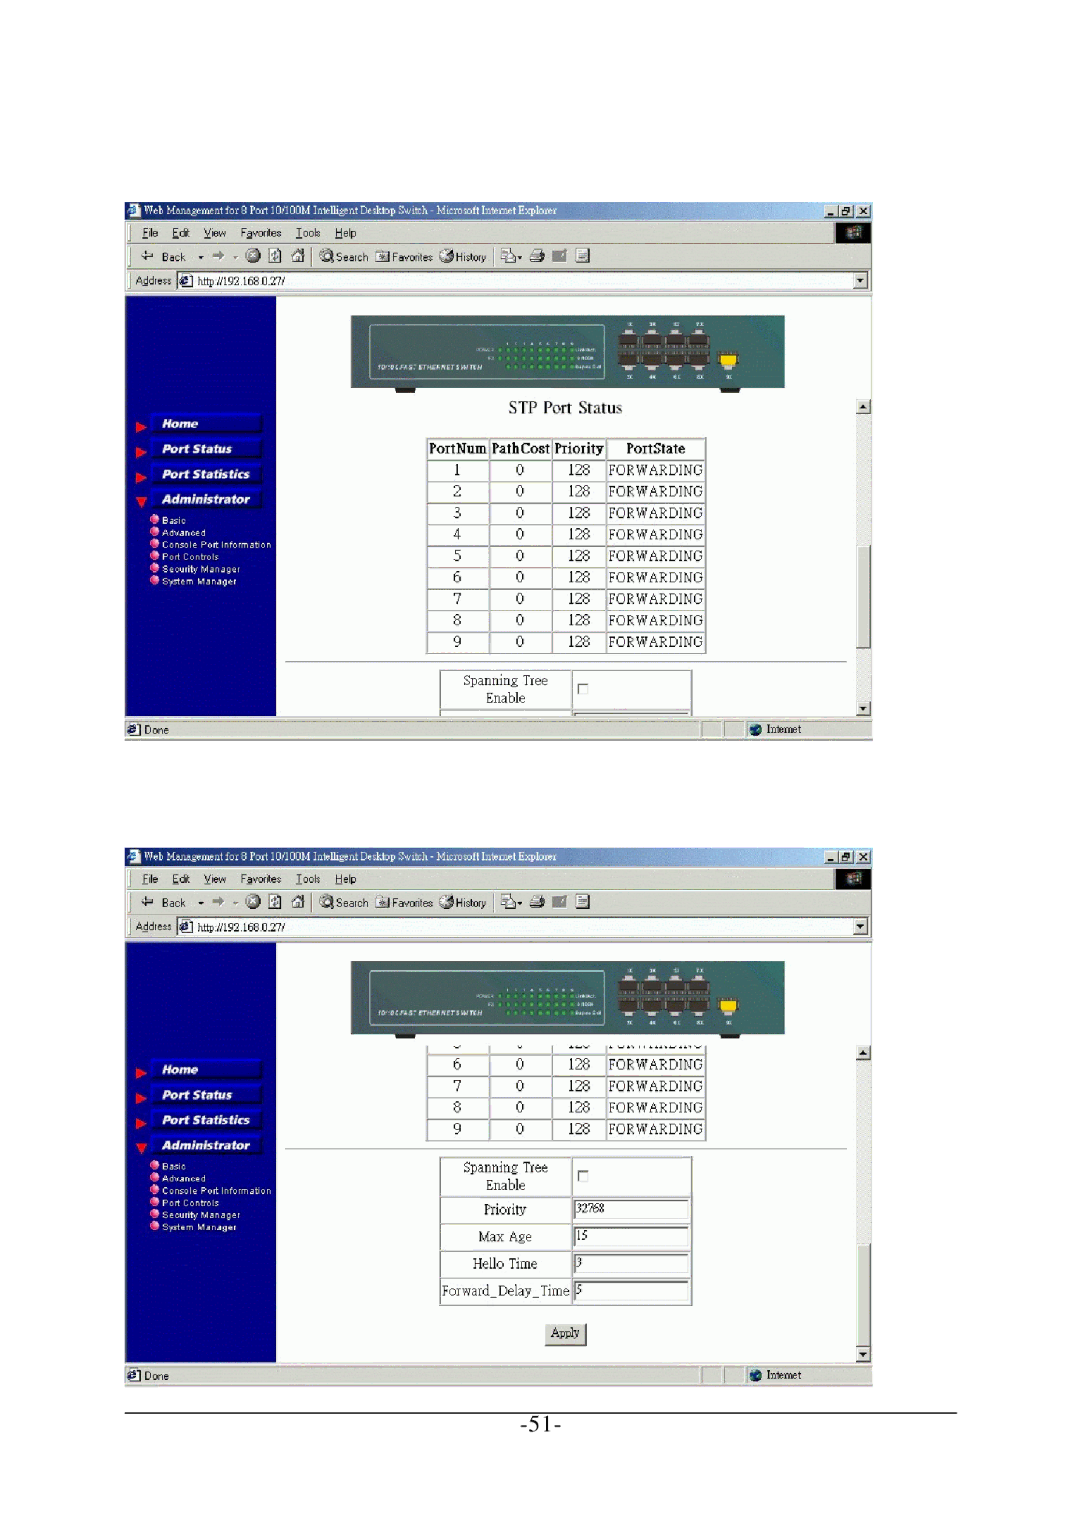
Advanced / Spanning
Page
Page
Fier to the network
Priority is assigned to the switch. The higher
MAC address of the switch as a unique identi
Value is lower priority. Range 0
Learning The switch enters the Learning State if no
Ports which are enabled can be in one of the follow
Listening Switches send messages to one another
Blocking The switch enters the Blocking State if a
Advanced / Trunking
Advanced / Sniffer
Page
Console Port Information
Port Controls
Security Manager
Click System Manager to perform
System Manager
Click Apply to start Tftp file transfer operations
Tftp Update Firmware
Page
Remote Boot System
Top
Page
Image
Contents