| 7 |
| 41 |
| 3 |
| 41 |
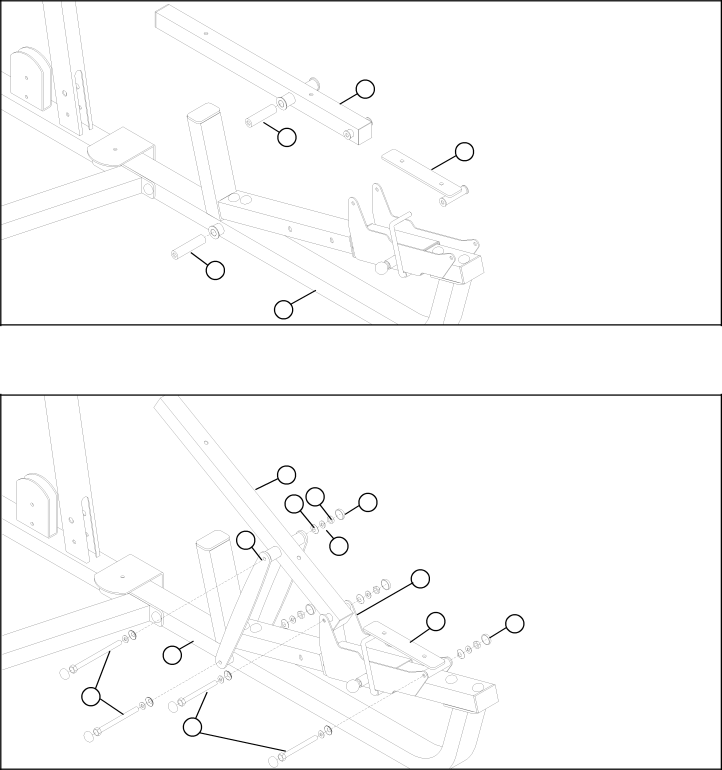
FIGURE 22 | 8 |
STEP 22: |
|
•Insert one
|
| 7 |
|
|
|
| 67 65 | 68 BLACK |
|
|
| 18 | 66 |
|
|
|
|
| |
|
|
| 6 |
|
|
|
| 3 | 68 BLACK |
| 8 |
|
|
|
3/8 X 164mm | 61 |
|
|
|
| 60 | 3/8 X 106mm |
|
|
|
|
|
| FIGURE 23 |
STEP 23:
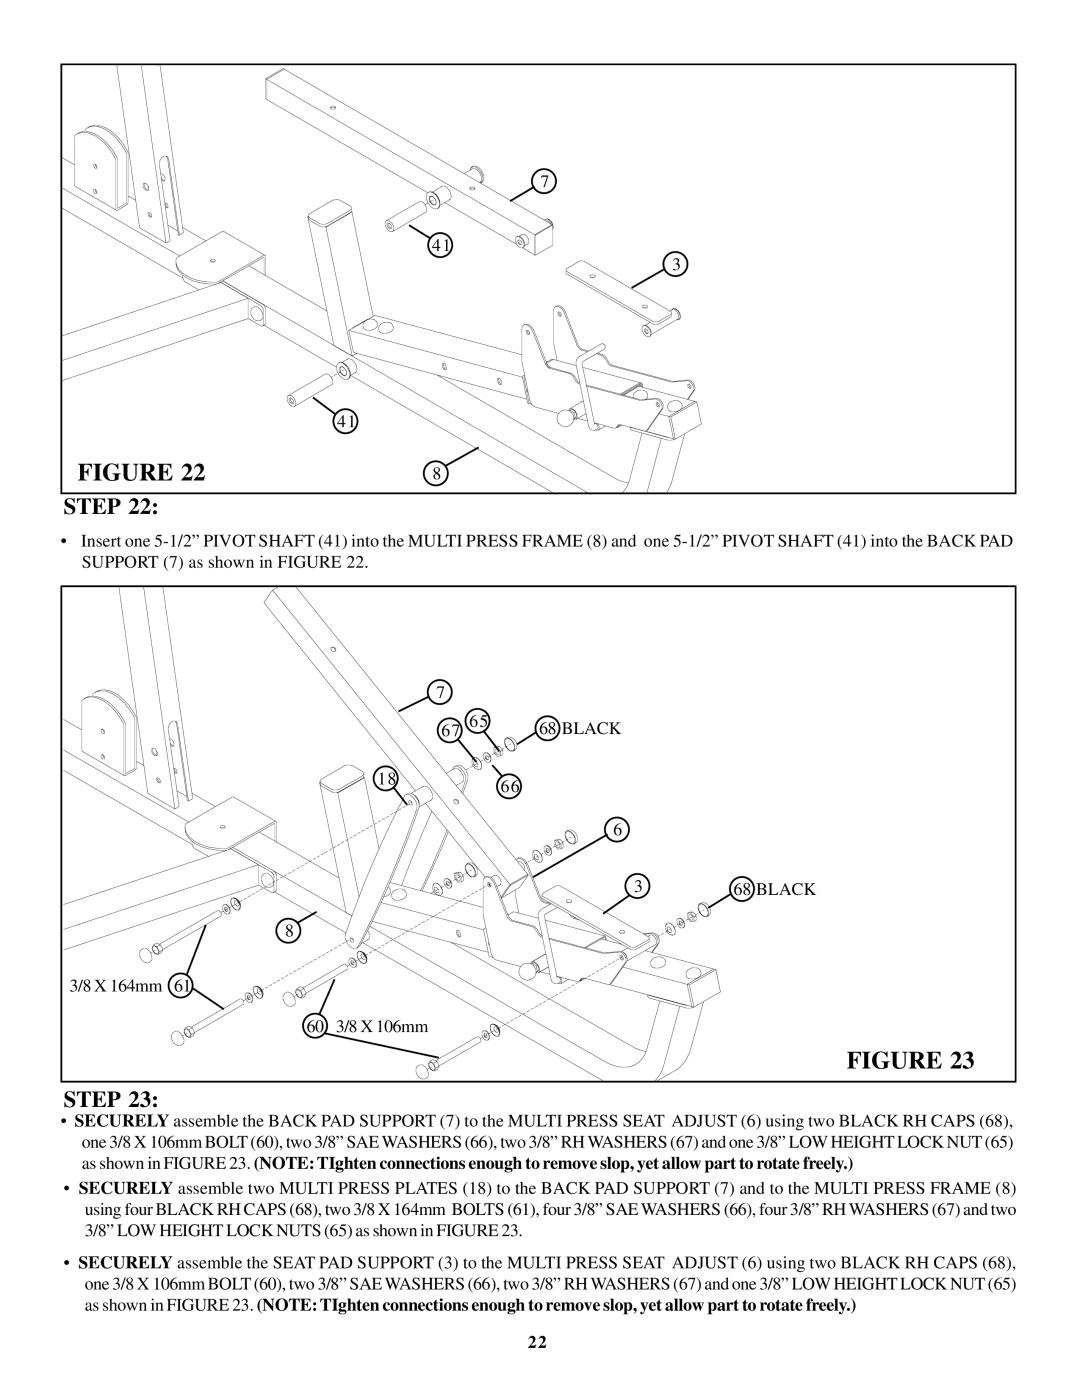
•SECURELY assemble the BACK PAD SUPPORT (7) to the MULTI PRESS SEAT ADJUST (6) using two BLACK RH CAPS (68), one 3/8 X 106mm BOLT (60), two 3/8” SAE WASHERS (66), two 3/8” RH WASHERS (67) and one 3/8” LOW HEIGHT LOCK NUT (65) as shown in FIGURE 23. (NOTE: TIghten connections enough to remove slop, yet allow part to rotate freely.)
•SECURELY assemble two MULTI PRESS PLATES (18) to the BACK PAD SUPPORT (7) and to the MULTI PRESS FRAME (8) using four BLACK RH CAPS (68), two 3/8 X 164mm BOLTS (61), four 3/8” SAE WASHERS (66), four 3/8” RH WASHERS (67) and two 3/8” LOW HEIGHT LOCK NUTS (65) as shown in FIGURE 23.
•SECURELY assemble the SEAT PAD SUPPORT (3) to the MULTI PRESS SEAT ADJUST (6) using two BLACK RH CAPS (68), one 3/8 X 106mm BOLT (60), two 3/8” SAE WASHERS (66), two 3/8” RH WASHERS (67) and one 3/8” LOW HEIGHT LOCK NUT (65) as shown in FIGURE 23. (NOTE: TIghten connections enough to remove slop, yet allow part to rotate freely.)
22
