Hoover Bagless Vacuum Cleaner manual Select tool, How to attach tools, After using tool

Page 13

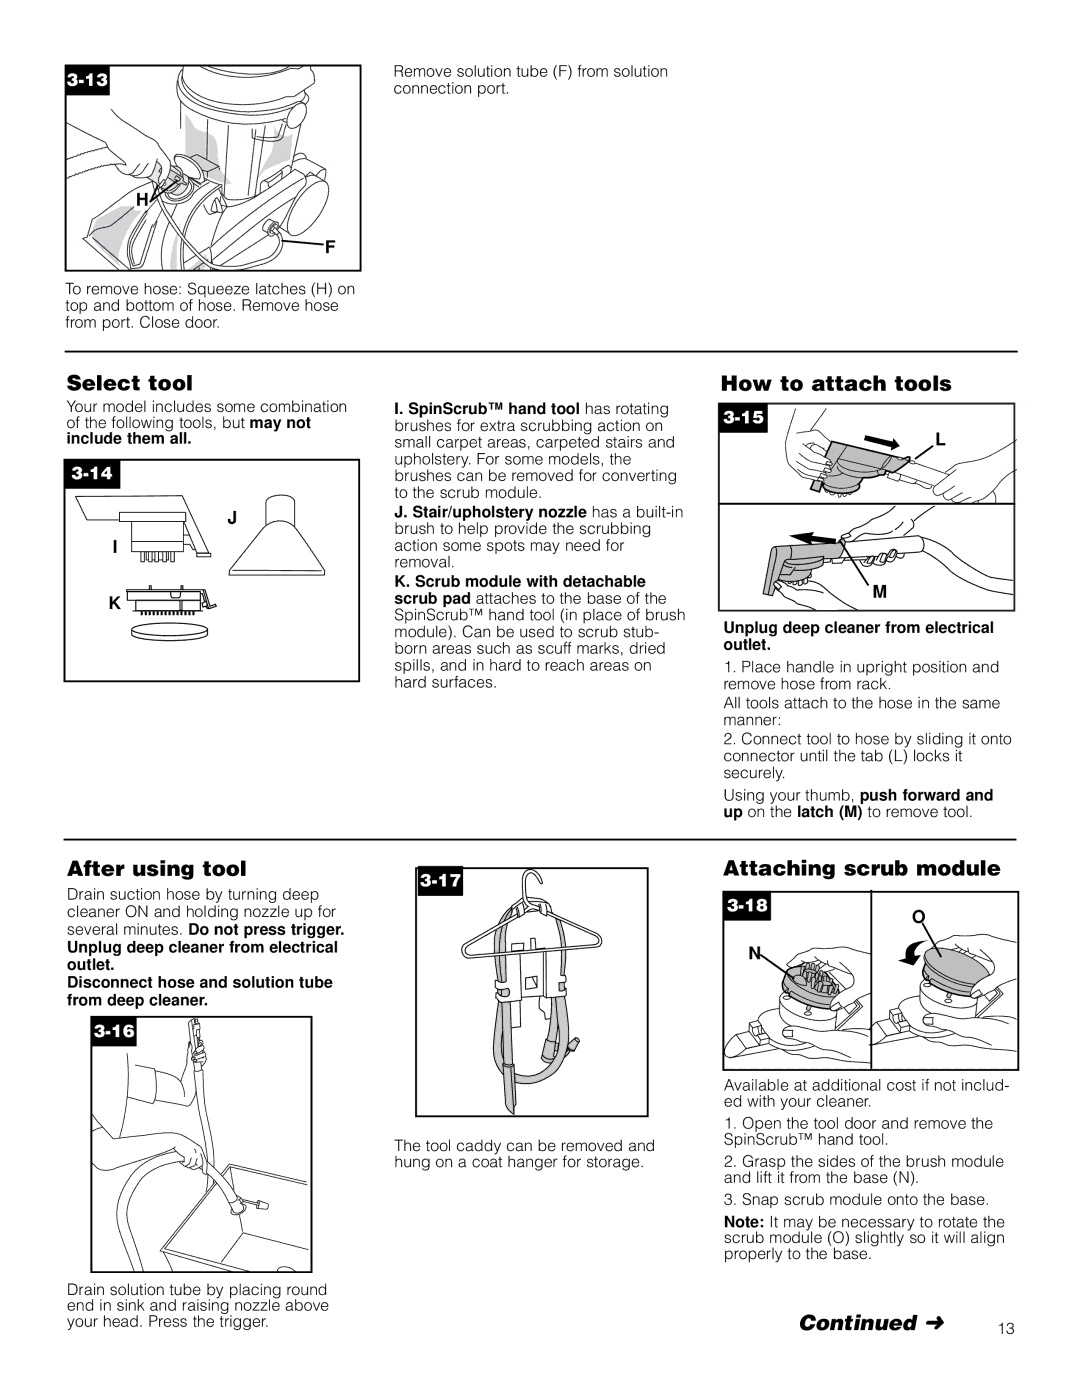
3-13

H

F

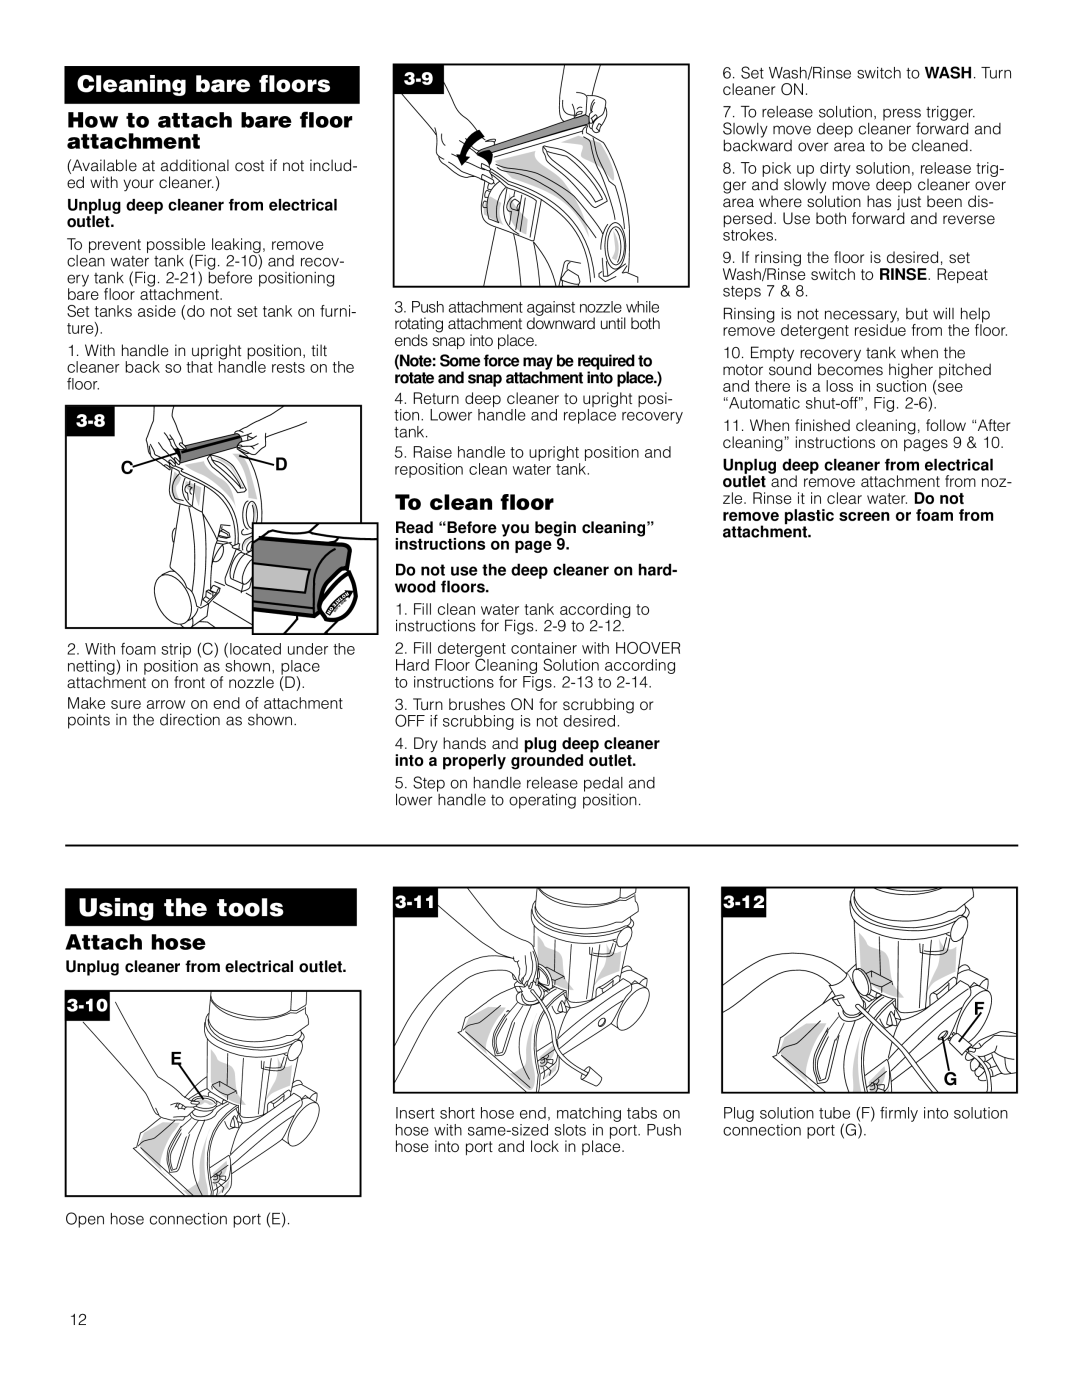
To remove hose: Squeeze latches (H) on top and bottom of hose. Remove hose from port. Close door.

Remove solution tube (F) from solution connection port.

Select tool

Your model includes some combination of the following tools, but may not include them all.

3-14

J

I

K

I. SpinScrub™ hand tool has rotating brushes for extra scrubbing action on small carpet areas, carpeted stairs and upholstery. For some models, the brushes can be removed for converting to the scrub module.

J. Stair/upholstery nozzle has a built-in brush to help provide the scrubbing action some spots may need for removal.

K. Scrub module with detachable scrub pad attaches to the base of the SpinScrub™ hand tool (in place of brush module). Can be used to scrub stub- born areas such as scuff marks, dried spills, and in hard to reach areas on hard surfaces.

How to attach tools

3-15

L

M

Unplug deep cleaner from electrical outlet.

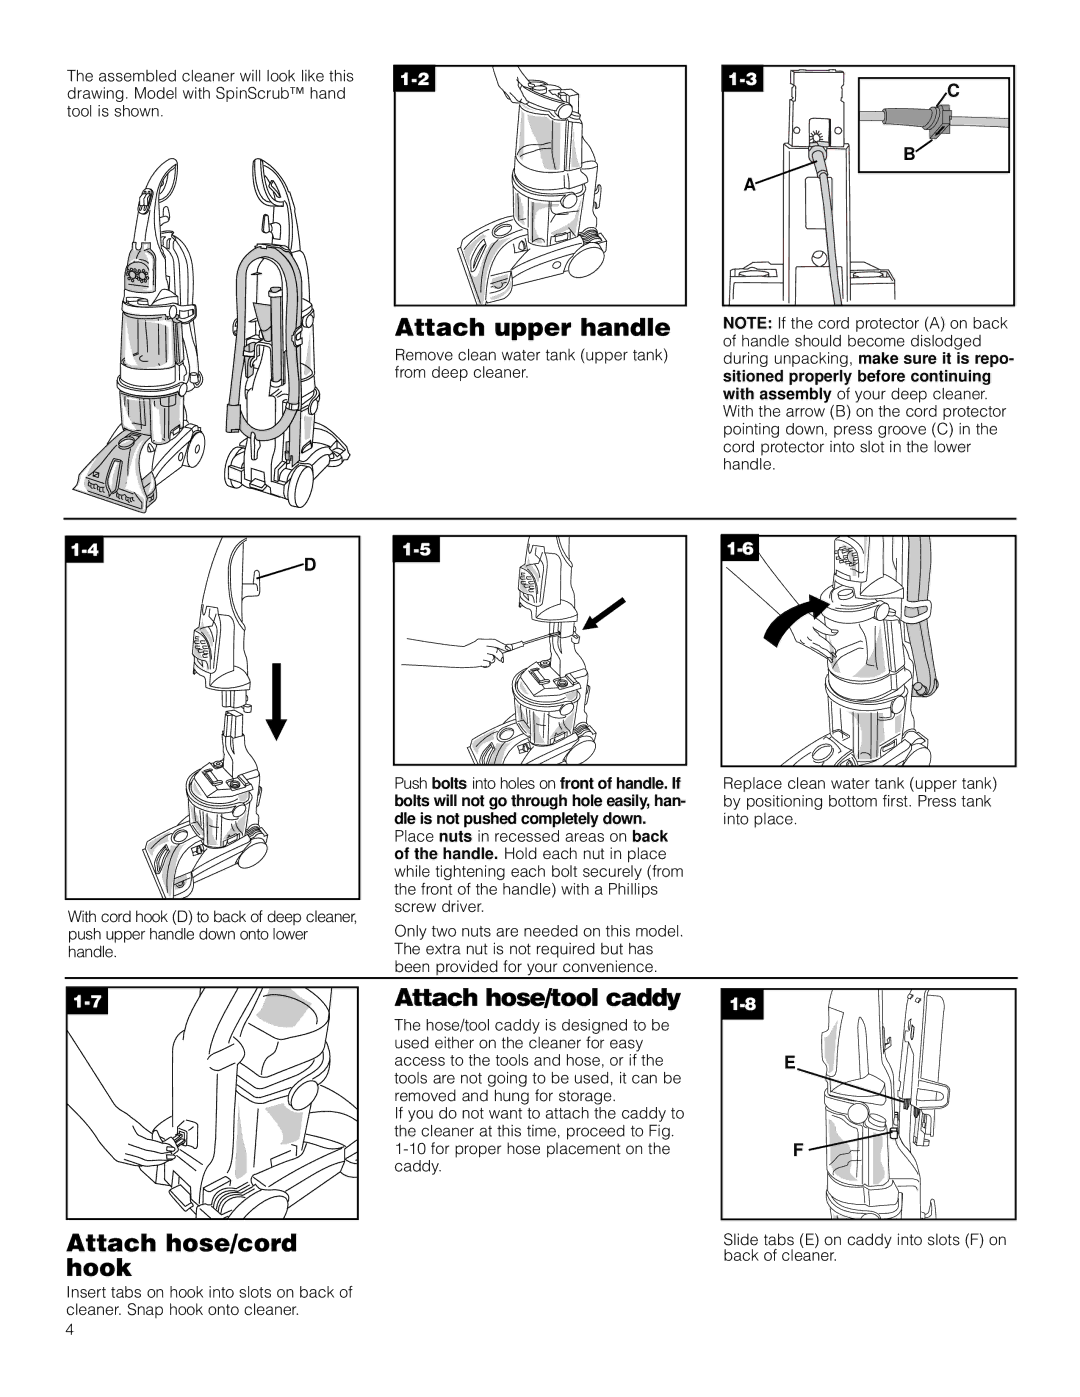
1.Place handle in upright position and remove hose from rack.

All tools attach to the hose in the same manner:

2.Connect tool to hose by sliding it onto connector until the tab (L) locks it securely.

Using your thumb, push forward and up on the latch (M) to remove tool.

After using tool

Drain suction hose by turning deep cleaner ON and holding nozzle up for several minutes. Do not press trigger.

Unplug deep cleaner from electrical outlet.

Disconnect hose and solution tube from deep cleaner.

3-16

3-17

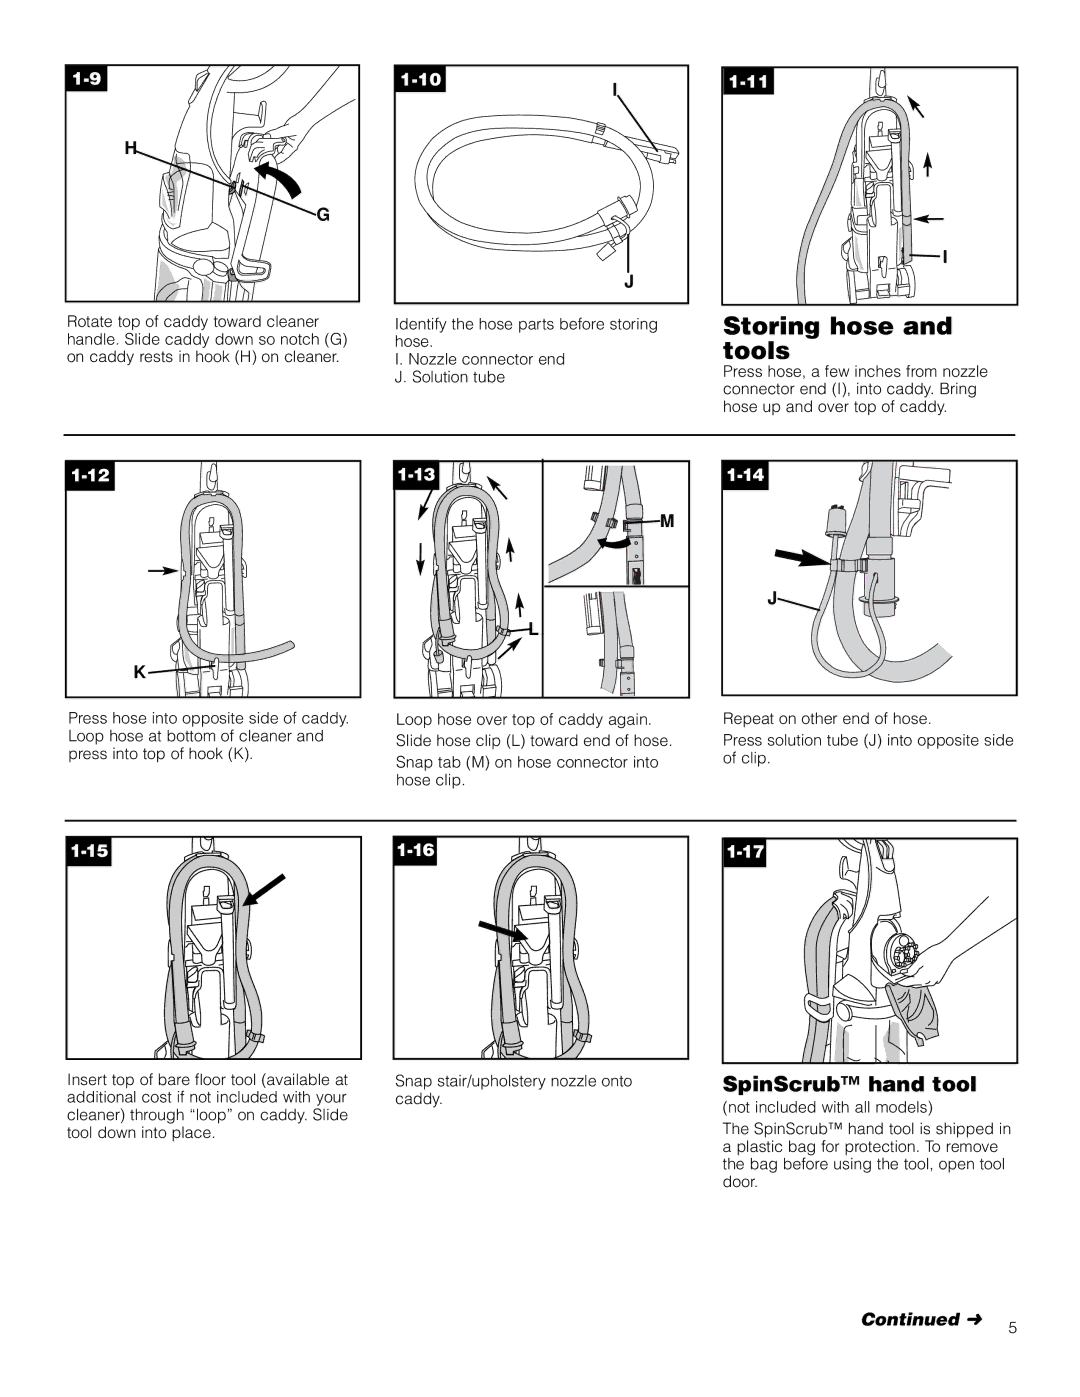
The tool caddy can be removed and hung on a coat hanger for storage.

Attaching scrub module

3-18

O

N

Available at additional cost if not includ- ed with your cleaner.

1.Open the tool door and remove the SpinScrub™ hand tool.

2.Grasp the sides of the brush module and lift it from the base (N).

3.Snap scrub module onto the base.

Note: It may be necessary to rotate the scrub module (O) slightly so it will align properly to the base.

Drain solution tube by placing round


end in sink and raising nozzle above

Continued


your head. Press the trigger.

13

Image 13
Contents Easy to Use Deep Cleaner Deep CleanerGrounding Instructions Important SafeguardsAssembly ContentsAttach hose/cord hook Attach upper handleAttach hose/tool caddy Storing hose and tools SpinScrub hand toolON/OFF switch Wash/Rinse switch How to reattach tool coverHand grip Hose Hose/tool caddy Stair/upholstery nozzleBrush setting selector ON/OFF switchHandle release pedal To transportClean water tank Wash/rinse switchHow to fill TanksHow to empty Recovery tankTurn deep cleaner off and unplug from electrical outlet Lower tankAfter cleaning Before you begin cleaningRead Before you begin cleaning instructions on To clean nozzleDo not clean over floor electrical out- lets Turn brushes on or OFF as desiredTo clean floor How to attach bare floor attachmentUnplug cleaner from electrical outlet Attach hoseAfter using tool How to attach toolsSelect tool Attaching scrub moduleAfter using scrub tool Using the scrub toolRemovable brushes Disconnect cleaner from electrical outletTo remove brushes To replace brushesRecovery tank full/automatic shut off engaged 5Possible. Ifcauseyou have a Possible solutionRecovery tank lid not on correctly Clean water tank not firmly in placeCenter or Authorized Hoover Warranty Service Dealer Depot by Full One Year Warranty Domestic Use¡Salvaguardias importantes Manual del ProprietarioLa limpiadora en Profundidad fácil de Usar Piezas necesarias para el ensamblado EnsambladoInstale el gancho para la manguera/cordón Instale el mango superiorCómo usar la limpiadora en profundidad Accesorio de mano SpinScrubTMPara guardar la manguera y los accesorios Como volver a colocar la cubierta de accesoriosCómo llenar Interruptor de encendido y apagado ON/OFFPedal para destrabar el mango Para transportarlaTanque de recuperación Cómo limpiarCómo vaciar Tanque inferiorDespués de la limpieza Para limpiar la boquillaApague y encienda las escobillas como desee Para limpiar el piso Cómo instalar el accesorio para pisos expuestosColoque la manguera Para sacar la mangueraInstalación del módulo de refregar Cómo conectar los accesoriosUso del accesorio para refregar Después de usar el accesorioMantenimiento Si tiene un problemaEscobillas removibles AlmacenamientoGarantía completa de un Año ServicioConsignes de sécurité importantes Guide de ’utilisateurLa shampouineuse facile à utiliser Français pAssemblage Fixer le plateau de rangement pour tuyau/accessoirePièces nécessaires pour l’assemblage Fixer la section supérieure du mancheUtilisation Arrêt automatique Poignée de transportSélecteur de vitesse de la brosse Interrupteur lavage/rinçageVidage du réservoir NettoyageRéservoir de récupération réservoir inférieur Avant de commencer le nettoyageNettoyage de tapis Nettoyage de l’emboutNe pas passer l’appareil sur des prises de courant au sol Comment fixer les accessoires Choix d’accessoiresUtilisation d’accessoires Fixer le tuyau Après l’utilisation de l’accessoireAprès l’utilisation de l’accessoire de frottage Utilisation l’accessoire de frottageFixation du module de frottage Nettoyage d’escaliers avec tapisEntretien DépannagePour remplacer les brosses Garantie Complète de un an ServicePage