Step 2.2 - Check the memory-card drive’s operation
Procedure
1After Windows installs the
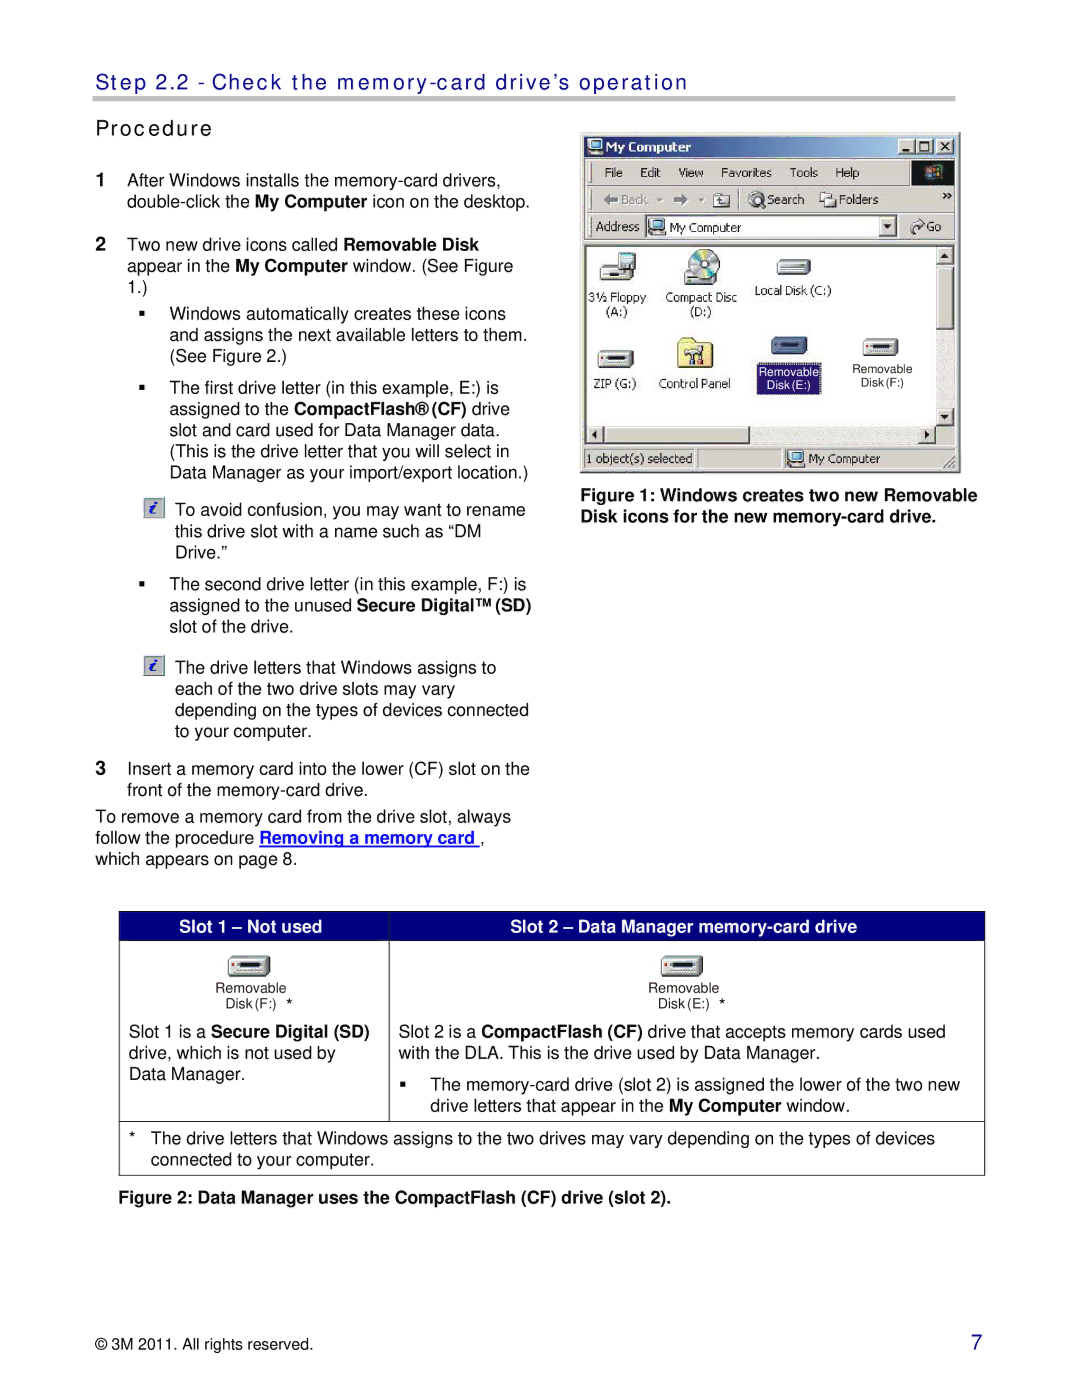
2Two new drive icons called Removable Disk appear in the My Computer window. (See Figure 1.)
Windows automatically creates these icons and assigns the next available letters to them. (See Figure 2.)
The first drive letter (in this example, E:) is assigned to the CompactFlash® (CF) drive slot and card used for Data Manager data. (This is the drive letter that you will select in Data Manager as your import/export location.)
| Removable |
Removable | |
Disk (E:) | Disk (F:) |
To avoid confusion, you may want to rename this drive slot with a name such as “DM Drive.”
The second drive letter (in this example, F:) is assigned to the unused Secure Digital™ (SD) slot of the drive.
The drive letters that Windows assigns to each of the two drive slots may vary depending on the types of devices connected to your computer.
3Insert a memory card into the lower (CF) slot on the front of the
To remove a memory card from the drive slot, always follow the procedure Removing a memory card , which appears on page 8.
Figure 1: Windows creates two new Removable Disk icons for the new memory-card drive.
Slot 1 – Not used
Removable
Disk (F:) *
Slot 1 is a Secure Digital (SD) drive, which is not used by Data Manager.
Slot 2 – Data Manager memory-card drive
Removable
Disk (E:) *
Slot 2 is a CompactFlash (CF) drive that accepts memory cards used with the DLA. This is the drive used by Data Manager.
The
*The drive letters that Windows assigns to the two drives may vary depending on the types of devices connected to your computer.
Figure 2: Data Manager uses the CompactFlash (CF) drive (slot 2).
© 3M 2011. All rights reserved. | 7 |
