Step 8.1 – Create and preview import formats
Data Manager imports the Item IDs from a collection category and/or
The import format should include any command codes required by your circulation system.
The import format can also add primary and/or secondary information to each record in imported collection and
Data Manager automatically assigns the “Pulled” and “Not Pulled” import formats to
To define input format parameters
1From the Admin Setup menu, click Import Formats.
2Click New to create a new import format.
To edit an existing import format
Select an existing Import Format and click Edit.
3Define the Import Format Parameters.
![]() See the Data Format Guide for detailed descriptions and examples of input format and date/timestamp characters.
See the Data Format Guide for detailed descriptions and examples of input format and date/timestamp characters.
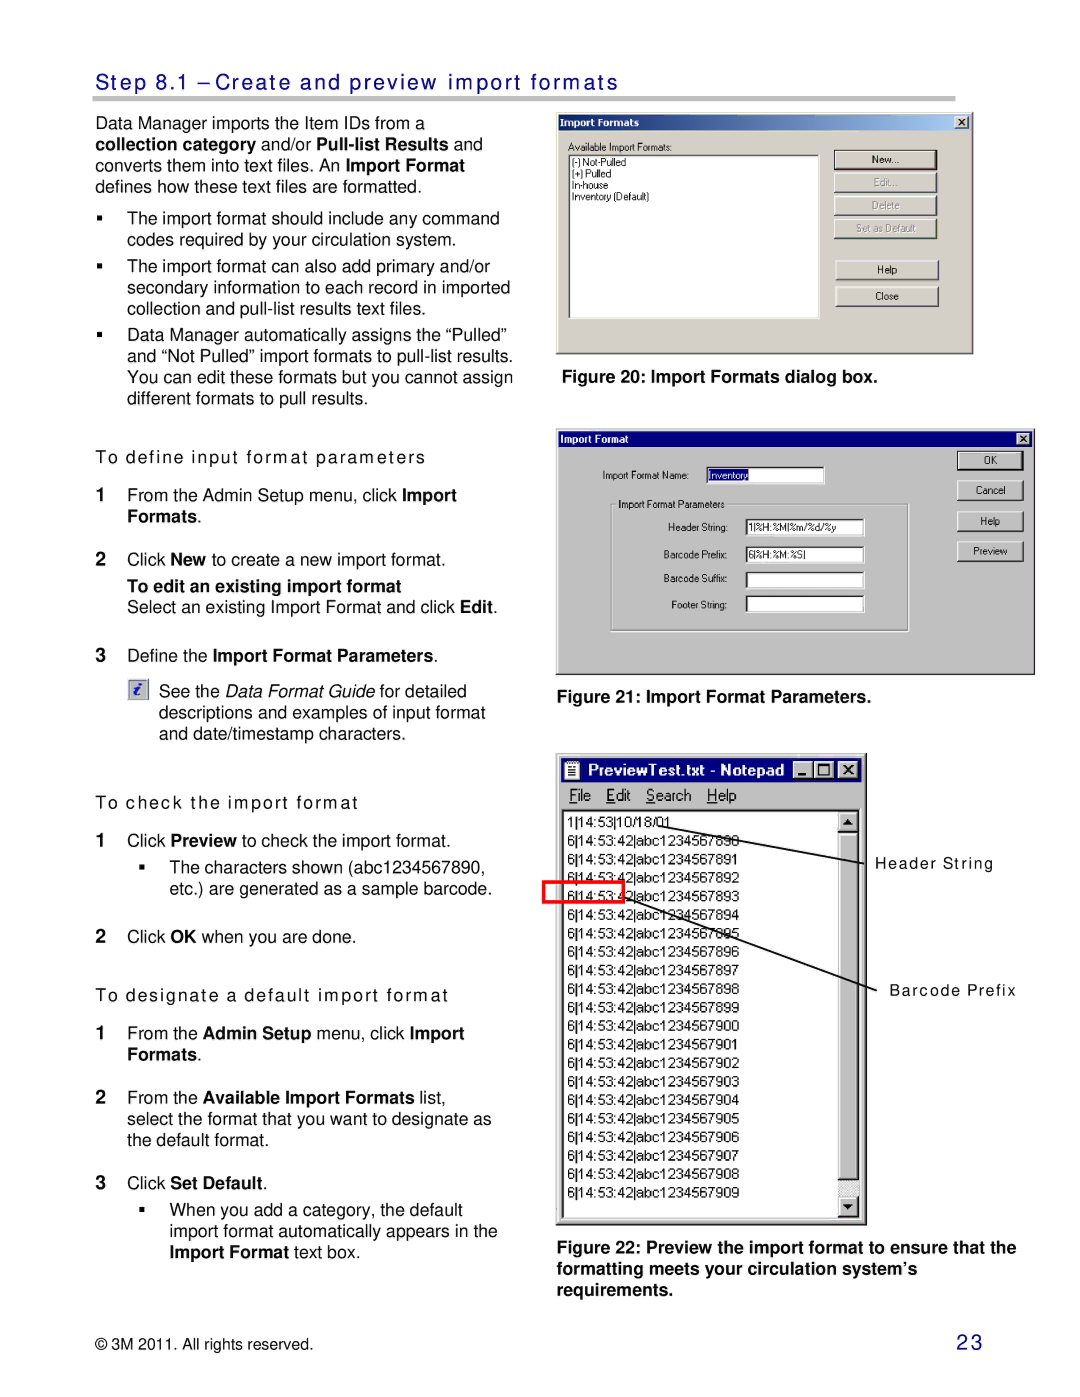
To check the import format
1Click Preview to check the import format.
The characters shown (abc1234567890, etc.) are generated as a sample barcode.
2Click OK when you are done.
To designate a default import format
1From the Admin Setup menu, click Import Formats.
2From the Available Import Formats list, select the format that you want to designate as the default format.
3Click Set Default.
When you add a category, the default import format automatically appears in the Import Format text box.
Figure 20: Import Formats dialog box.
Figure 21: Import Format Parameters.
Header String
Barcode Prefix
Figure 22: Preview the import format to ensure that the formatting meets your circulation system’s requirements.
© 3M 2011. All rights reserved. | 23 |