consult your computer’s user manual. Be sure to Save the settings before exiting the BIOS Setup. The computer will then reboot. Set your modem’s jumpers to COM 2 - IRQ 3. (See Jumper Settings in the Installing the Mo- dem section for jumper setting diagrams.)
•You are now ready to install the modem. Proceed to the next section.
Installing The Modem
JUMPER SETTINGS
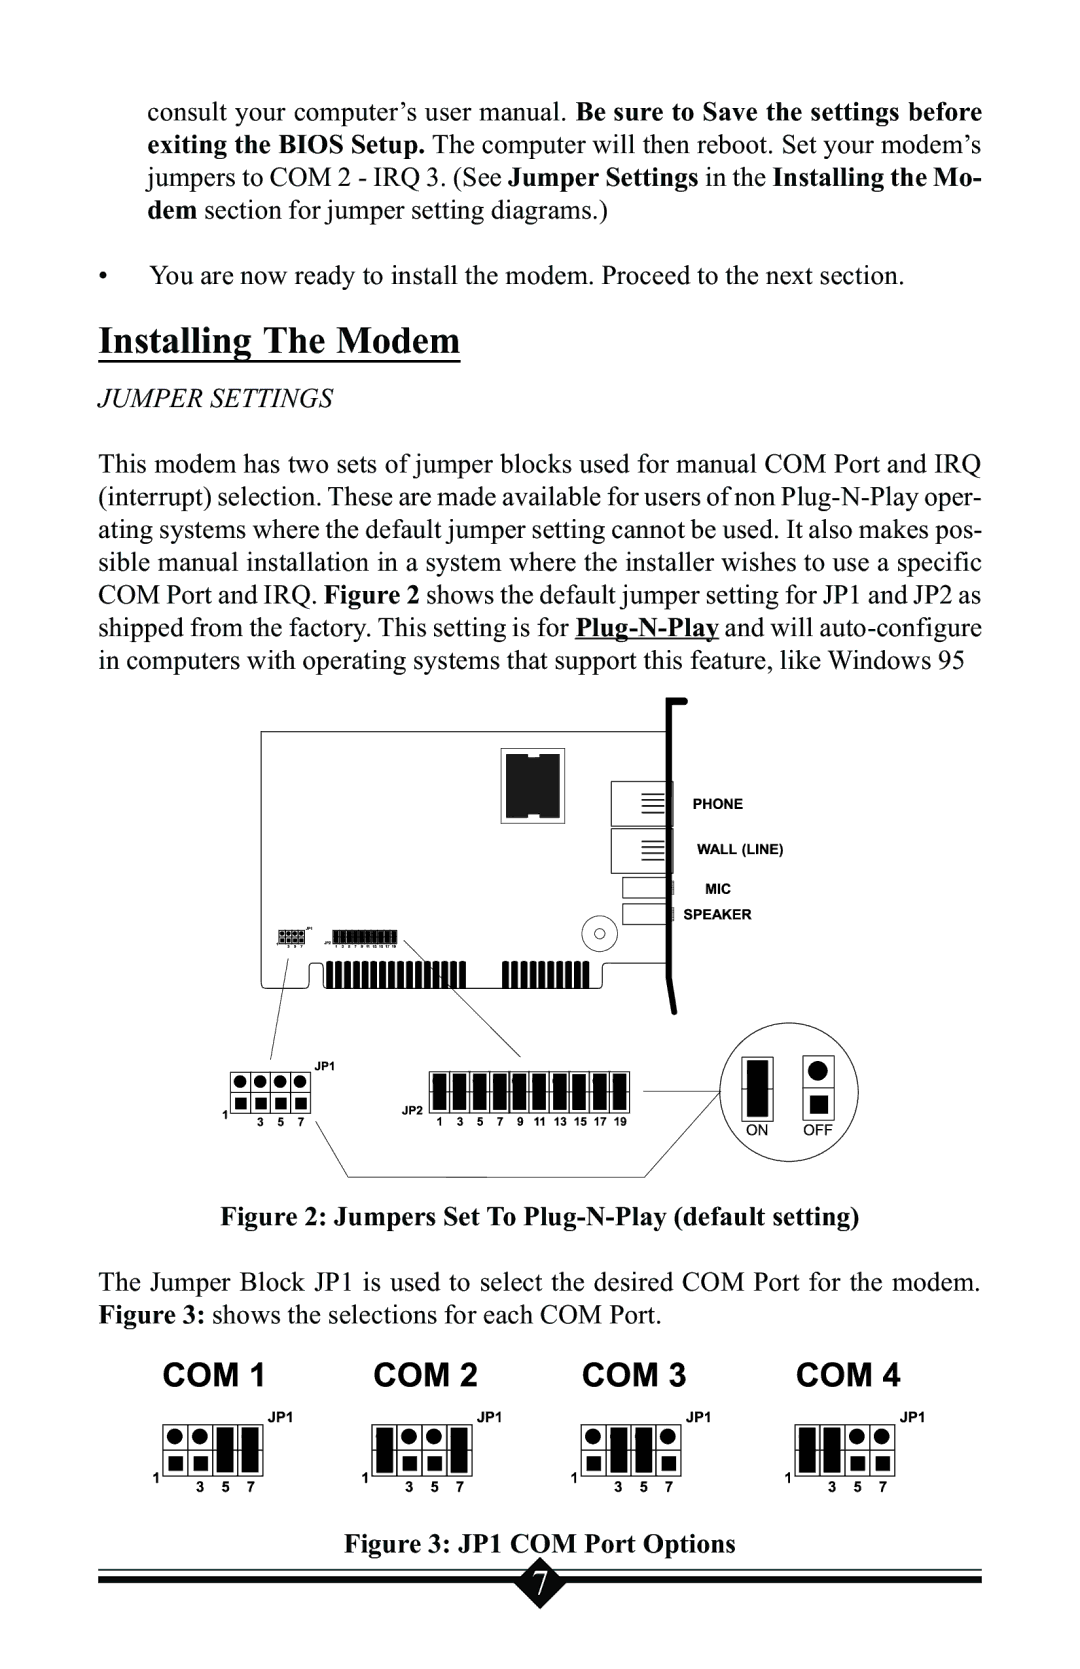
This modem has two sets of jumper blocks used for manual COM Port and IRQ (interrupt) selection. These are made available for users of non
Figure 2: Jumpers Set To Plug-N-Play (default setting)
The Jumper Block JP1 is used to select the desired COM Port for the modem. Figure 3: shows the selections for each COM Port.
Figure 3: JP1 COM Port Options
7
