OPERATION
OPERATION
5.2 Connecting the Mower-Pull Type
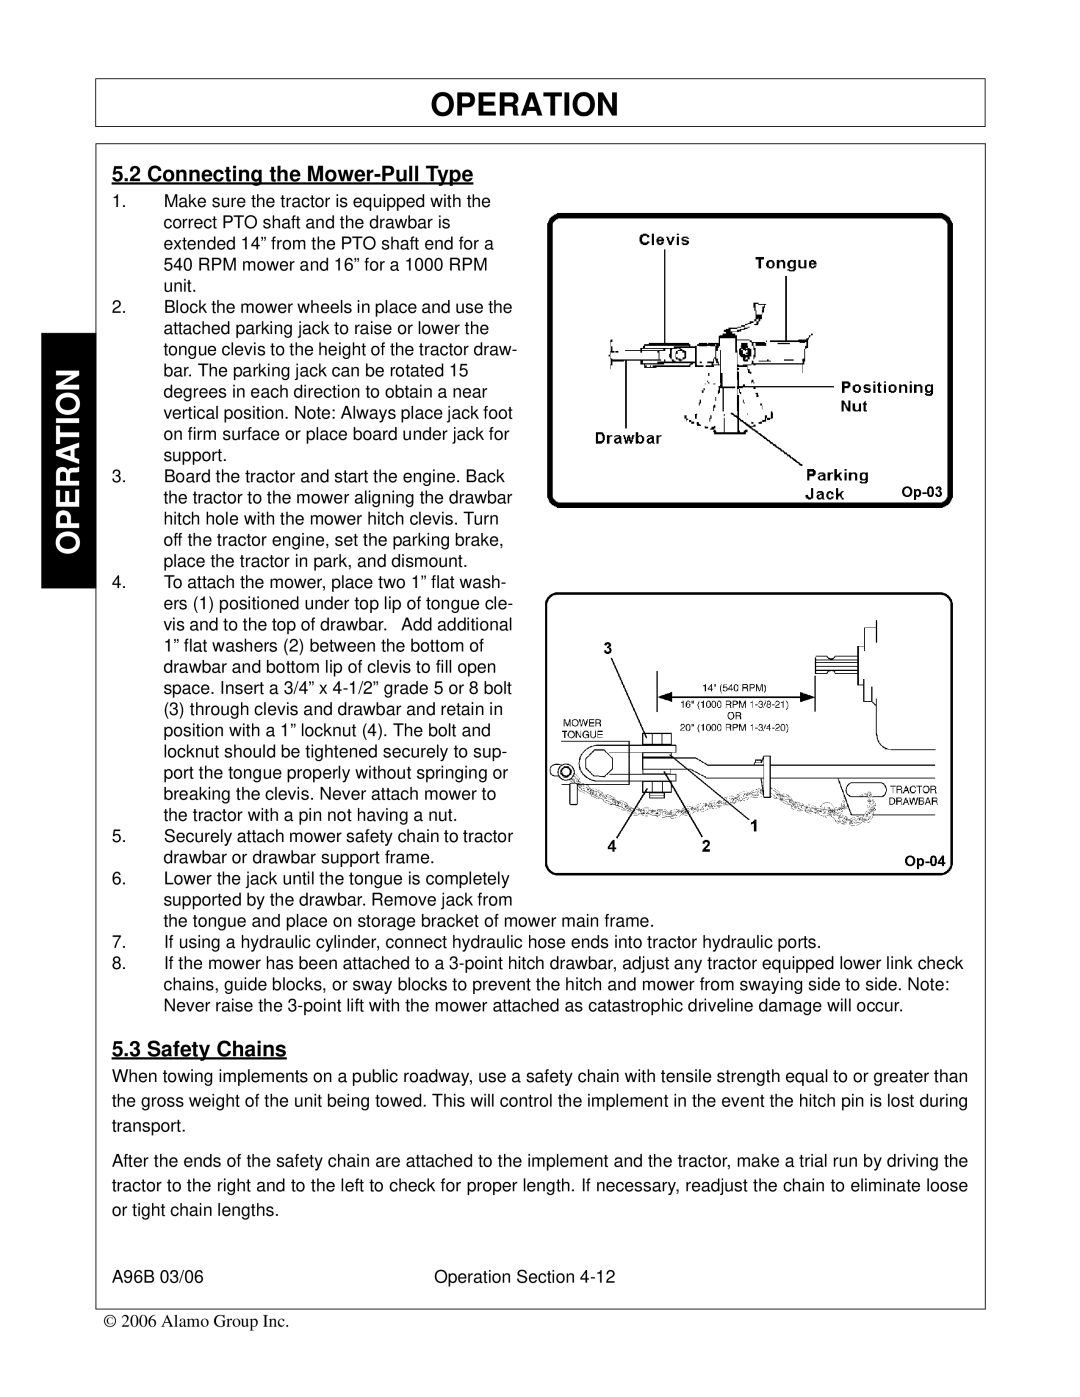
1.Make sure the tractor is equipped with the correct PTO shaft and the drawbar is extended 14” from the PTO shaft end for a 540 RPM mower and 16” for a 1000 RPM unit.
2.Block the mower wheels in place and use the attached parking jack to raise or lower the tongue clevis to the height of the tractor draw- bar. The parking jack can be rotated 15 degrees in each direction to obtain a near vertical position. Note: Always place jack foot on firm surface or place board under jack for support.
3.Board the tractor and start the engine. Back the tractor to the mower aligning the drawbar hitch hole with the mower hitch clevis. Turn off the tractor engine, set the parking brake, place the tractor in park, and dismount.
4.To attach the mower, place two 1” flat wash- ers (1) positioned under top lip of tongue cle- vis and to the top of drawbar. Add additional 1” flat washers (2) between the bottom of drawbar and bottom lip of clevis to fill open space. Insert a 3/4” x
(3) through clevis and drawbar and retain in position with a 1” locknut (4). The bolt and locknut should be tightened securely to sup- port the tongue properly without springing or breaking the clevis. Never attach mower to the tractor with a pin not having a nut.
5.Securely attach mower safety chain to tractor drawbar or drawbar support frame.
6.Lower the jack until the tongue is completely supported by the drawbar. Remove jack from
the tongue and place on storage bracket of mower main frame.
7.If using a hydraulic cylinder, connect hydraulic hose ends into tractor hydraulic ports.
8.If the mower has been attached to a
5.3 Safety Chains
When towing implements on a public roadway, use a safety chain with tensile strength equal to or greater than the gross weight of the unit being towed. This will control the implement in the event the hitch pin is lost during transport.
After the ends of the safety chain are attached to the implement and the tractor, make a trial run by driving the tractor to the right and to the left to check for proper length. If necessary, readjust the chain to eliminate loose or tight chain lengths.
A96B 03/06 | Operation Section |
© 2006 Alamo Group Inc.
