ASSEMBLY
CHECK CHAINS (EXTRA EQUIP-
MENT) FOR LIFT-MODELS
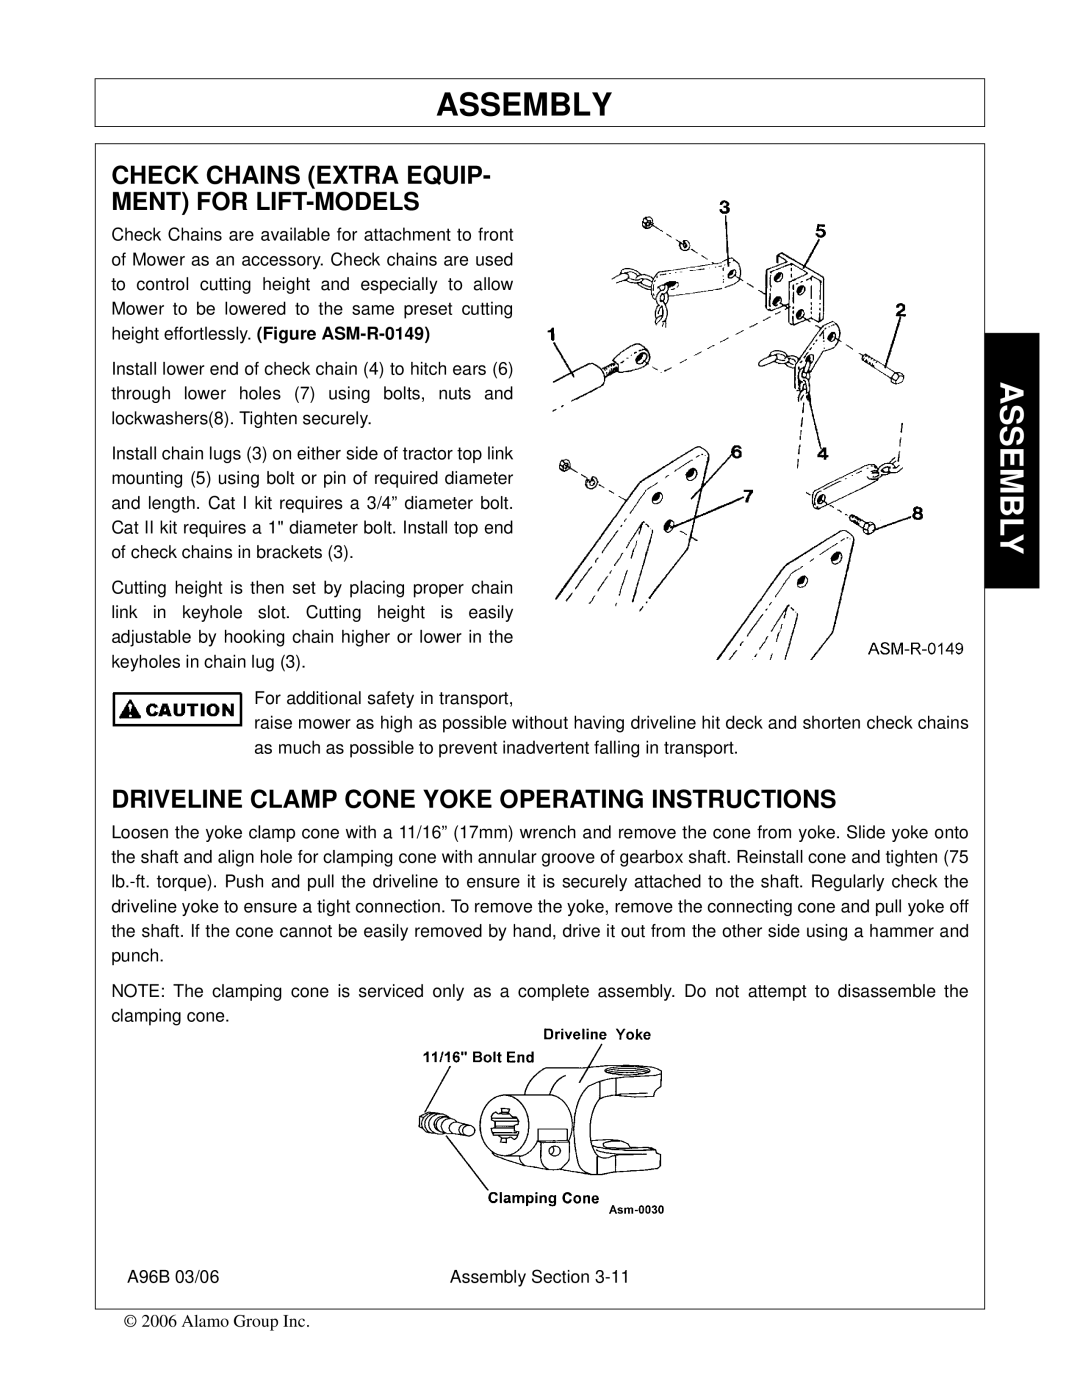
Check Chains are available for attachment to front of Mower as an accessory. Check chains are used to control cutting height and especially to allow Mower to be lowered to the same preset cutting height effortlessly. (Figure
Install lower end of check chain (4) to hitch ears (6) through lower holes (7) using bolts, nuts and lockwashers(8). Tighten securely.
Install chain lugs (3) on either side of tractor top link mounting (5) using bolt or pin of required diameter and length. Cat I kit requires a 3/4” diameter bolt. Cat II kit requires a 1" diameter bolt. Install top end of check chains in brackets (3).
Cutting height is then set by placing proper chain link in keyhole slot. Cutting height is easily adjustable by hooking chain higher or lower in the keyholes in chain lug (3).
For additional safety in transport,
raise mower as high as possible without having driveline hit deck and shorten check chains as much as possible to prevent inadvertent falling in transport.
DRIVELINE CLAMP CONE YOKE OPERATING INSTRUCTIONS
Loosen the yoke clamp cone with a 11/16” (17mm) wrench and remove the cone from yoke. Slide yoke onto the shaft and align hole for clamping cone with annular groove of gearbox shaft. Reinstall cone and tighten (75
NOTE: The clamping cone is serviced only as a complete assembly. Do not attempt to disassemble the clamping cone.
A96B 03/06 | Assembly Section |
© 2006 Alamo Group Inc.
