MAINTENANCE
BLADE TIMING PROCEDURE
1.Raise the mower to minimum height to allow sufficient clearance between the mower deck and ground to visually inspect blade carriers.
2.Completely shut down the tractor and secure the tractor in position by placing the tractor in park and setting the parking brake. Securely block the mower at this height.
3.On a side gearbox, remove connecting driveline coupler.
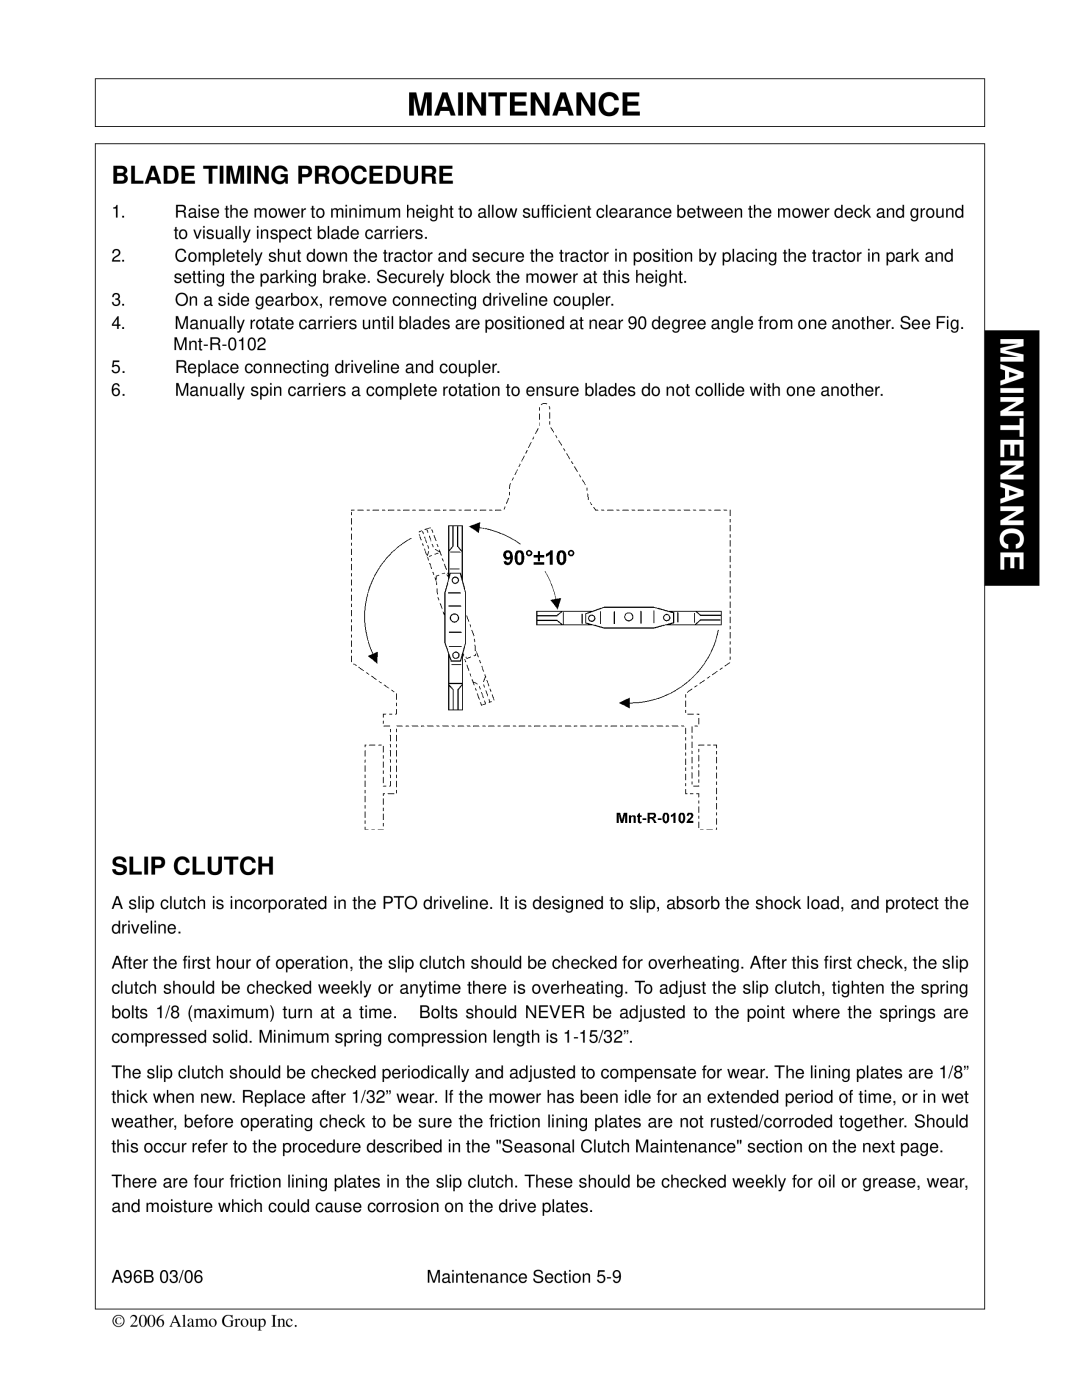
4.Manually rotate carriers until blades are positioned at near 90 degree angle from one another. See Fig.
5.Replace connecting driveline and coupler.
6.Manually spin carriers a complete rotation to ensure blades do not collide with one another.
SLIP CLUTCH
A slip clutch is incorporated in the PTO driveline. It is designed to slip, absorb the shock load, and protect the driveline.
After the first hour of operation, the slip clutch should be checked for overheating. After this first check, the slip clutch should be checked weekly or anytime there is overheating. To adjust the slip clutch, tighten the spring bolts 1/8 (maximum) turn at a time. Bolts should NEVER be adjusted to the point where the springs are compressed solid. Minimum spring compression length is
The slip clutch should be checked periodically and adjusted to compensate for wear. The lining plates are 1/8” thick when new. Replace after 1/32” wear. If the mower has been idle for an extended period of time, or in wet weather, before operating check to be sure the friction lining plates are not rusted/corroded together. Should this occur refer to the procedure described in the "Seasonal Clutch Maintenance" section on the next page.
There are four friction lining plates in the slip clutch. These should be checked weekly for oil or grease, wear, and moisture which could cause corrosion on the drive plates.
A96B 03/06 | Maintenance Section |
© 2006 Alamo Group Inc.
