Installation and Upgrading
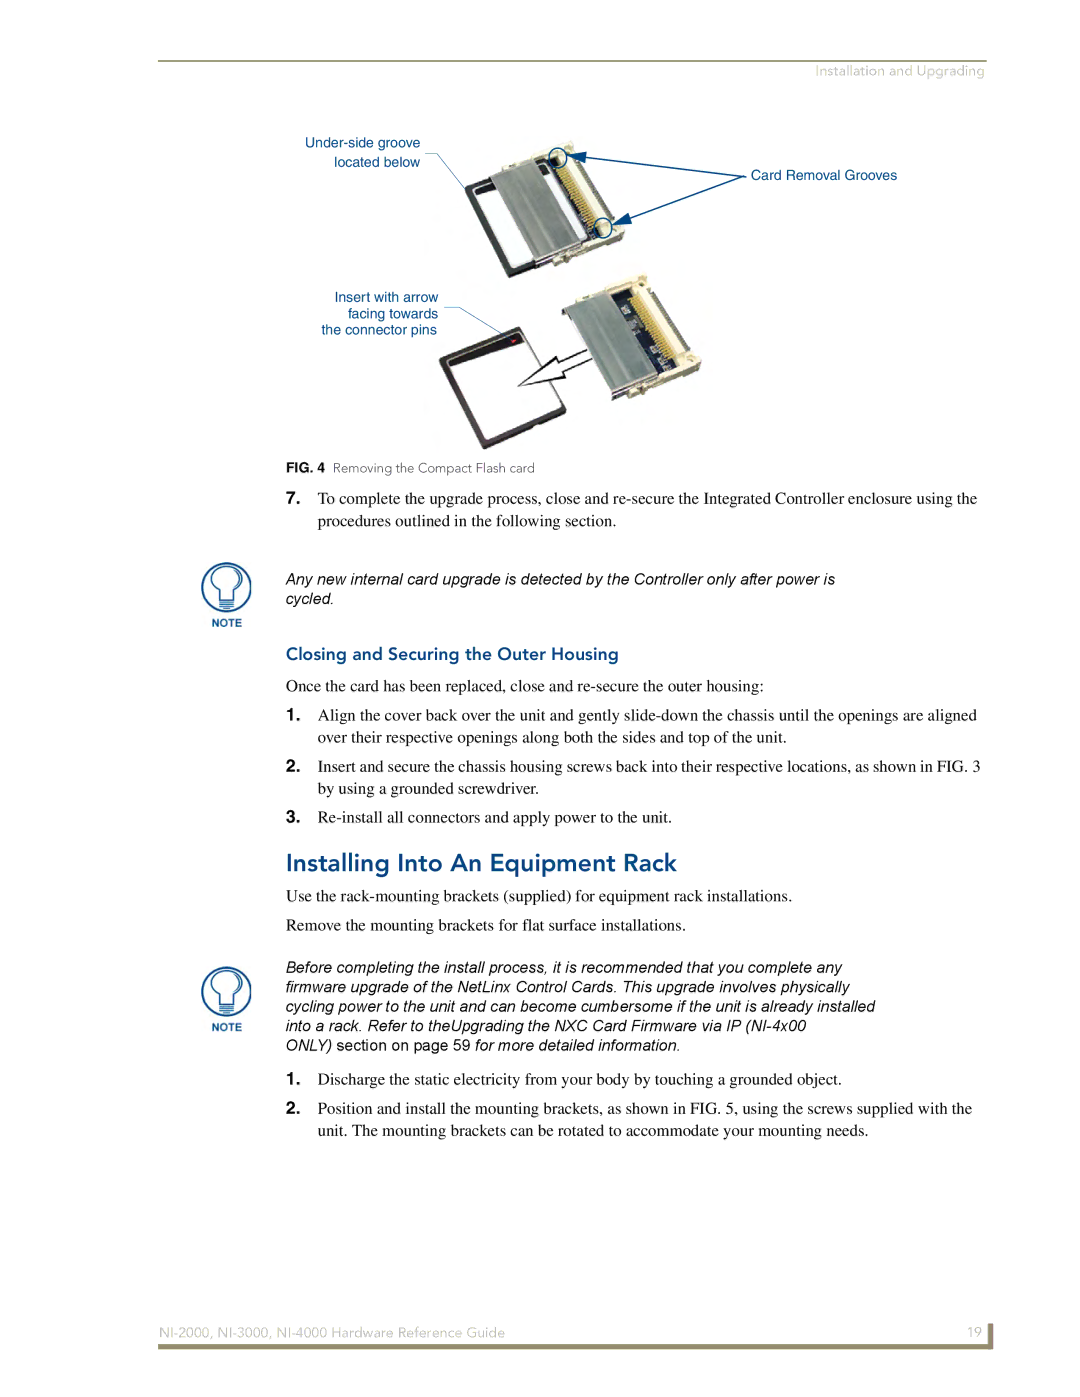
located below
Card Removal Grooves
Insert with arrow facing towards the connector pins
FIG. 4 Removing the Compact Flash card
7.To complete the upgrade process, close and
Any new internal card upgrade is detected by the Controller only after power is cycled.
Closing and Securing the Outer Housing
Once the card has been replaced, close and
1.Align the cover back over the unit and gently
2.Insert and secure the chassis housing screws back into their respective locations, as shown in FIG. 3 by using a grounded screwdriver.
3.
Installing Into An Equipment Rack
Use the
Remove the mounting brackets for flat surface installations.
Before completing the install process, it is recommended that you complete any firmware upgrade of the NetLinx Control Cards. This upgrade involves physically cycling power to the unit and can become cumbersome if the unit is already installed into a rack. Refer to theUpgrading the NXC Card Firmware via IP
1.Discharge the static electricity from your body by touching a grounded object.
2.Position and install the mounting brackets, as shown in FIG. 5, using the screws supplied with the unit. The mounting brackets can be rotated to accommodate your mounting needs.
19 | |
|
|
