Manuals
/
AT&T
/
Photography
/
Security Camera
AT&T
8110, 8102
user manual
Models:
8102
8110
1
23
45
45
Download
45 pages
44.85 Kb
20
21
22
23
24
25
26
27
Install
Warranty
Safety
Service
Using the Features
Page 23
Image 23
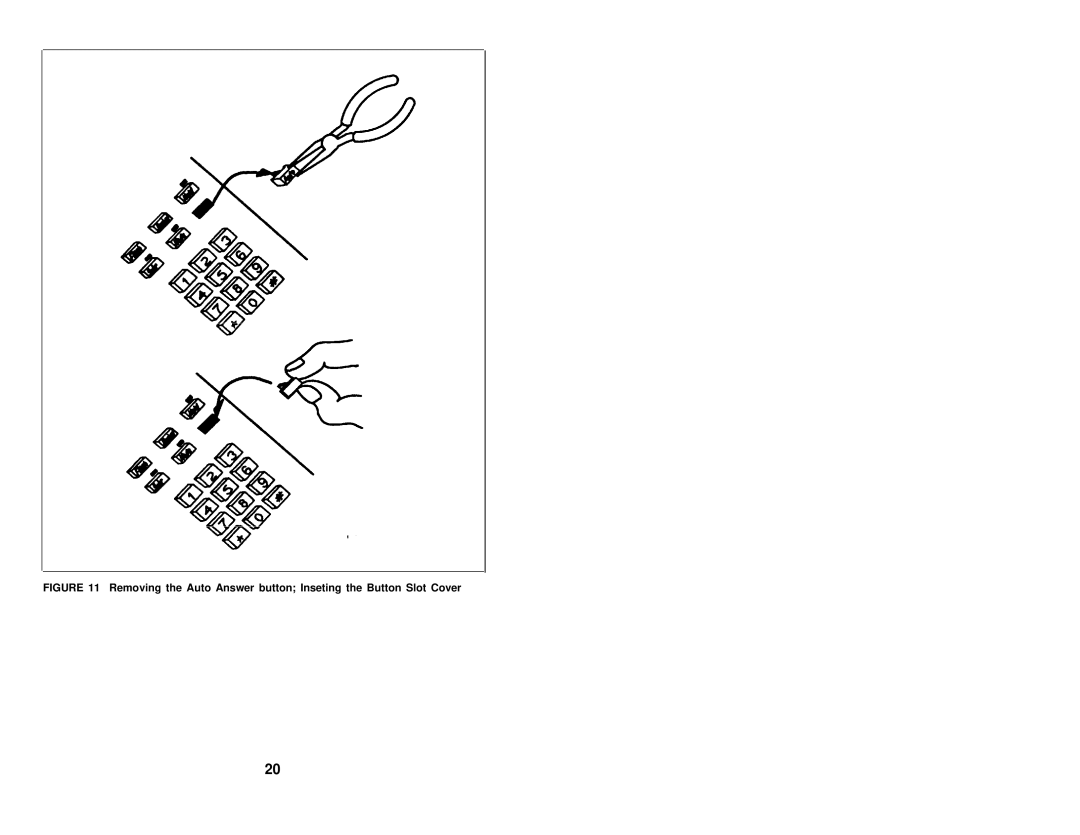
FIGURE 11 Removing the Auto Answer button; Inseting the Button Slot Cover
20
Page 22
Page 24
Page 23
Image 23
Page 22
Page 24
Contents
AT&T
Trademarks
Contents
Use
Important Safety Instructions
Service
Emploi
Consignes DE Securite Importantes
Entretien
Conservez CES Instructions
Appendix B
Your 8102 and 8110 Telephones
Page
TOP View
8110 Telephone Top, Side, and Bottom Views
Auto Answer button On the 8110 only
Handset Adjunct equipment jack On the 8102 only
Program button
Tone Selector Fast or Slow Ringer Volume control
Flash button
Line jack
Table/Desk Installation
Installing Your Telephone
Handset cord jack Handset jack
Rotating the Handset Tab
Wall Installation
Triangle
Mounting studs Base
Base Locking Tab Voice Terminal Wall
Labeling the Programmable Dialing Button Designation Card
Using the Features
Removing and Covering the Auto Answer Button
Page
Answering and Placing a Call
Using the Features
To end a call
To place a call using the speakerphone for 8110 users
To have your telephone automatically answer a call
To turn off the Auto Answer feature
Auto Answer for 8110 Users
To return to the held call
Flash
Hold
To put a call on hold
Mute for 8110 Users
Message
Programmable Dialing Buttons
Personalized Ring
Programmable Dialing Buttons
To erase a number stored on a programmable dialing button
Redial With Auto-Pause
To dial a number with a programmable dialing button
To program an automatic pause for redialed numbers
To erase ALL stored access codes
To change from speakerphone to handset
Speakerphone for 8110 Users
To place/answer a call without lifting the handset
To prevent other party from hearing you To mute microphone
Appendix a
Page
Putting Calls on Hold
Appendix B
Answering Calls
Originating Calls
Switching from the Headset to the Handset
Appendix C
Auxiliary Power for the 8110 Telephone
If Your Telephone Does Not Respond
Appendix D
Connection and USE with the Nationwide Telephone Network
FCC Registration and Repair Information
Right of the Telephone Company
Interference Information
AT&T Warranty Information
Holding and Returning to a Call
Storing Numbers in Memory
Dialing Numbers in Memory
Erasing a Number in Memory
Using the Auto Answer Feature For 8110 Users Only
Using the Built-in Speakerphone For 8110 Users Only
Comcode 555-015-131 Graphics AT&T Issue 2, March
Top
Page
Image
Contents