4. GUI Installation and Operation
GUI Operation
sáÇÉç=pïáíÅÜáåÖ=q~Ä
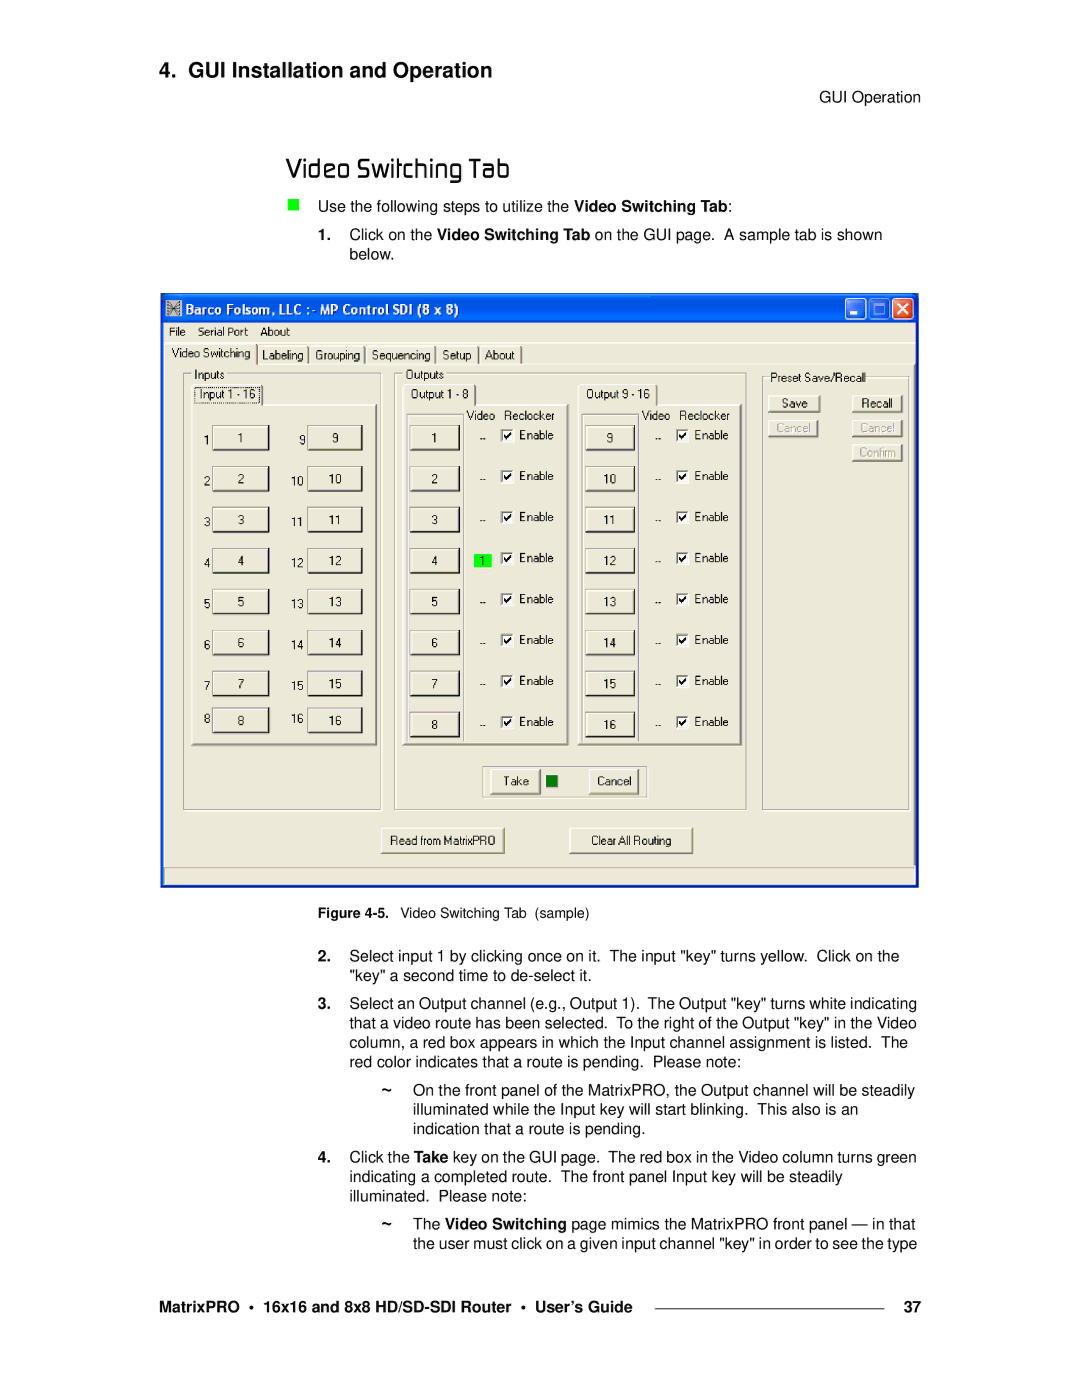
Use the following steps to utilize the Video Switching Tab:
1.Click on the Video Switching Tab on the GUI page. A sample tab is shown below.
Figure 4-5. Video Switching Tab (sample)
2.Select input 1 by clicking once on it. The input "key" turns yellow. Click on the "key" a second time to
3.Select an Output channel (e.g., Output 1). The Output "key" turns white indicating that a video route has been selected. To the right of the Output "key" in the Video column, a red box appears in which the Input channel assignment is listed. The red color indicates that a route is pending. Please note:
~On the front panel of the MatrixPRO, the Output channel will be steadily illuminated while the Input key will start blinking. This also is an indication that a route is pending.
4.Click the Take key on the GUI page. The red box in the Video column turns green indicating a completed route. The front panel Input key will be steadily illuminated. Please note:
~The Video Switching page mimics the MatrixPRO front panel — in that the user must click on a given input channel "key" in order to see the type
MatrixPRO • 16x16 and 8x8 |
| 37 |
|
