![]() BM 2610025580
BM 2610025580
preparing for Saw Operations
Workpiece Support
Using the Workpiece Clamp
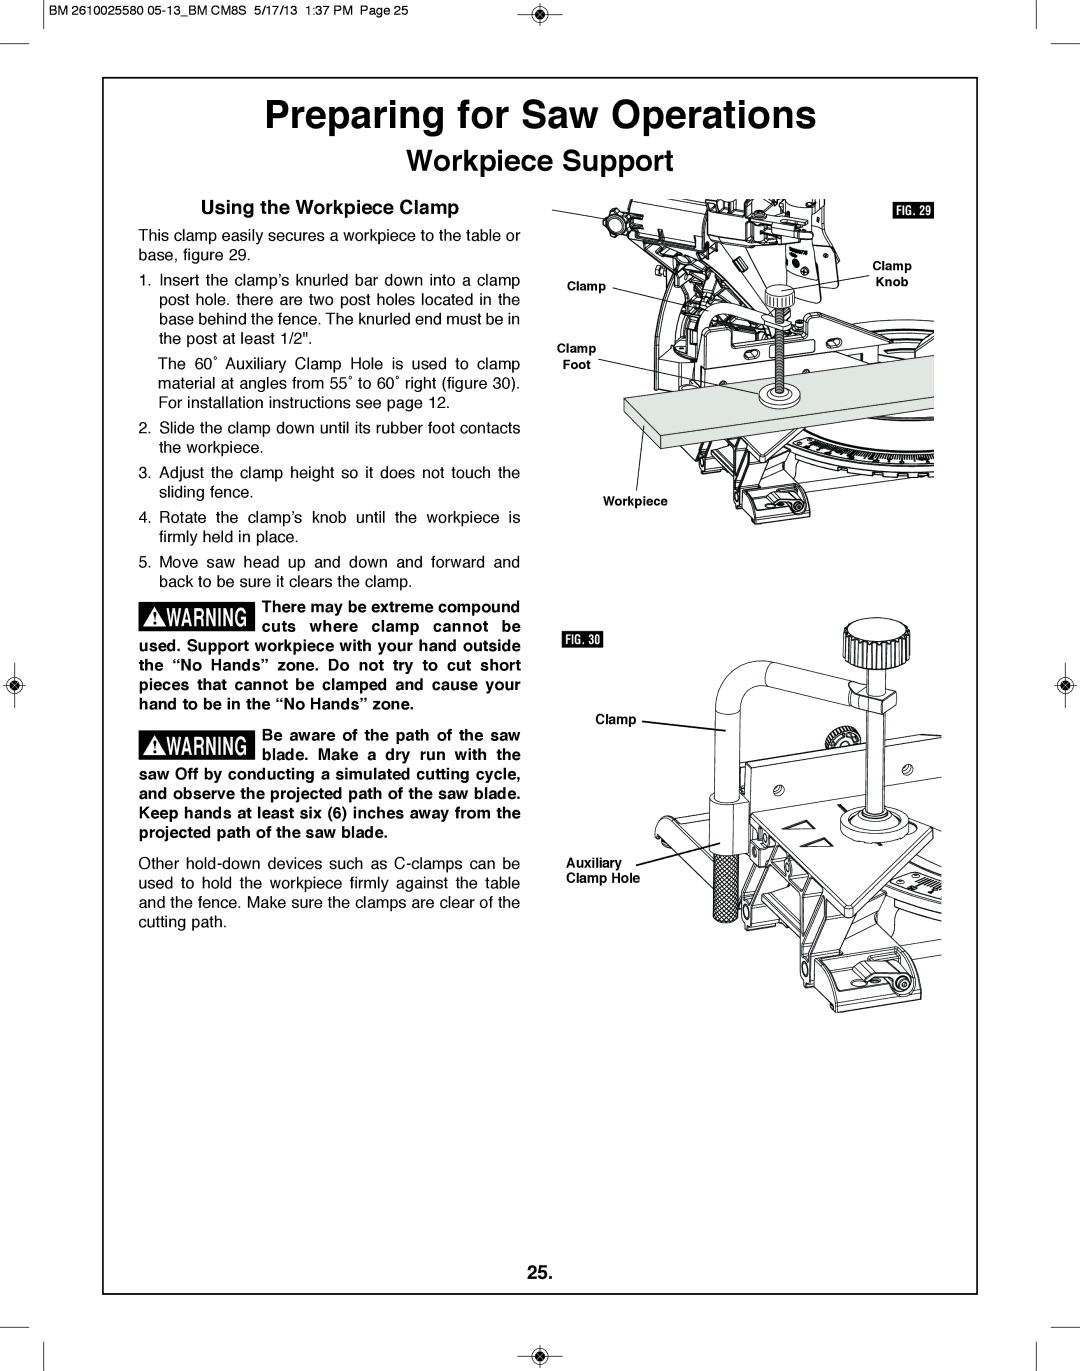
This clamp easily secures a workpiece to the table or base, figure 29.
1.Insert the clamp’s knurled bar down into a clamp post hole. there are two post holes located in the base behind the fence. The knurled end must be in the post at least 1/2".
The 60˚ Auxiliary Clamp Hole is used to clamp material at angles from 55˚ to 60˚ right (figure 30). For installation instructions see page 12.
2.Slide the clamp down until its rubber foot contacts the workpiece.
3.Adjust the clamp height so it does not touch the sliding fence.
4.Rotate the clamp’s knob until the workpiece is firmly held in place.
5.Move saw head up and down and forward and back to be sure it clears the clamp.
There may be extreme compound ! WARNING cuts where clamp cannot be
used. Support workpiece with your hand outside the “No Hands” zone. Do not try to cut short pieces that cannot be clamped and cause your hand to be in the “No Hands” zone.
Be aware of the path of the saw blade. Make a dry run with the saw Off by conducting a simulated cutting cycle,
and observe the projected path of the saw blade. Keep hands at least six (6) inches away from the projected path of the saw blade.
Other
Clamp
Clamp
foot
Workpiece
FIG. 30
Clamp
Auxiliary ![]()
![]()
![]()
![]()
![]()
![]()
![]()
![]()
![]() Clamp Hole
Clamp Hole ![]()
![]()
![]()
![]()
![]()
![]()
![]()
![]()
![]()
![]()
![]()
![]()
![]()
![]()
FIG. 29
Clamp
![]() Knob
Knob
25.