![]() BM 2610025580
BM 2610025580
Adjustments
Kerf Insert
! WARNING | To avoid | possible | injury, | FIG. 15 |
disconnect | plug from | power |
|
source before performing any assembly, adjustment or repair.
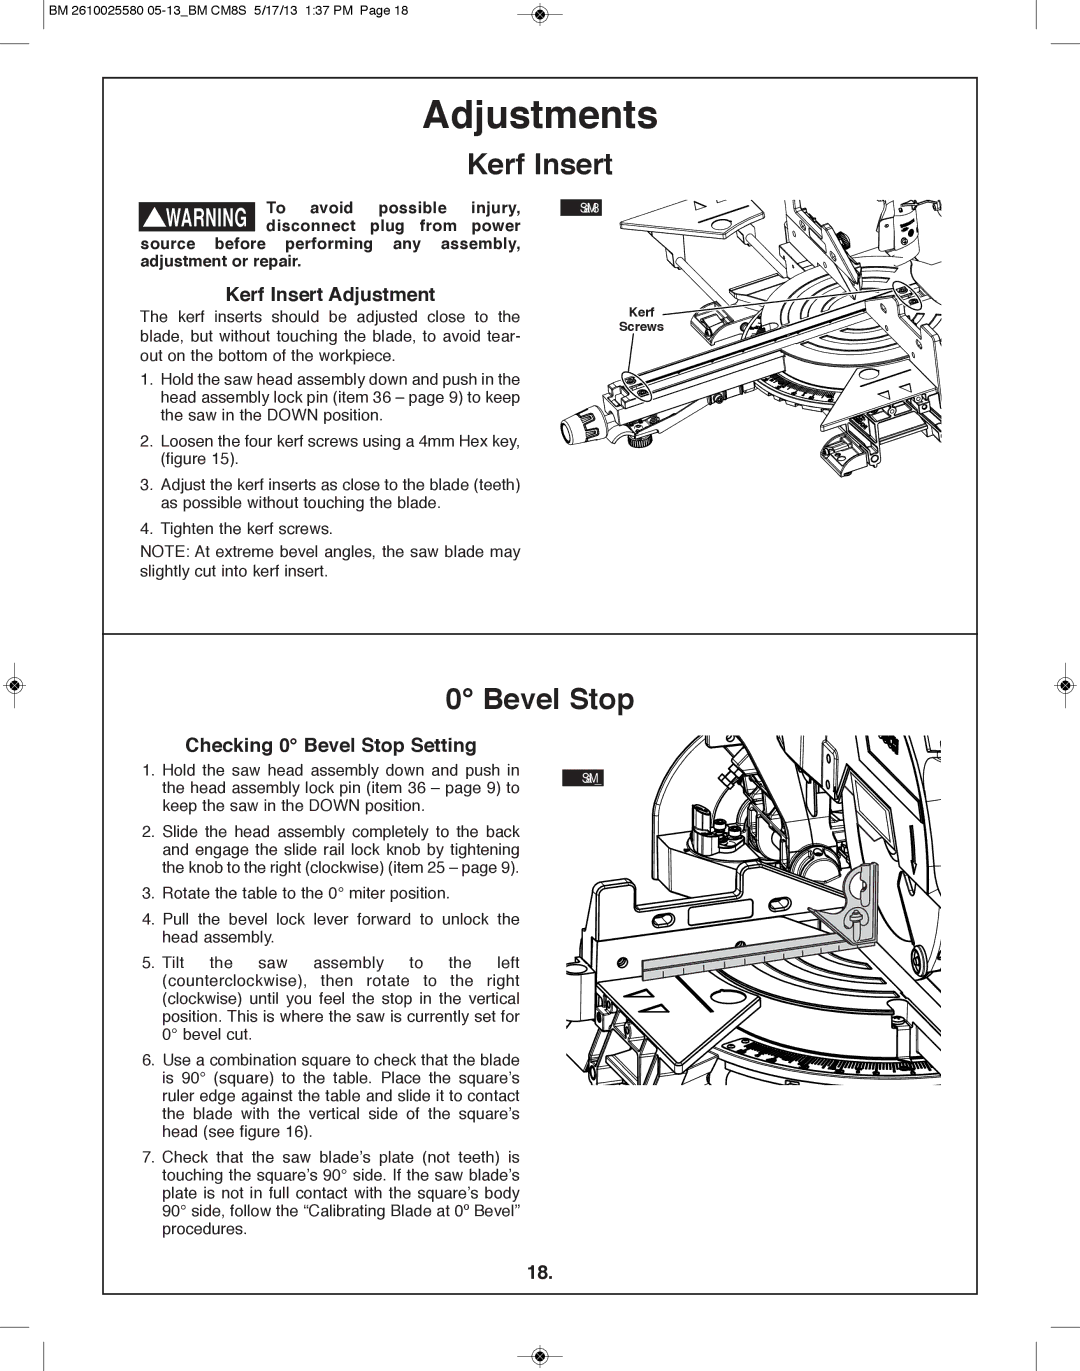
Kerf Insert Adjustment
The kerf inserts should be adjusted close to the blade, but without touching the blade, to avoid tear- out on the bottom of the workpiece.
1. Hold the saw head assembly down and push in the head assembly lock pin (item 36 – page 9) to keep the saw in the DOWN position.
2. Loosen the four kerf screws using a 4mm Hex key, (figure 15).
3.Adjust the kerf inserts as close to the blade (teeth) as possible without touching the blade.
4.Tighten the kerf screws.
NOTE: At extreme bevel angles, the saw blade may slightly cut into kerf insert.
Kerf ![]()
![]()
![]()
![]()
![]()
![]()
![]()
![]() Screws
Screws ![]()
![]()
![]()
![]()
![]()
![]()
![]()
![]()
![]()
![]()
![]()
![]()
![]()
![]()
![]()
![]()
![]()
![]()
![]()
0° Bevel Stop
| Checking 0° Bevel Stop Setting |
|
1. | Hold the saw head assembly down and push in | FIG. 16 |
| the head assembly lock pin (item 36 – page 9) to | |
|
| |
| keep the saw in the DOWN position. |
|
2. | Slide the head assembly completely to the back |
|
| and engage the slide rail lock knob by tightening |
|
| the knob to the right (clockwise) (item 25 – page 9). |
|
3. | Rotate the table to the 0° miter position. |
|
4. | Pull the bevel lock lever forward to unlock the |
|
| head assembly. |
|
5. | Tilt the saw assembly to the left |
|
| (counterclockwise), then rotate to the right |
|
| (clockwise) until you feel the stop in the vertical |
|
| position. This is where the saw is currently set for |
|
| 0° bevel cut. |
|
6. | Use a combination square to check that the blade |
|
| is 90° (square) to the table. Place the square’s |
|
| ruler edge against the table and slide it to contact |
|
| the blade with the vertical side of the square’s |
|
| head (see figure 16). |
|
7.Check that the saw blade’s plate (not teeth) is touching the square’s 90° side. If the saw blade’s plate is not in full contact with the square’s body 90° side, follow the “Calibrating Blade at 0º Bevel” procedures.
18.