![]() BM 2610025580
BM 2610025580
Saw Operations
Auxiliary fence
Making an Auxiliary fence
Certain types of molding need a fence face extension because of the size and position of the workpiece. Holes are provided in the fence to attach an auxiliary fence. The auxiliary fence is used with the saw in the 0° bevel position only.
1.Use ¾” thick piece of wood (plywood is prefferd) to cut an auxiliary fence based on dimensions shown in Figure 49.
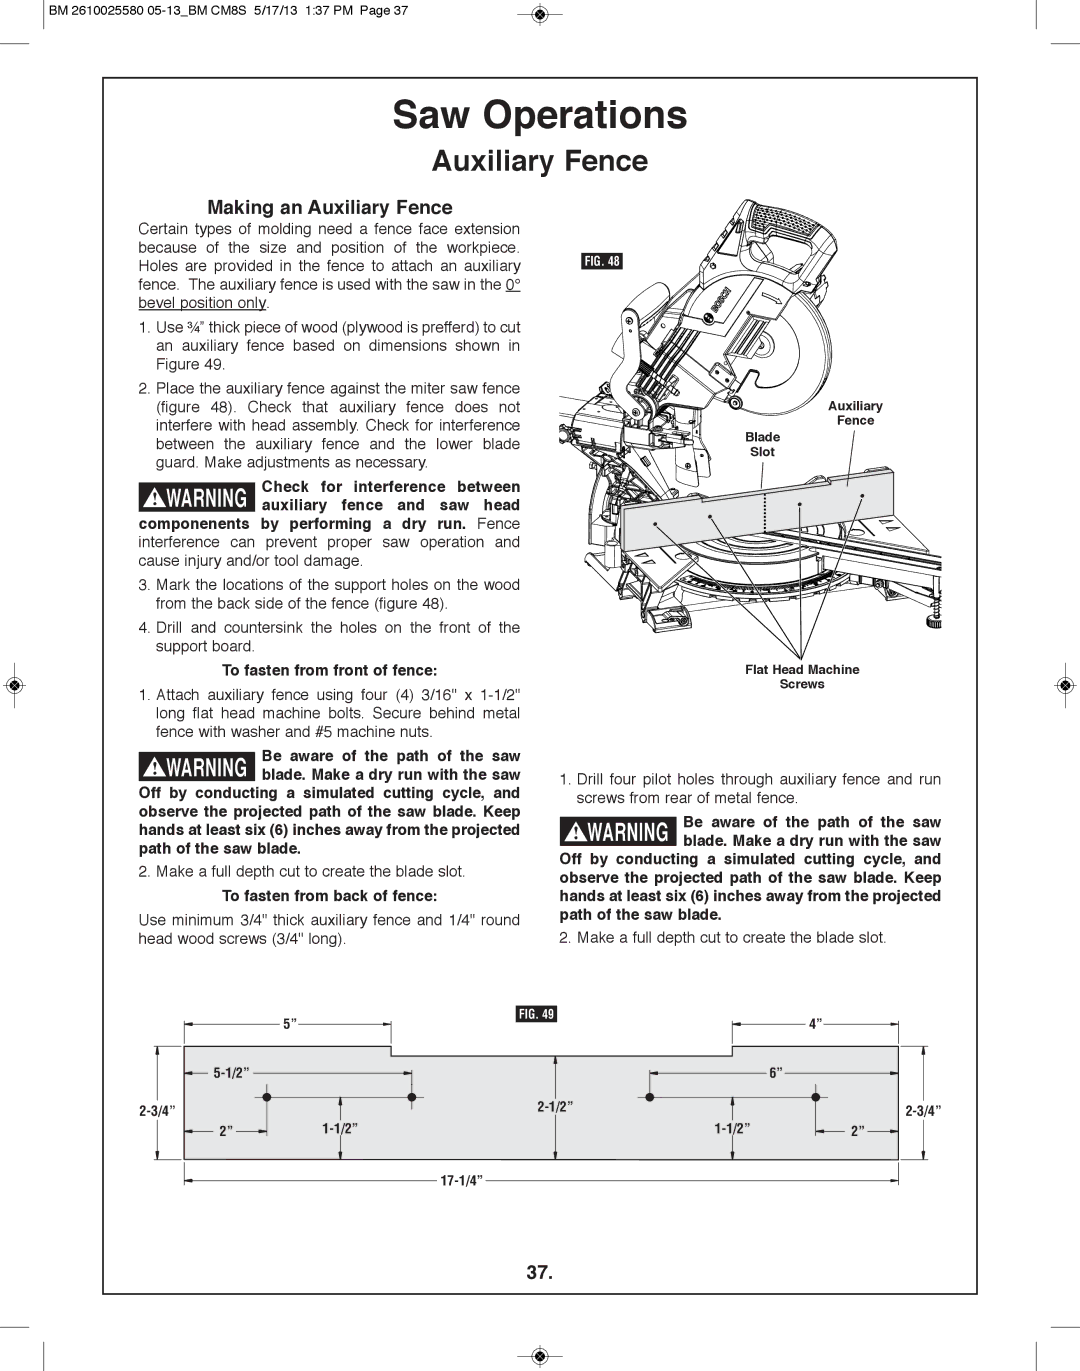
2.Place the auxiliary fence against the miter saw fence (figure 48). Check that auxiliary fence does not interfere with head assembly. Check for interference between the auxiliary fence and the lower blade guard. Make adjustments as necessary.
Check for interference between ! WARNING auxiliary fence and saw head
componenents by performing a dry run. Fence interference can prevent proper saw operation and cause injury and/or tool damage.
3. Mark the locations of the support holes on the wood from the back side of the fence (figure 48).
4. Drill and countersink the holes on the front of the support board.
To fasten from front of fence:
1.Attach auxiliary fence using four (4) 3/16" x
Be aware of the path of the saw blade. Make a dry run with the saw Off by conducting a simulated cutting cycle, and
observe the projected path of the saw blade. Keep hands at least six (6) inches away from the projected path of the saw blade.
2. Make a full depth cut to create the blade slot.
To fasten from back of fence:
Use minimum 3/4" thick auxiliary fence and 1/4" round head wood screws (3/4" long).
FIG. 48
Auxiliary
fence
Blade
Slot
flat Head Machine
Screws
1.Drill four pilot holes through auxiliary fence and run screws from rear of metal fence.
Be aware of the path of the saw blade. Make a dry run with the saw Off by conducting a simulated cutting cycle, and
observe the projected path of the saw blade. Keep hands at least six (6) inches away from the projected path of the saw blade.
2. Make a full depth cut to create the blade slot.
![]()
2”
5”
FIG. 49 | 4” |
| |
| 6” |
2” |
37.