AXIS 2110 User’s Manual | Using Your Camera with a Modem | 21 |
Refining the Dial-up Networking Properties...
Having created the
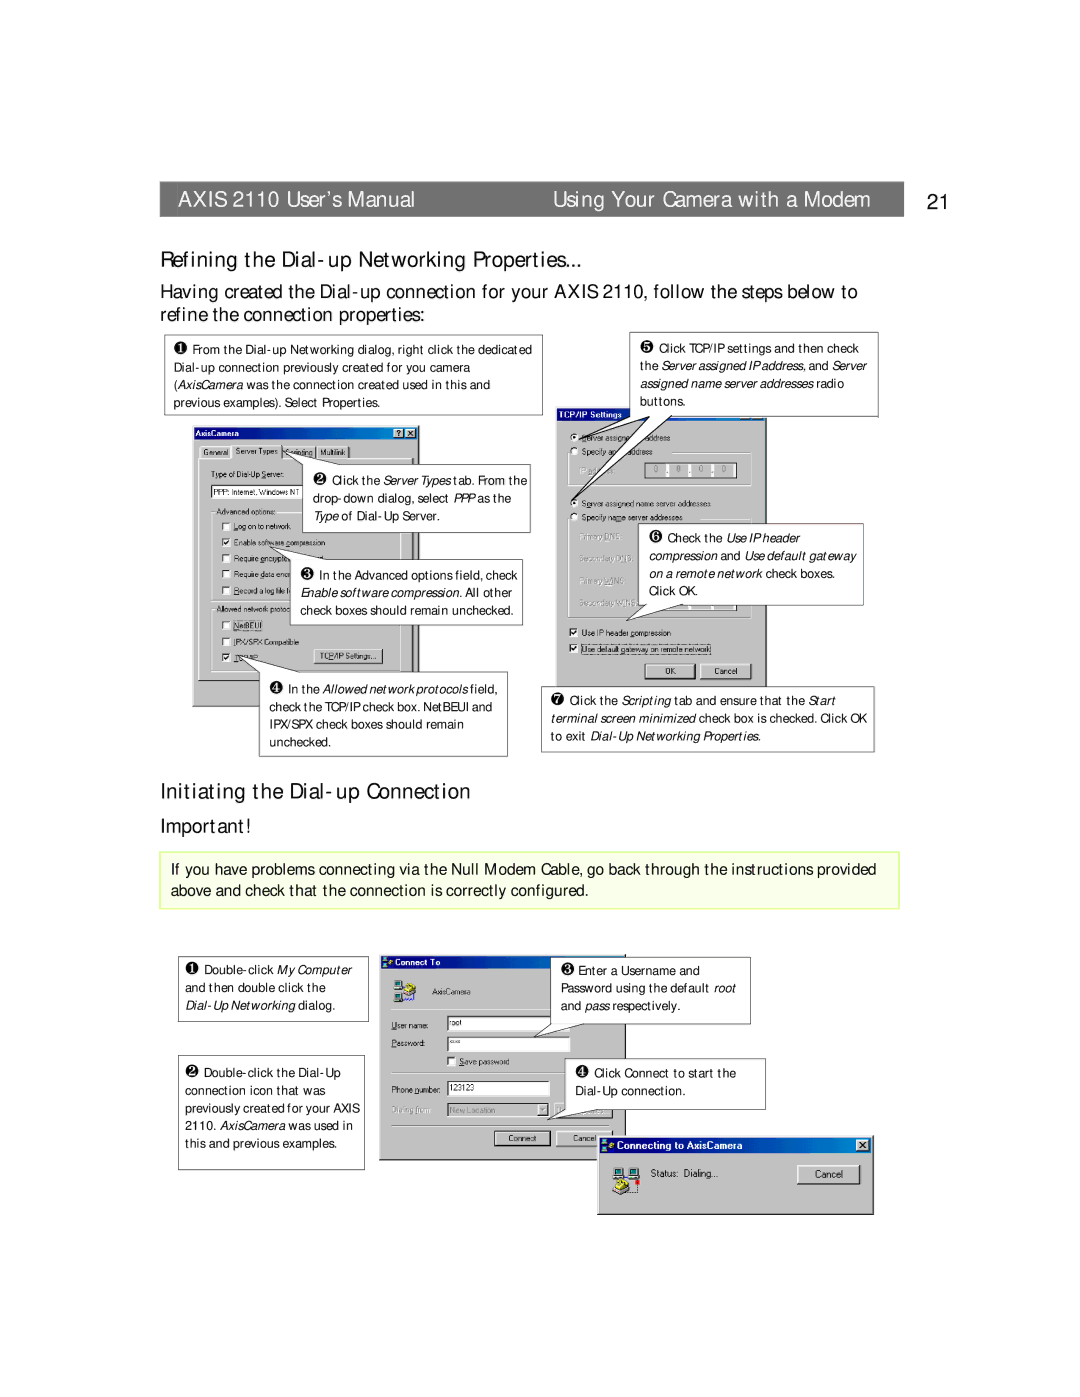
❶From the
❷Click the Server Types tab. From the
❸In the Advanced options field, check Enable software compression. All other check boxes should remain unchecked.
❹In the Allowed network protocols field, check the TCP/IP check box. NetBEUI and IPX/SPX check boxes should remain unchecked.
❺Click TCP/IP settings and then check the Server assigned IP address, and Server assigned name server addresses radio buttons.
❻Check the Use IP header compression and Use default gateway on a remote network check boxes. Click OK.
❼Click the Scripting tab and ensure that the Start terminal screen minimized check box is checked. Click OK to exit
Initiating the Dial-up Connection
Important!
If you have problems connecting via the Null Modem Cable, go back through the instructions provided above and check that the connection is correctly configured.
❶
❷
❸Enter a Username and Password using the default root and pass respectively.
❹Click Connect to start the