42 |
| Lenses and Focusing | AXIS 2110 User’s Manual |
Replacing the Lens
Because the AXIS 2110 is designed with a
Note: Although the lens supplied with your camera can be replaced with any ![]()
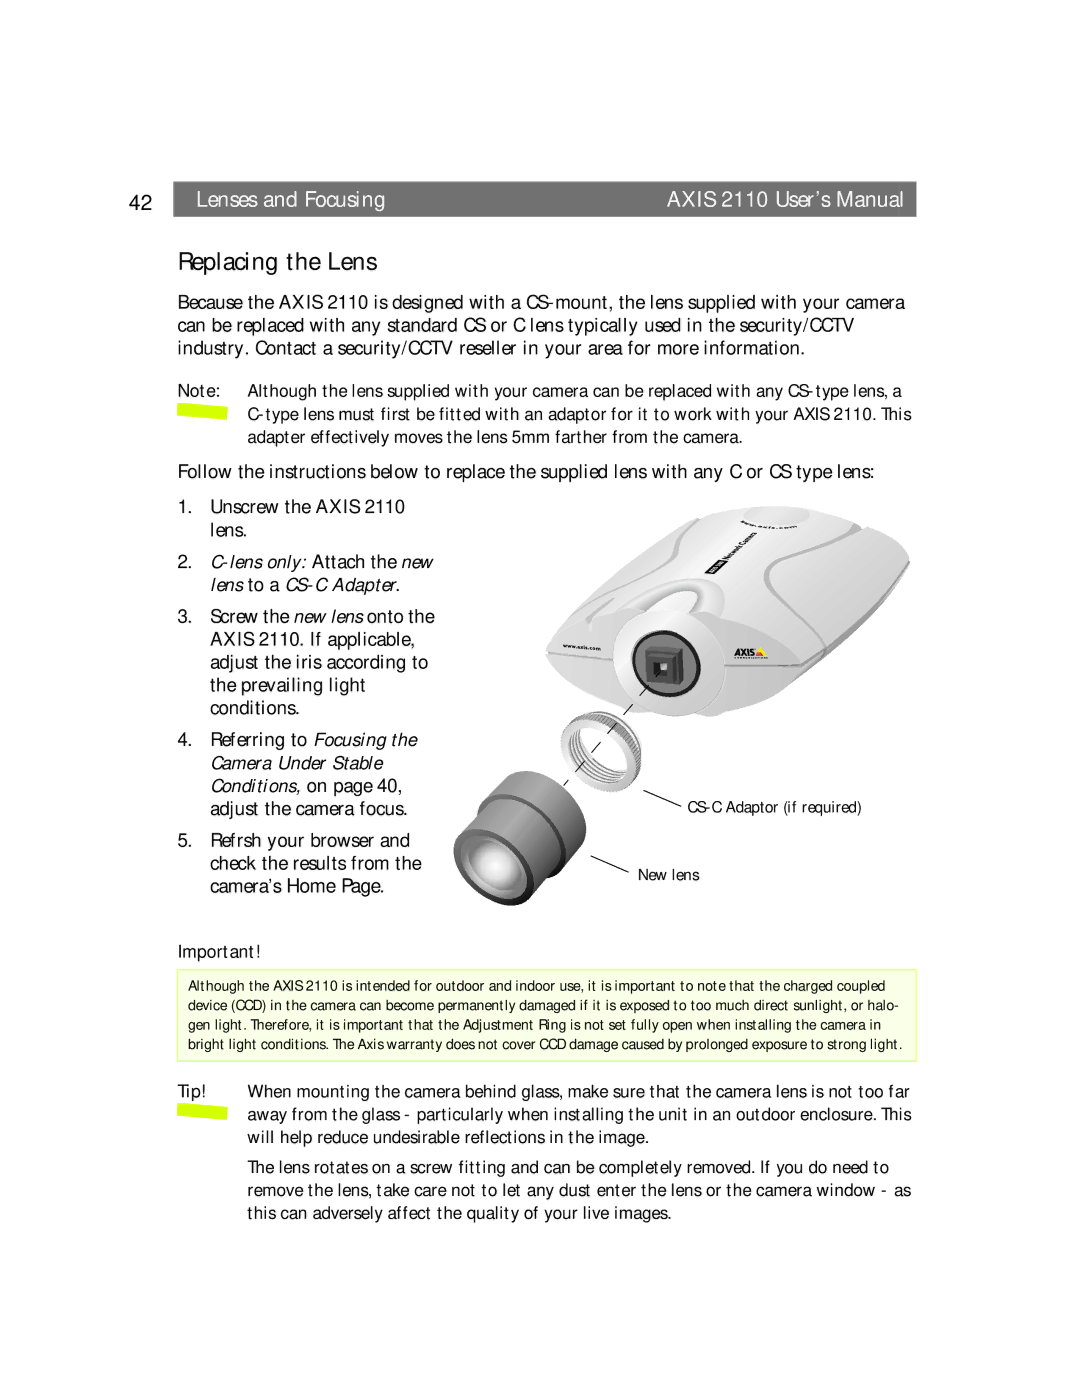
Follow the instructions below to replace the supplied lens with any C or CS type lens:
1.Unscrew the AXIS 2110 lens.
2.
3.Screw the new lens onto the AXIS 2110. If applicable, adjust the iris according to the prevailing light conditions.
4.Referring to Focusing the Camera Under Stable Conditions, on page 40, adjust the camera focus.
5.Refrsh your browser and check the results from the camera’s Home Page.

CS-C Adaptor (if required)
New lens
Important!
Although the AXIS 2110 is intended for outdoor and indoor use, it is important to note that the charged coupled device (CCD) in the camera can become permanently damaged if it is exposed to too much direct sunlight, or halo- gen light. Therefore, it is important that the Adjustment Ring is not set fully open when installing the camera in bright light conditions. The Axis warranty does not cover CCD damage caused by prolonged exposure to strong light.
Tip! When mounting the camera behind glass, make sure that the camera lens is not too far
away from the glass - particularly when installing the unit in an outdoor enclosure. This will help reduce undesirable reflections in the image.
The lens rotates on a screw fitting and can be completely removed. If you do need to remove the lens, take care not to let any dust enter the lens or the camera window - as this can adversely affect the quality of your live images.
