Gamma Curve Settings
This section describes the procedure for adjusting the gamma level for scanning documents.
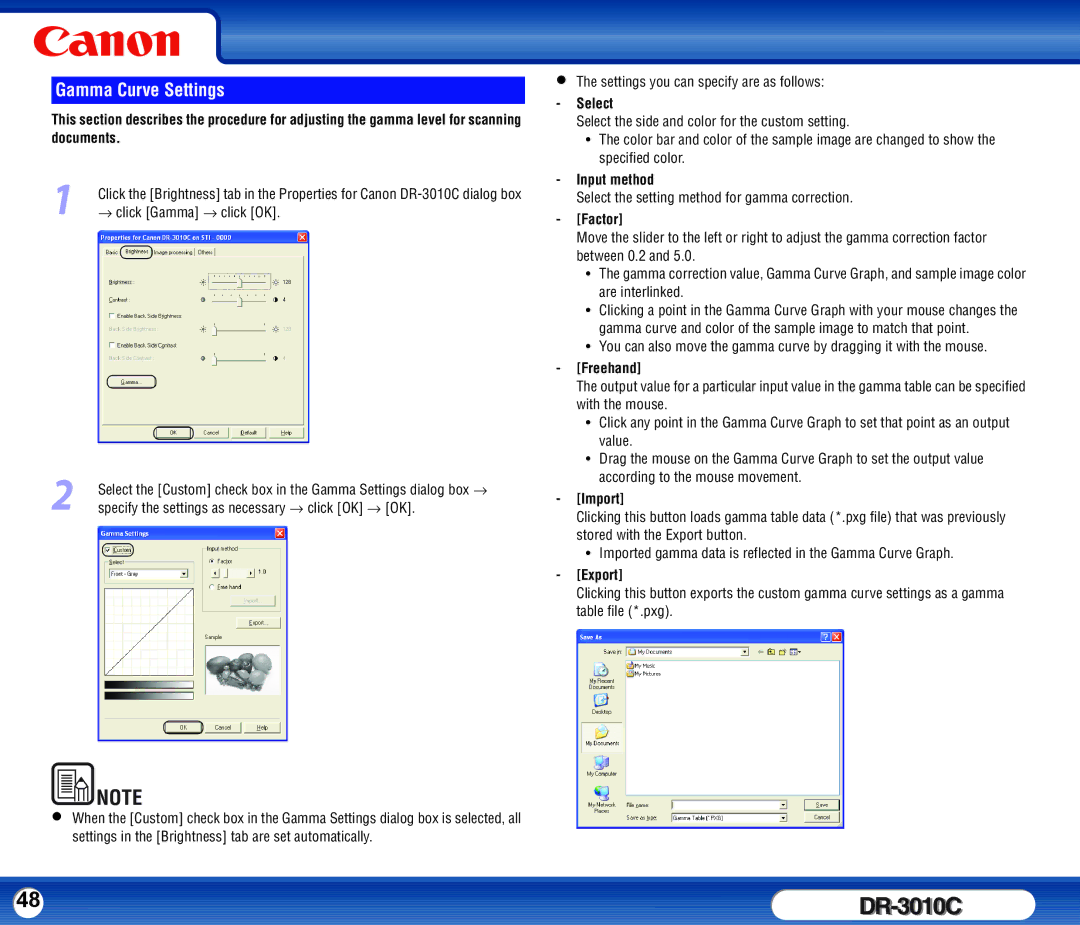
1Click the [Brightness] tab in the Properties for Canon
2Select the [Custom] check box in the Gamma Settings dialog box → specify the settings as necessary → click [OK] → [OK].
•The settings you can specify are as follows:
-Select
Select the side and color for the custom setting.
y The color bar and color of the sample image are changed to show the specified color.
-Input method
Select the setting method for gamma correction.
-[Factor]
Move the slider to the left or right to adjust the gamma correction factor between 0.2 and 5.0.
y The gamma correction value, Gamma Curve Graph, and sample image color are interlinked.
y Clicking a point in the Gamma Curve Graph with your mouse changes the gamma curve and color of the sample image to match that point.
y You can also move the gamma curve by dragging it with the mouse.
-[Freehand]
The output value for a particular input value in the gamma table can be specified with the mouse.
y Click any point in the Gamma Curve Graph to set that point as an output value.
y Drag the mouse on the Gamma Curve Graph to set the output value according to the mouse movement.
-[Import]
Clicking this button loads gamma table data (*.pxg file) that was previously stored with the Export button.
y Imported gamma data is reflected in the Gamma Curve Graph.
-[Export]
Clicking this button exports the custom gamma curve settings as a gamma table file (*.pxg).
• | NOTE |
When the [Custom] check box in the Gamma Settings dialog box is selected, all | |
| settings in the [Brightness] tab are set automatically. |
48 |
|