Maintaining the printhead
![]() NOTE
NOTE
• Before doing the following, open the scanning unit, press “PUSH” on the ink tanks and check that they are securely inserted. Check how much ink is left and if there is none, replace the ink tank ( p.
Flowchart of printhead maintenance
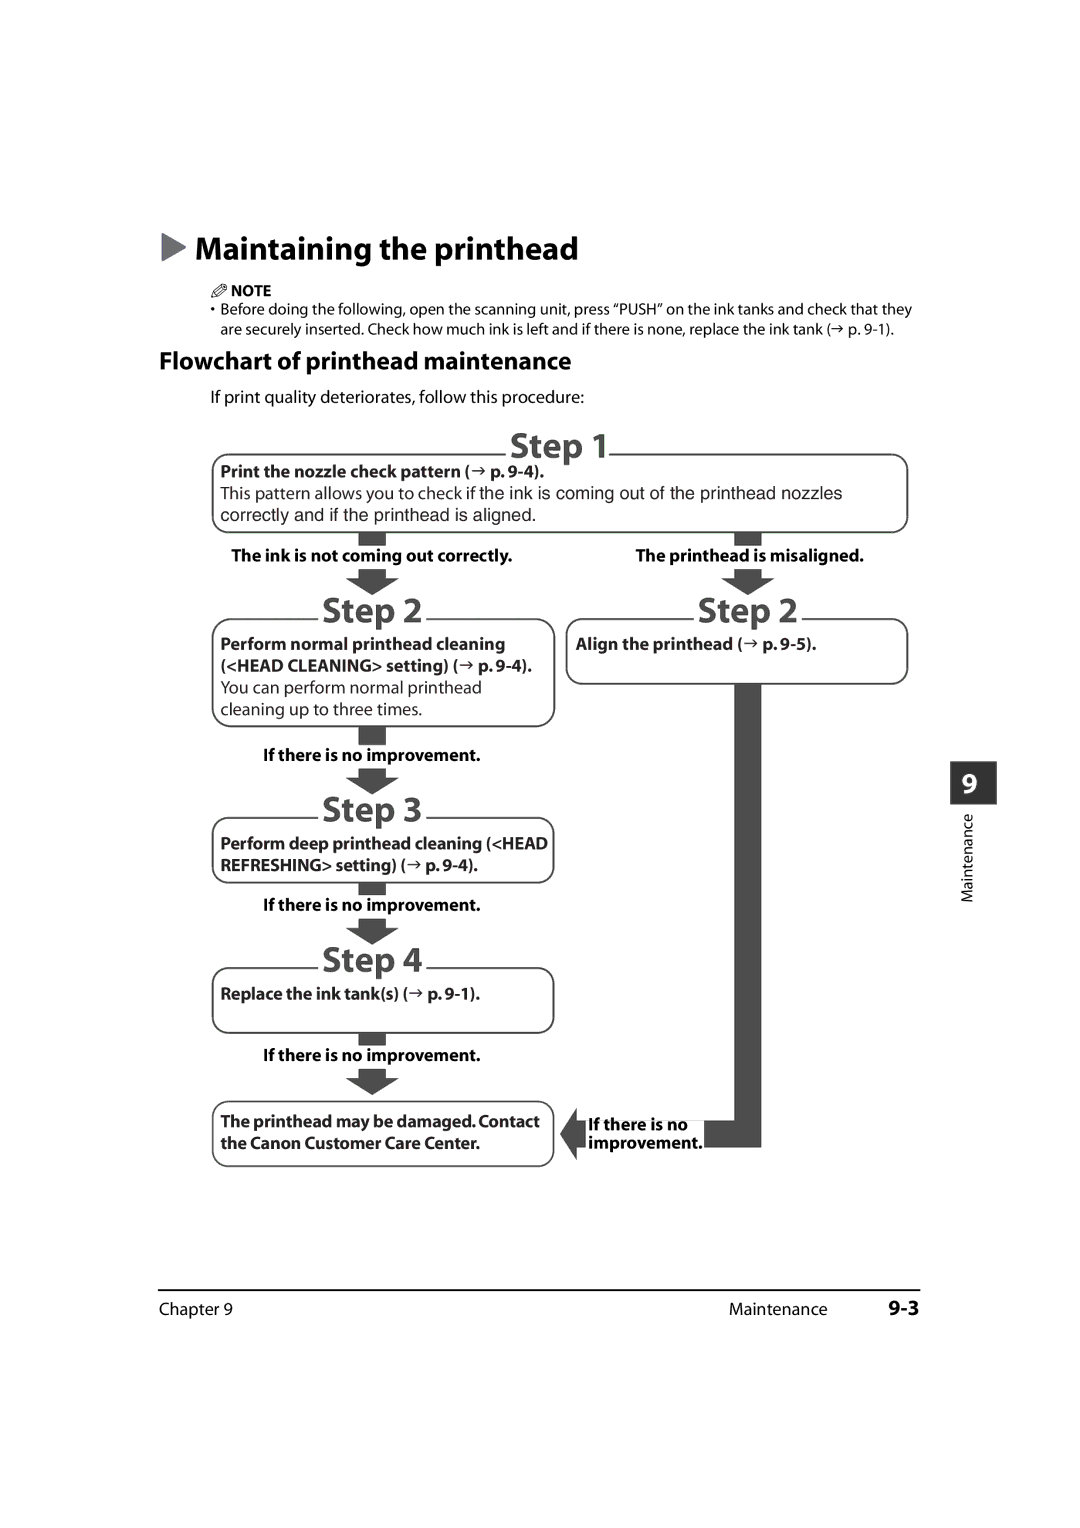
If print quality deteriorates, follow this procedure:
Step 1
Print the nozzle check pattern ( p. 9-4).
This pattern allows you to check if the ink is coming out of the printhead nozzles correctly and if the printhead is aligned.
The ink is not coming | out correctly. | The print | head is m | isaligned. | ||||
|
|
|
|
|
|
|
|
|
Step 2
Perform normal printhead cleaning (<HEAD CLEANING> setting) ( p.
If there is no improvement.
Step 3
Perform deep printhead cleaning (<HEAD REFRESHING> setting) ( p.
If there is no improvement.
Step 4
Replace the ink tank(s) ( p. 9-1).
If there is no improvement.
The printhead may be damaged. Contact the Canon Customer Care Center.
Step 2
Align the printhead ( p.
If there is no
improvement.
9
Maintenance
Chapter 9 | Maintenance |
