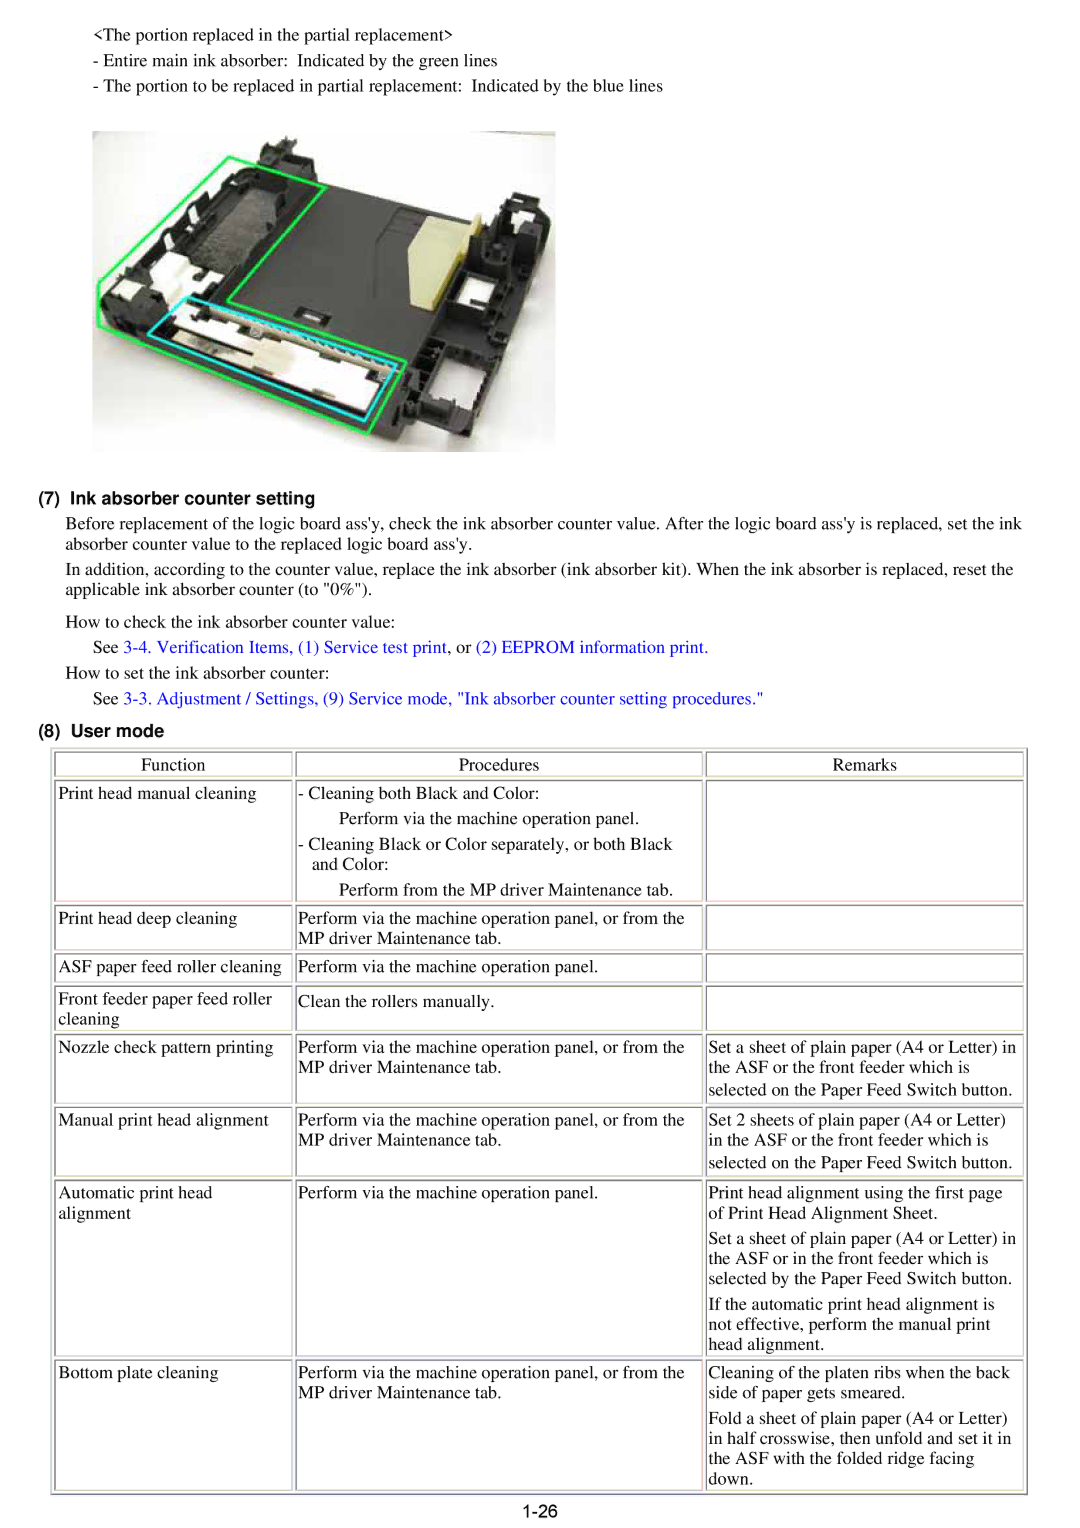
<The portion replaced in the partial replacement>
-Entire main ink absorber: Indicated by the green lines
-The portion to be replaced in partial replacement: Indicated by the blue lines
(7) Ink absorber counter setting
Before replacement of the logic board ass'y, check the ink absorber counter value. After the logic board ass'y is replaced, set the ink absorber counter value to the replaced logic board ass'y.
In addition, according to the counter value, replace the ink absorber (ink absorber kit). When the ink absorber is replaced, reset the applicable ink absorber counter (to "0%").
How to check the ink absorber counter value:
See
How to set the ink absorber counter:
See
(8) User mode |
|
|
Function | Procedures | Remarks |
Print head manual cleaning | - Cleaning both Black and Color: |
|
| Perform via the machine operation panel. |
|
| - Cleaning Black or Color separately, or both Black |
|
| and Color: |
|
| Perform from the MP driver Maintenance tab. |
|
Print head deep cleaning | Perform via the machine operation panel, or from the |
|
| MP driver Maintenance tab. |
|
ASF paper feed roller cleaning
Front feeder paper feed roller cleaning
Nozzle check pattern printing
Manual print head alignment
Automatic print head alignment
Bottom plate cleaning
Perform via the machine operation panel.
Clean the rollers manually.
Perform via the machine operation panel, or from the MP driver Maintenance tab.
Perform via the machine operation panel, or from the MP driver Maintenance tab.
Perform via the machine operation panel.
Perform via the machine operation panel, or from the MP driver Maintenance tab.
Set a sheet of plain paper (A4 or Letter) in the ASF or the front feeder which is
selected on the Paper Feed Switch button.
Set 2 sheets of plain paper (A4 or Letter) in the ASF or the front feeder which is
selected on the Paper Feed Switch button.
Print head alignment using the first page of Print Head Alignment Sheet.
Set a sheet of plain paper (A4 or Letter) in the ASF or in the front feeder which is selected by the Paper Feed Switch button.
If the automatic print head alignment is not effective, perform the manual print head alignment.
Cleaning of the platen ribs when the back side of paper gets smeared.
Fold a sheet of plain paper (A4 or Letter) in half crosswise, then unfold and set it in the ASF with the folded ridge facing down.
