<Button and LCD test procedures>
Confirm the operation after replacement of the operation panel unit or LCD unit.
1)In the button and LCD test mode, press the Stop/Reset button. The LCD turns blue, waiting for a button to be pressed.
2)Press each button of the operation panel.
The LCD is divided into segments, representing each button. The color of a segment corresponding to the pressed button changes to red.
When all the buttons are pressed, the entire LCD changes to a full red screen. The buttons to be pressed are:
-Paper Feed Switch button
-COPY button
-SCAN button
-MEMORY CARD button
-Menu button
-Back button
-Photo Index Sheet button
-Settings button
-OK button
-Black button
-Color button
-Up / down / left / right cursor buttons
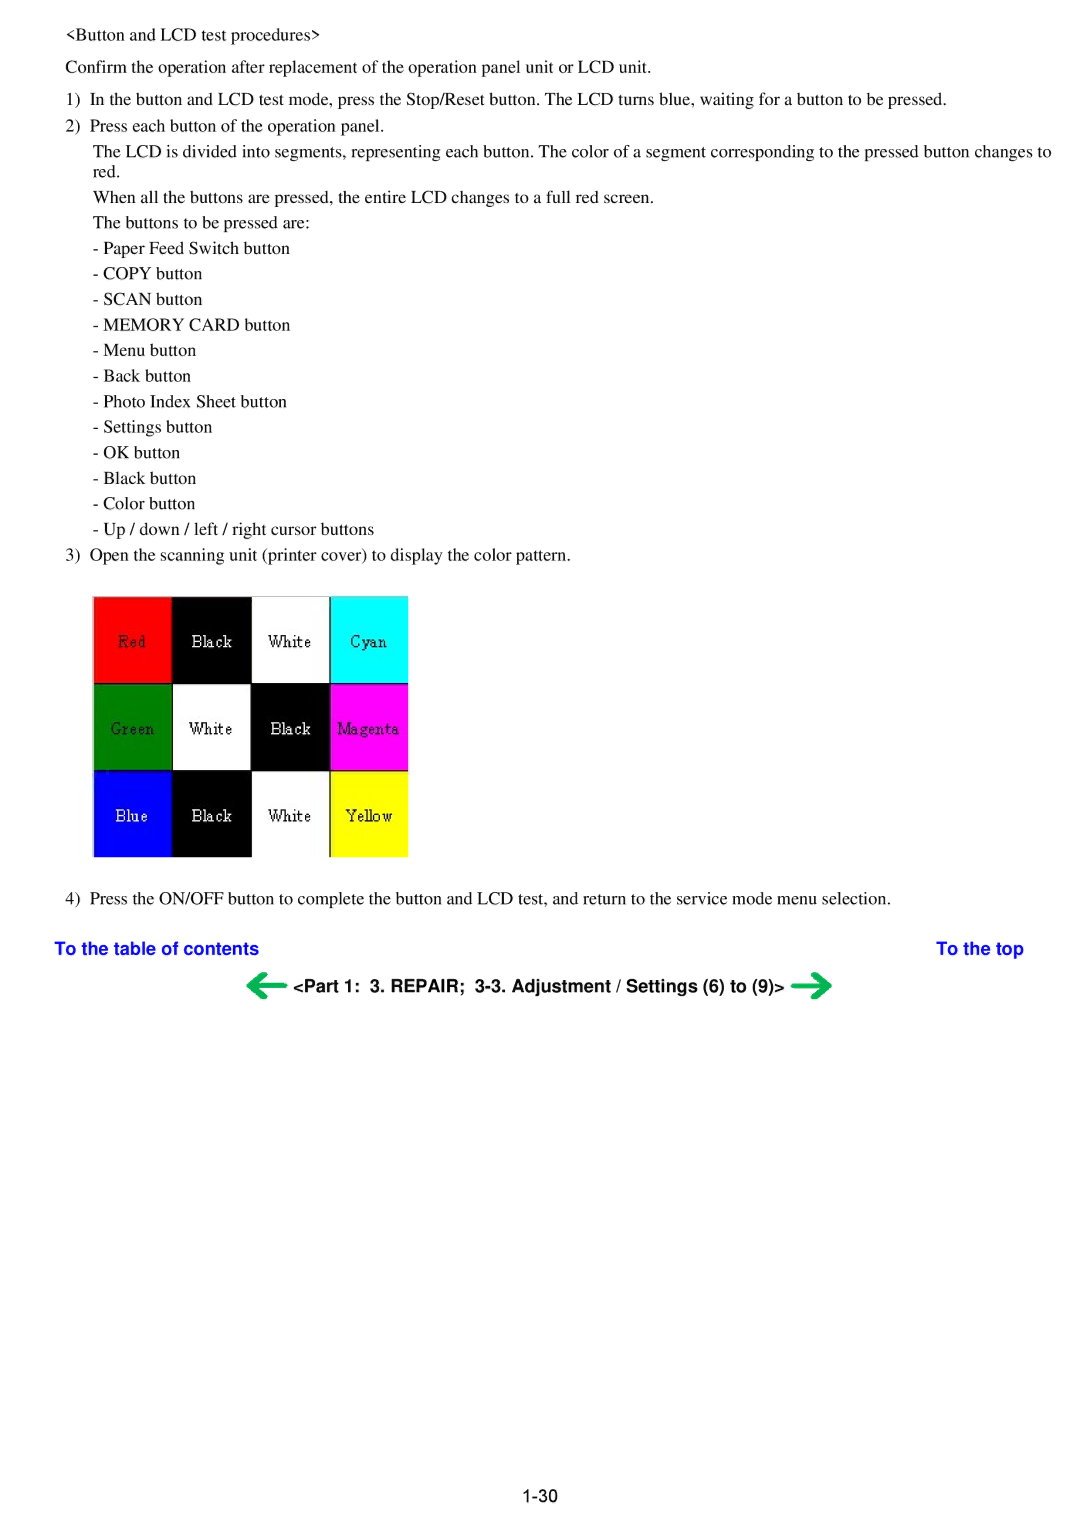
3)Open the scanning unit (printer cover) to display the color pattern.
4) Press the ON/OFF button to complete the button and LCD test, and return to the service mode menu selection.
To the table of contents | To the top |