COPY PREVIOUS PROGRAM | MODE | |||
DAY |
|
|
| UP |
|
|
|
| |
CHANGE DAY | HUMIDITY | FAN | ||
|
|
| RESET | DOWN |
|
|
|
| |
SET TIME/TEMP |
|
| FILTER | HOLD |
HOLIDAY | ||||
|
|
|
| End |
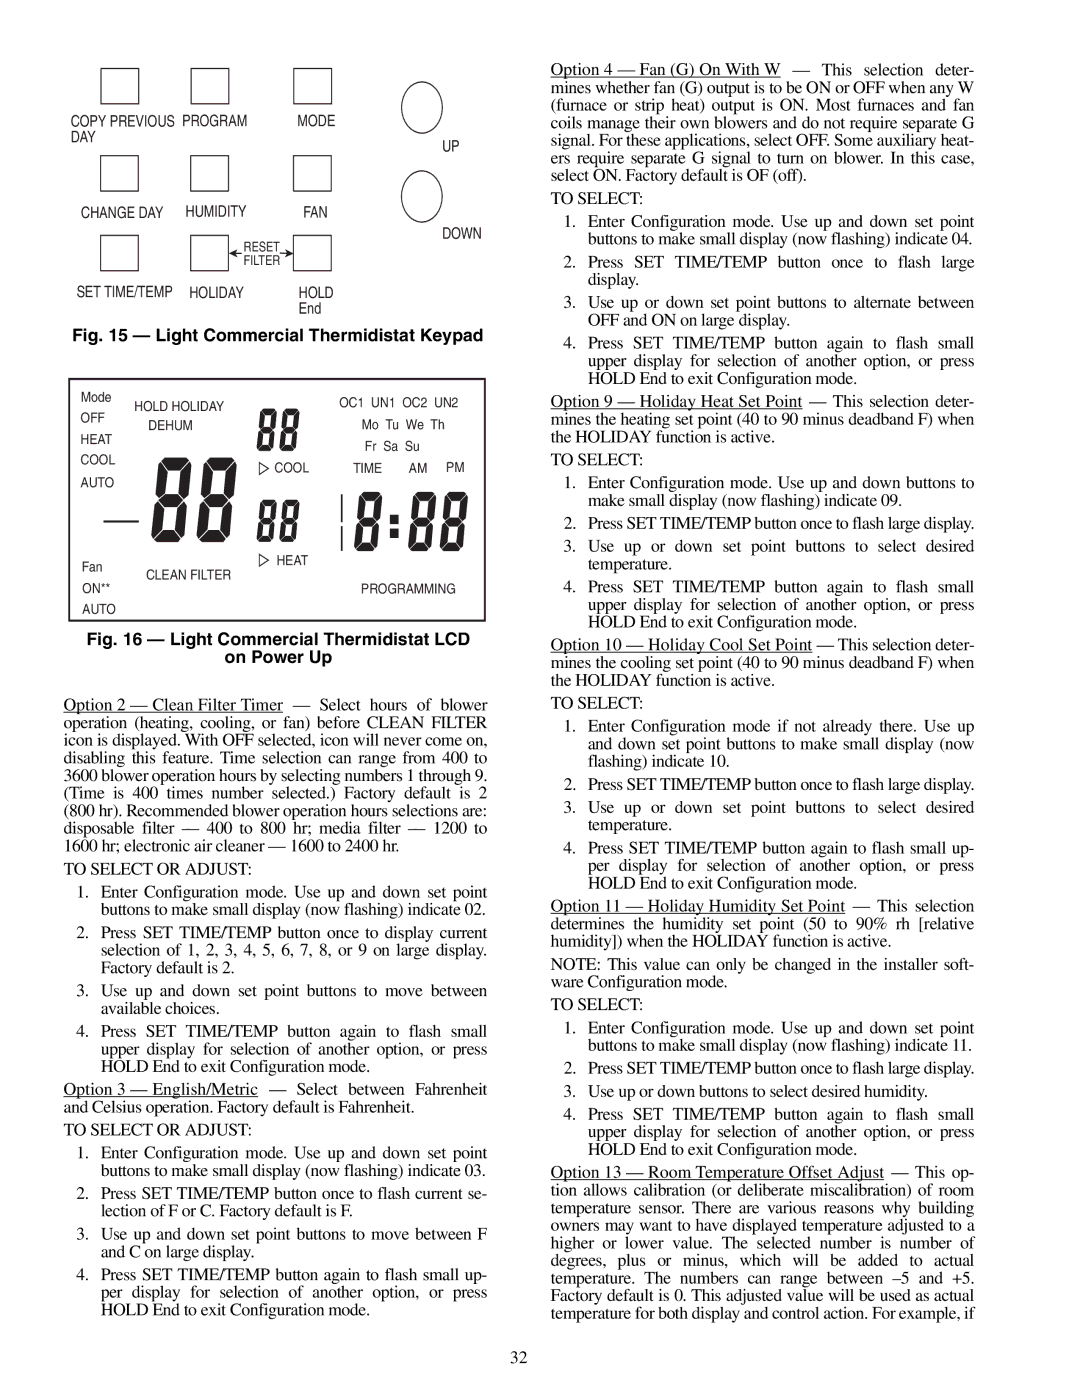
Fig. 15 — Light Commercial Thermidistat Keypad
Mode | HOLD HOLIDAY | OC1 UN1 OC2 UN2 | |
OFF | |||
DEHUM | Mo Tu We Th | ||
HEAT | |||
| Fr Sa Su | ||
COOL |
| ||
COOL | TIME AM PM | ||
AUTO | |||
|
| ||
Fan | HEAT |
| |
CLEAN FILTER |
| ||
ON** | PROGRAMMING | ||
| |||
AUTO |
|
|
Fig. 16 — Light Commercial Thermidistat LCD
on Power Up
Option 2 — Clean Filter Timer — Select hours of blower operation (heating, cooling, or fan) before CLEAN FILTER icon is displayed. With OFF selected, icon will never come on, disabling this feature. Time selection can range from 400 to 3600 blower operation hours by selecting numbers 1 through 9. (Time is 400 times number selected.) Factory default is 2
(800 hr). Recommended blower operation hours selections are: disposable filter — 400 to 800 hr; media filter — 1200 to 1600 hr; electronic air cleaner — 1600 to 2400 hr.
TO SELECT OR ADJUST:
1.Enter Configuration mode. Use up and down set point buttons to make small display (now flashing) indicate 02.
2.Press SET TIME/TEMP button once to display current selection of 1, 2, 3, 4, 5, 6, 7, 8, or 9 on large display. Factory default is 2.
3.Use up and down set point buttons to move between available choices.
4.Press SET TIME/TEMP button again to flash small upper display for selection of another option, or press HOLD End to exit Configuration mode.
Option 3 — English/Metric — Select between Fahrenheit and Celsius operation. Factory default is Fahrenheit.
TO SELECT OR ADJUST:
1.Enter Configuration mode. Use up and down set point buttons to make small display (now flashing) indicate 03.
2.Press SET TIME/TEMP button once to flash current se- lection of F or C. Factory default is F.
3.Use up and down set point buttons to move between F and C on large display.
4.Press SET TIME/TEMP button again to flash small up- per display for selection of another option, or press HOLD End to exit Configuration mode.
Option 4 — Fan (G) On With W — This selection deter- mines whether fan (G) output is to be ON or OFF when any W (furnace or strip heat) output is ON. Most furnaces and fan coils manage their own blowers and do not require separate G signal. For these applications, select OFF. Some auxiliary heat- ers require separate G signal to turn on blower. In this case, select ON. Factory default is OF (off).
TO SELECT:
1.Enter Configuration mode. Use up and down set point buttons to make small display (now flashing) indicate 04.
2.Press SET TIME/TEMP button once to flash large display.
3.Use up or down set point buttons to alternate between OFF and ON on large display.
4.Press SET TIME/TEMP button again to flash small upper display for selection of another option, or press HOLD End to exit Configuration mode.
Option 9 — Holiday Heat Set Point — This selection deter- mines the heating set point (40 to 90 minus deadband F) when the HOLIDAY function is active.
TO SELECT:
1.Enter Configuration mode. Use up and down buttons to make small display (now flashing) indicate 09.
2.Press SET TIME/TEMP button once to flash large display.
3.Use up or down set point buttons to select desired temperature.
4.Press SET TIME/TEMP button again to flash small upper display for selection of another option, or press HOLD End to exit Configuration mode.
Option 10 — Holiday Cool Set Point — This selection deter- mines the cooling set point (40 to 90 minus deadband F) when the HOLIDAY function is active.
TO SELECT:
1.Enter Configuration mode if not already there. Use up and down set point buttons to make small display (now flashing) indicate 10.
2.Press SET TIME/TEMP button once to flash large display.
3.Use up or down set point buttons to select desired temperature.
4.Press SET TIME/TEMP button again to flash small up- per display for selection of another option, or press HOLD End to exit Configuration mode.
Option 11 — Holiday Humidity Set Point — This selection determines the humidity set point (50 to 90% rh [relative humidity]) when the HOLIDAY function is active.
NOTE: This value can only be changed in the installer soft- ware Configuration mode.
TO SELECT:
1.Enter Configuration mode. Use up and down set point buttons to make small display (now flashing) indicate 11.
2.Press SET TIME/TEMP button once to flash large display.
3.Use up or down buttons to select desired humidity.
4.Press SET TIME/TEMP button again to flash small upper display for selection of another option, or press HOLD End to exit Configuration mode.
Option 13 — Room Temperature Offset Adjust — This op- tion allows calibration (or deliberate miscalibration) of room temperature sensor. There are various reasons why building owners may want to have displayed temperature adjusted to a higher or lower value. The selected number is number of degrees, plus or minus, which will be added to actual temperature. The numbers can range between
32