Chapter 2 Getting Started
Installing the Cisco Video Surveillance 2611 IP Dome
1
2
2
4
5
Camera housing
Camera unit
Camera unit screws
Privacy shield
Dome and trim ring assembly
Step 4 Remove the ceiling tile from the location at which you want to mount the IP dome and cut a
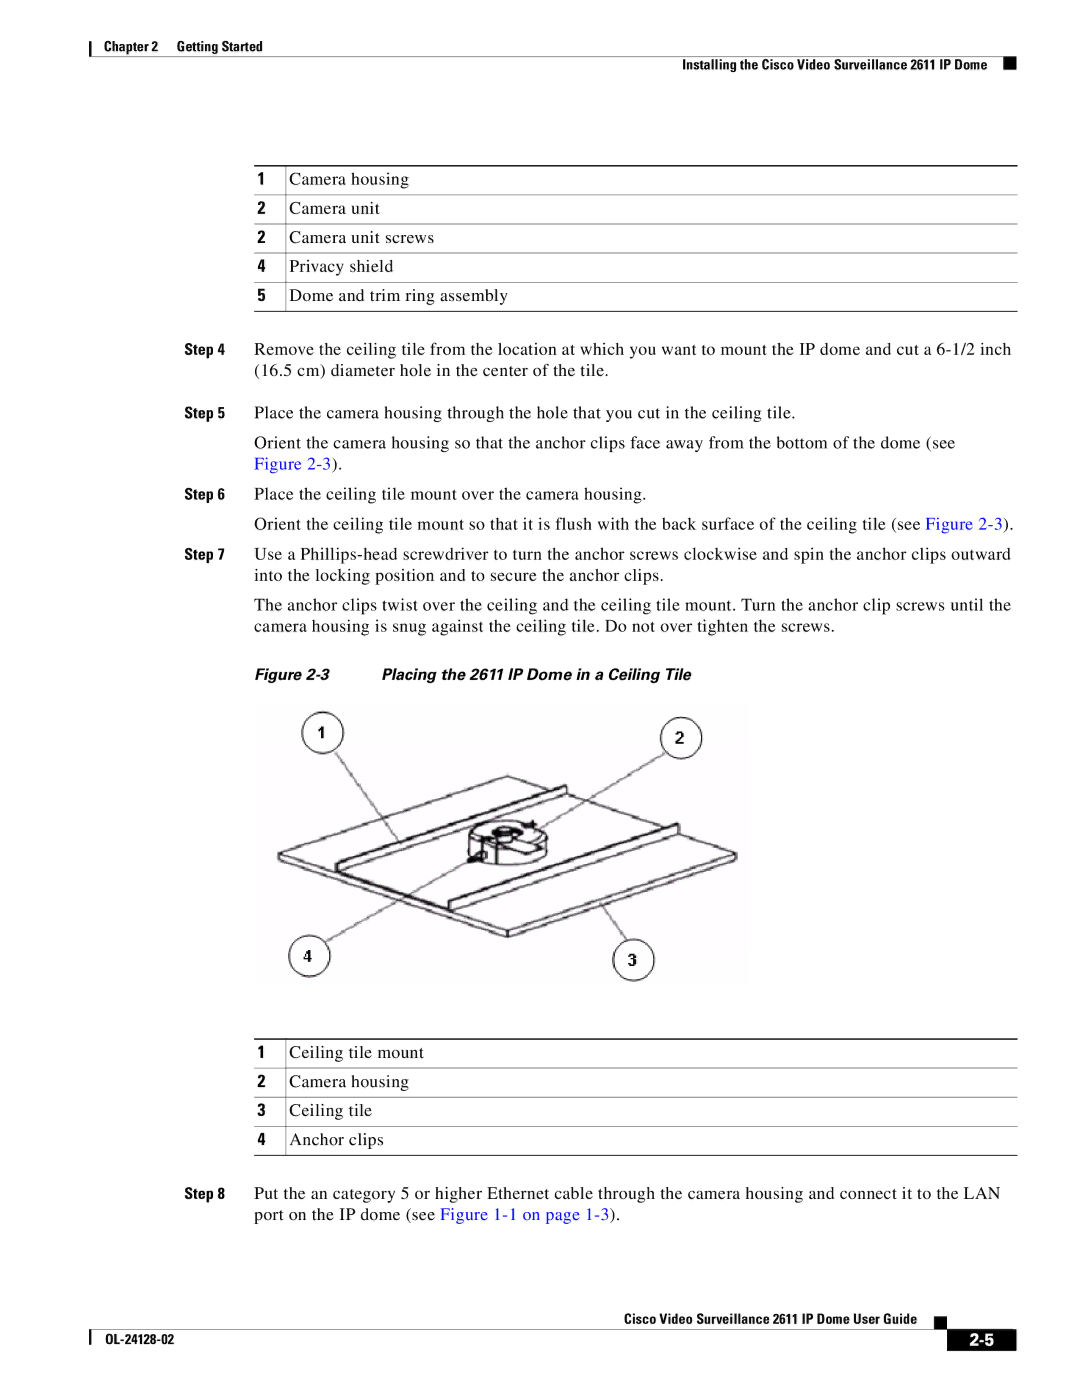
Step 5 Place the camera housing through the hole that you cut in the ceiling tile.
Orient the camera housing so that the anchor clips face away from the bottom of the dome (see Figure
Step 6 Place the ceiling tile mount over the camera housing.
Orient the ceiling tile mount so that it is flush with the back surface of the ceiling tile (see Figure
Step 7 Use a
The anchor clips twist over the ceiling and the ceiling tile mount. Turn the anchor clip screws until the camera housing is snug against the ceiling tile. Do not over tighten the screws.
Figure 2-3 Placing the 2611 IP Dome in a Ceiling Tile
1
2
3
4
Ceiling tile mount
Camera housing
Ceiling tile
Anchor clips
Step 8 Put the an category 5 or higher Ethernet cable through the camera housing and connect it to the LAN port on the IP dome (see Figure
Cisco Video Surveillance 2611 IP Dome User Guide
|
| ||
|
|
