Chapter 4 Viewing Live Video
Viewing Video through the Home Window Overview
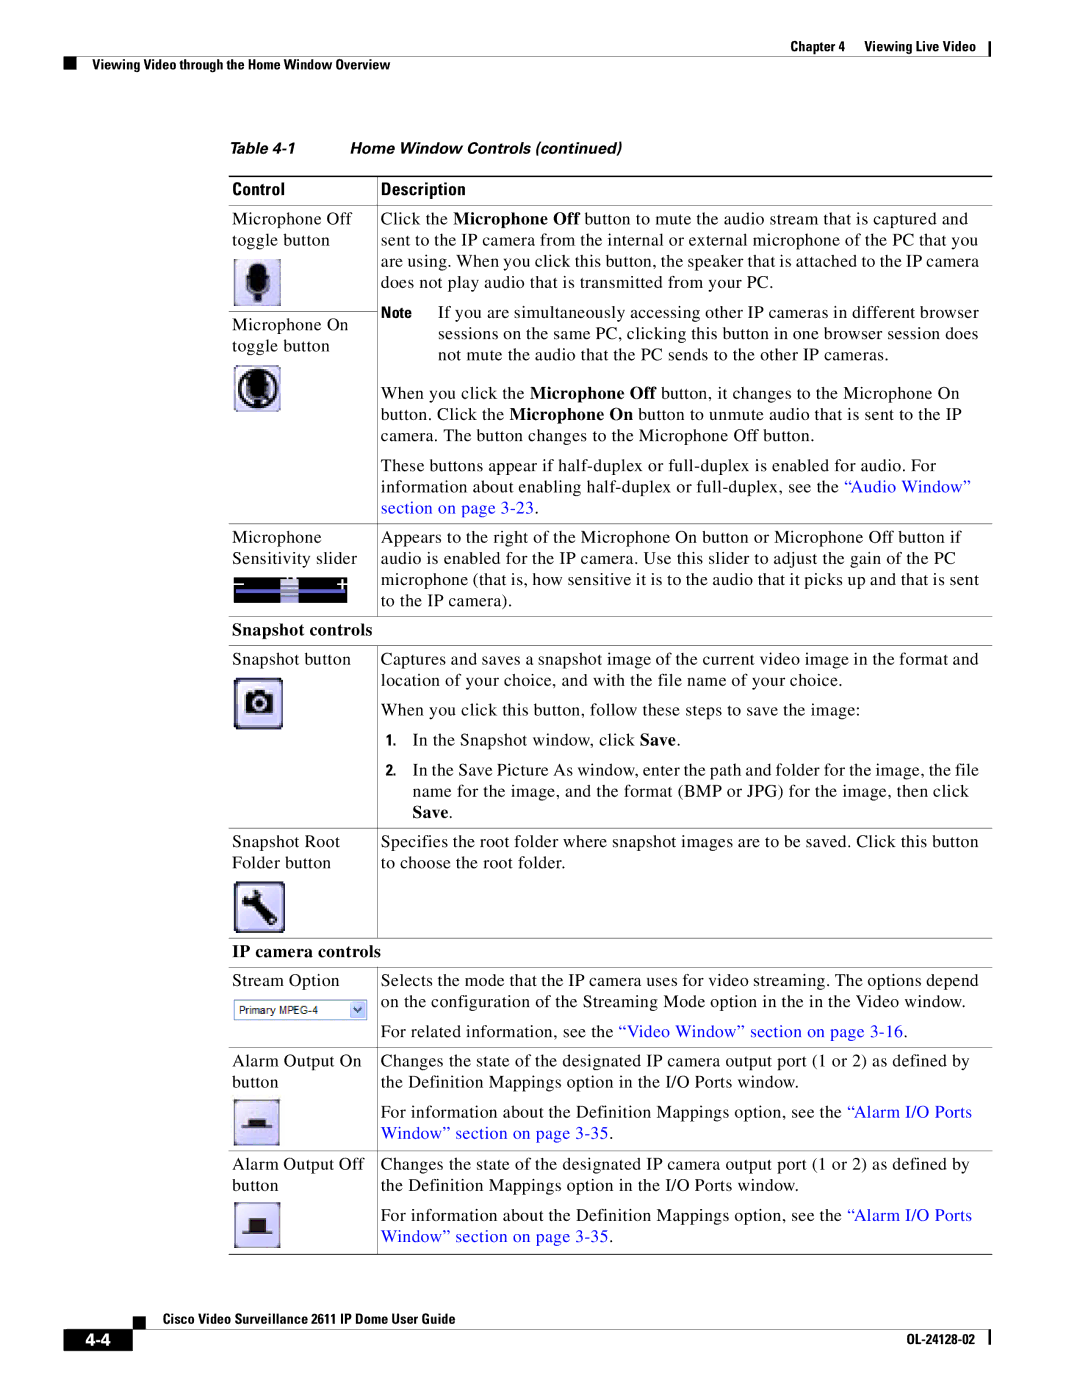
Table | Home Window Controls (continued) | |
|
|
|
Control |
| Description |
|
| |
Microphone Off | Click the Microphone Off button to mute the audio stream that is captured and | |
toggle button |
| sent to the IP camera from the internal or external microphone of the PC that you |
|
| are using. When you click this button, the speaker that is attached to the IP camera |
|
| does not play audio that is transmitted from your PC. |
|
| Note If you are simultaneously accessing other IP cameras in different browser |
Microphone On |
| |
| sessions on the same PC, clicking this button in one browser session does | |
toggle button |
| |
| not mute the audio that the PC sends to the other IP cameras. | |
|
| |
|
| When you click the Microphone Off button, it changes to the Microphone On |
|
| button. Click the Microphone On button to unmute audio that is sent to the IP |
|
| camera. The button changes to the Microphone Off button. |
|
| These buttons appear if |
|
| information about enabling |
|
| section on page |
|
|
|
Microphone |
| Appears to the right of the Microphone On button or Microphone Off button if |
Sensitivity slider | audio is enabled for the IP camera. Use this slider to adjust the gain of the PC | |
|
| microphone (that is, how sensitive it is to the audio that it picks up and that is sent |
|
| to the IP camera). |
|
| |
Snapshot controls |
| |
|
| |
Snapshot button | Captures and saves a snapshot image of the current video image in the format and | |
|
| location of your choice, and with the file name of your choice. |
|
| When you click this button, follow these steps to save the image: |
|
| 1. In the Snapshot window, click Save. |
|
| 2. In the Save Picture As window, enter the path and folder for the image, the file |
|
| name for the image, and the format (BMP or JPG) for the image, then click |
|
| Save. |
|
|
|
Snapshot Root |
| Specifies the root folder where snapshot images are to be saved. Click this button |
Folder button |
| to choose the root folder. |
|
|
|
IP camera controls
Stream Option | Selects the mode that the IP camera uses for video streaming. The options depend |
| on the configuration of the Streaming Mode option in the in the Video window. |
| For related information, see the “Video Window” section on page |
|
|
Alarm Output On | Changes the state of the designated IP camera output port (1 or 2) as defined by |
button | the Definition Mappings option in the I/O Ports window. |
| For information about the Definition Mappings option, see the “Alarm I/O Ports |
| Window” section on page |
|
|
Alarm Output Off | Changes the state of the designated IP camera output port (1 or 2) as defined by |
button | the Definition Mappings option in the I/O Ports window. |
| For information about the Definition Mappings option, see the “Alarm I/O Ports |
| Window” section on page |
|
|
Cisco Video Surveillance 2611 IP Dome User Guide
| ||
|