Chapter 2 Switch Installation
Installing the Switch
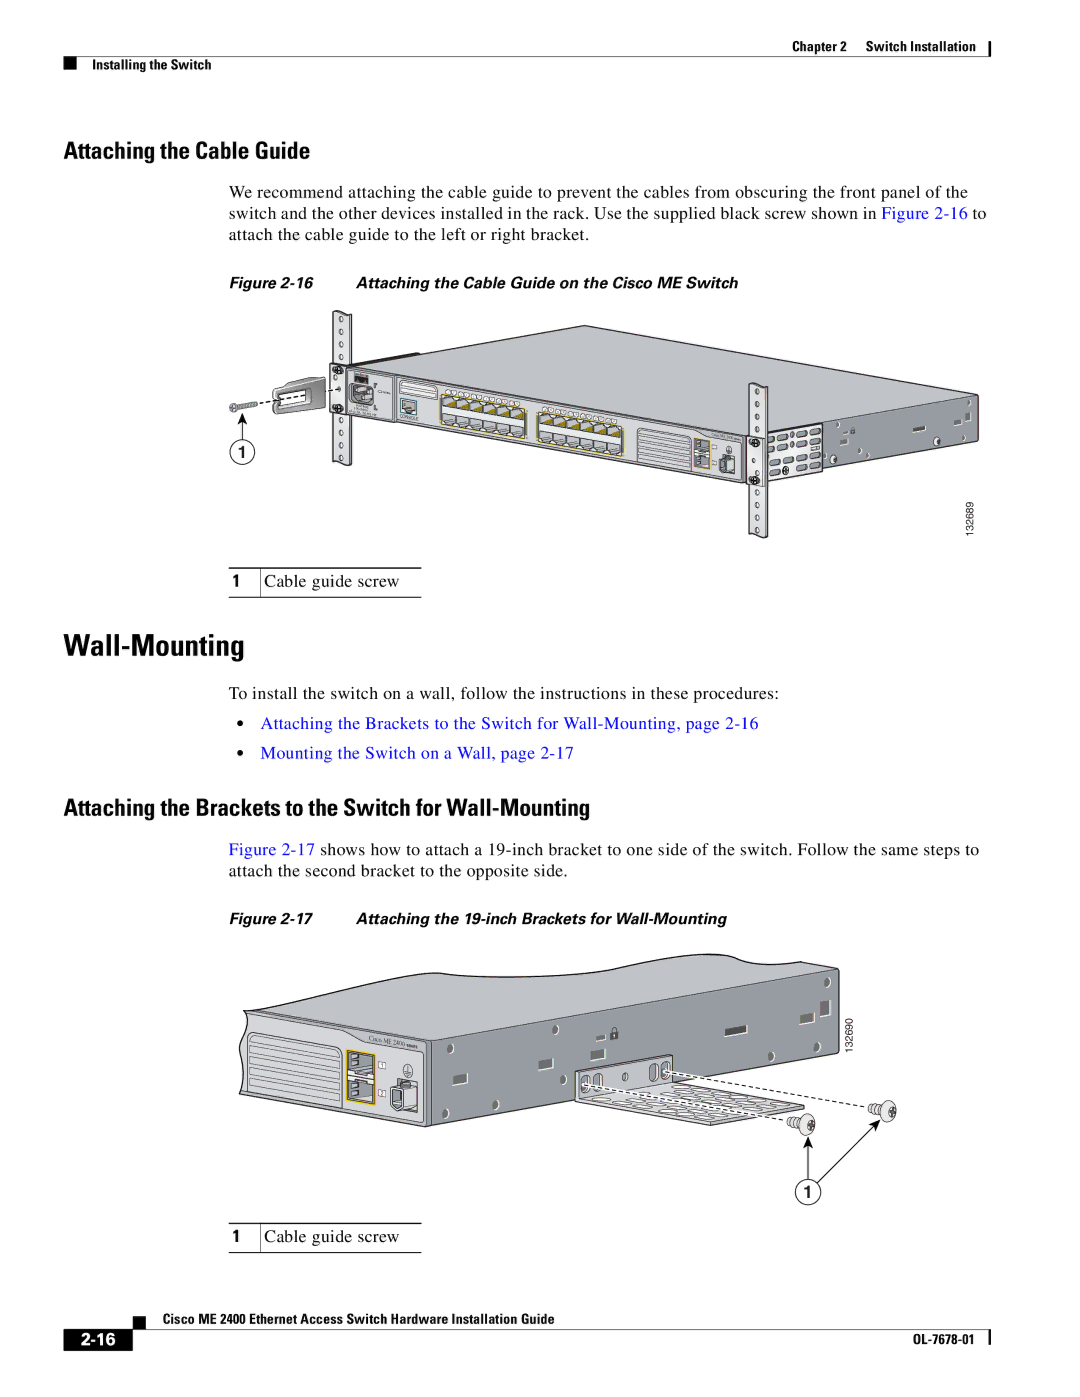
Attaching the Cable Guide
We recommend attaching the cable guide to prevent the cables from obscuring the front panel of the switch and the other devices installed in the rack. Use the supplied black screw shown in Figure
Figure 2-16 Attaching the Cable Guide on the Cisco ME Switch
1
![]() SYSTEM
SYSTEM
RATING |
|
| |
~ |
| ||
| HZ | ||
| |||
CONSOLE
1X
2X
1 | 2 | 4 |
|
|
|
|
|
| 3 | 6 |
|
|
|
| |
|
| 5 | 8 |
|
|
| |
|
|
| 7 | 10 |
|
| |
|
|
|
| 9 | 11 | 12 |
11X
12X
13 | 14 |
13X |
|
14X |
|
15 | 16 | 17 | 18 |
|
|
|
|
|
|
|
| 19 | 20 |
|
|
|
| ||
|
|
|
|
|
| 21 | 22 | 23 | 24 |
|
|
|
|
|
|
|
|
23X
Cisco ME 2400 SERIES
1
24X![]()
![]() 2
2
132689
1
Cable guide screw
Wall-Mounting
To install the switch on a wall, follow the instructions in these procedures:
•Attaching the Brackets to the Switch for
•Mounting the Switch on a Wall, page
Attaching the Brackets to the Switch for Wall-Mounting
Figure 2-17 shows how to attach a 19-inch bracket to one side of the switch. Follow the same steps to attach the second bracket to the opposite side.
Figure 2-17 Attaching the 19-inch Brackets for Wall-Mounting
Cisco |
|
ME |
|
2400 | SERIES |
132690
1
2
1
1
Cable guide screw
Cisco ME 2400 Ethernet Access Switch Hardware Installation Guide
|
| |
|