RESERVOIR FILL
PROCEDURES
WARNING: IMPROPER REFILLING OF
KETTLE JACKET WILL RESULT IN IRREVERSIBLE DAMAGE TO UNIT.
The kettle's water level must be maintained at the proper level. Under normal operating conditions, the sealed water reservoir should never require the addition of water.
If the red "low water" light comes on during use (while the kettle is in an upright position), the water level has reached a critically low level. The low water protection control has automatically shut off the gas burner. The following procedure must be completed before further use:
DANGER: PRESSURE RELIEF VALVE WILL EXHAUST HIGH TEMPERATURE STEAM. CONTACT WITH SKIN COULD RESULT IN SERIOUS BURNS. KEEP FACE,
HANDS AND BODY CLEAR OF DISCHARGE.
DANGER: WORKING ON MACHINES
1.Ensure kettle is at room
| 150 | 200 |
|
| temperature and pressure | |
100 |
| 250 |
| gauge showing zero or less | ||
| 20 |
|
| |||
50 | 30 |
|
| |||
10 | 40 300 | pressure. | ||||
| ||||||
|
|
|
|
| ||
0 |
|
| 50 |
|
| |
I |
|
|
|
| ||
R |
|
|
| 350 | Shut off power to the kettle | |
A |
| 60 |
| |||
V |
|
| 2. | |||
T |
|
|
|
|
| |
N |
|
|
|
|
| |
E |
|
|
|
|
| |
|
| psi |
| 400 | at the fused disconnect | |
|
|
| kPa | |||
|
|
|
| |||
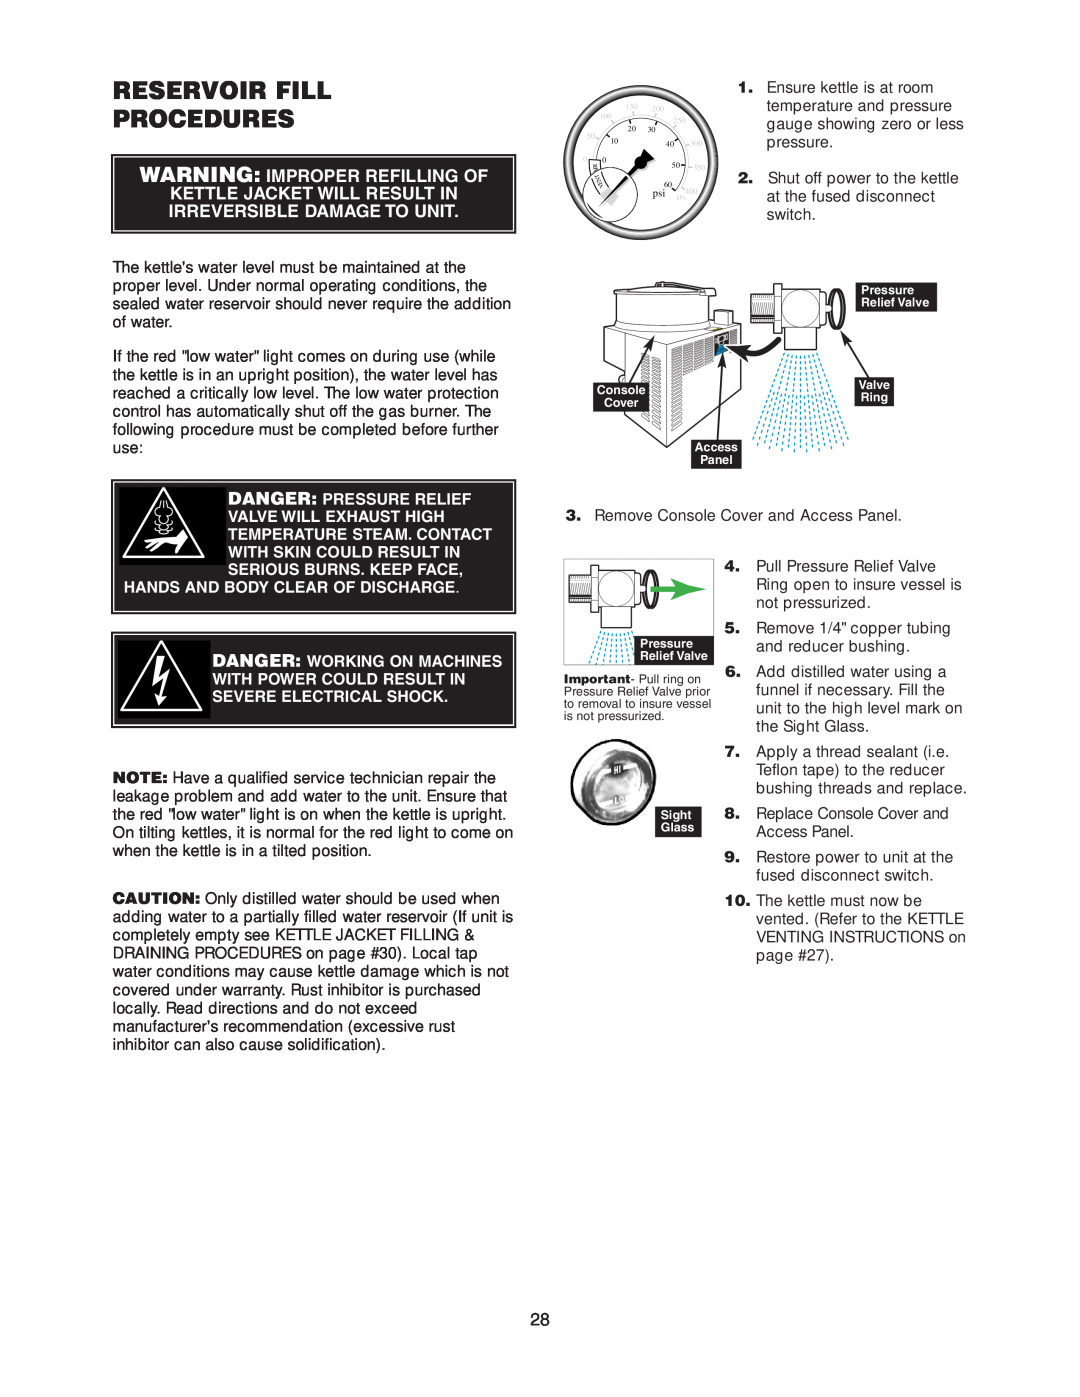
switch.
Pressure
Relief Valve
Console | Valve | |
Ring | ||
Cover | ||
|
Access
Panel
3. Remove Console Cover and Access Panel.
4. | Pull Pressure Relief Valve |
| Ring open to insure vessel is |
| not pressurized. |
5. | Remove 1/4" copper tubing |
Pressure | and reducer bushing. |
Relief Valve |
|
WITH POWER COULD RESULT IN
SEVERE ELECTRICAL SHOCK.
NOTE: Have a qualified service technician repair the leakage problem and add water to the unit. Ensure that the red "low water" light is on when the kettle is upright. On tilting kettles, it is normal for the red light to come on when the kettle is in a tilted position.
Important- Pull ring on Pressure Relief Valve prior to removal to insure vessel is not pressurized.
Sight
Glass
6.Add distilled water using a funnel if necessary. Fill the unit to the high level mark on the Sight Glass.
7.Apply a thread sealant (i.e. Teflon tape) to the reducer bushing threads and replace.
8.Replace Console Cover and Access Panel.
CAUTION: Only distilled water should be used when adding water to a partially filled water reservoir (If unit is completely empty see KETTLE JACKET FILLING & DRAINING PROCEDURES on page #30). Local tap water conditions may cause kettle damage which is not covered under warranty. Rust inhibitor is purchased locally. Read directions and do not exceed manufacturer's recommendation (excessive rust inhibitor can also cause solidification).
9.Restore power to unit at the fused disconnect switch.
10.The kettle must now be vented. (Refer to the KETTLE VENTING INSTRUCTIONS on page #27).
28