Introduction
Rear Panel
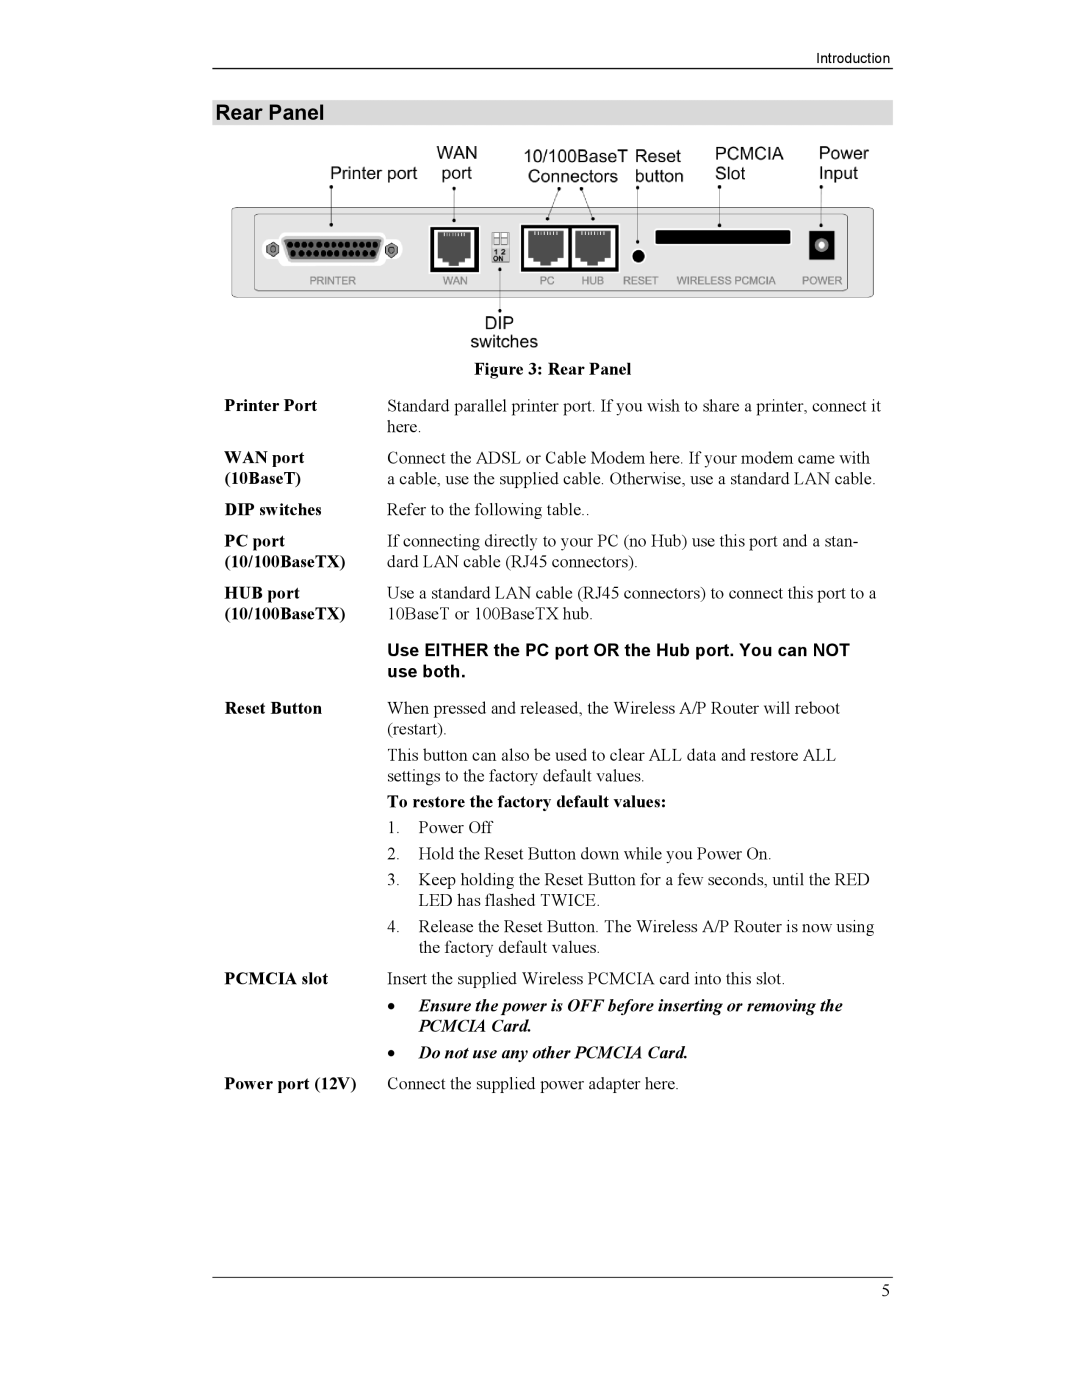
| Figure 3: Rear Panel |
Printer Port | Standard parallel printer port. If you wish to share a printer, connect it |
| here. |
WAN port | Connect the ADSL or Cable Modem here. If your modem came with |
(10BaseT) | a cable, use the supplied cable. Otherwise, use a standard LAN cable. |
DIP switches | Refer to the following table.. |
PC port | If connecting directly to your PC (no Hub) use this port and a stan- |
(10/100BaseTX) | dard LAN cable (RJ45 connectors). |
HUB port | Use a standard LAN cable (RJ45 connectors) to connect this port to a |
(10/100BaseTX) | 10BaseT or 100BaseTX hub. |
| Use EITHER the PC port OR the Hub port. You can NOT |
| use both. |
Reset Button | When pressed and released, the Wireless A/P Router will reboot |
| (restart). |
| This button can also be used to clear ALL data and restore ALL |
| settings to the factory default values. |
| To restore the factory default values: |
| 1. Power Off |
| 2. Hold the Reset Button down while you Power On. |
| 3. Keep holding the Reset Button for a few seconds, until the RED |
| LED has flashed TWICE. |
| 4. Release the Reset Button. The Wireless A/P Router is now using |
| the factory default values. |
PCMCIA slot | Insert the supplied Wireless PCMCIA card into this slot. |
| • Ensure the power is OFF before inserting or removing the |
| PCMCIA Card. |
| • Do not use any other PCMCIA Card. |
Power port (12V) | Connect the supplied power adapter here. |
5
