Security Groups
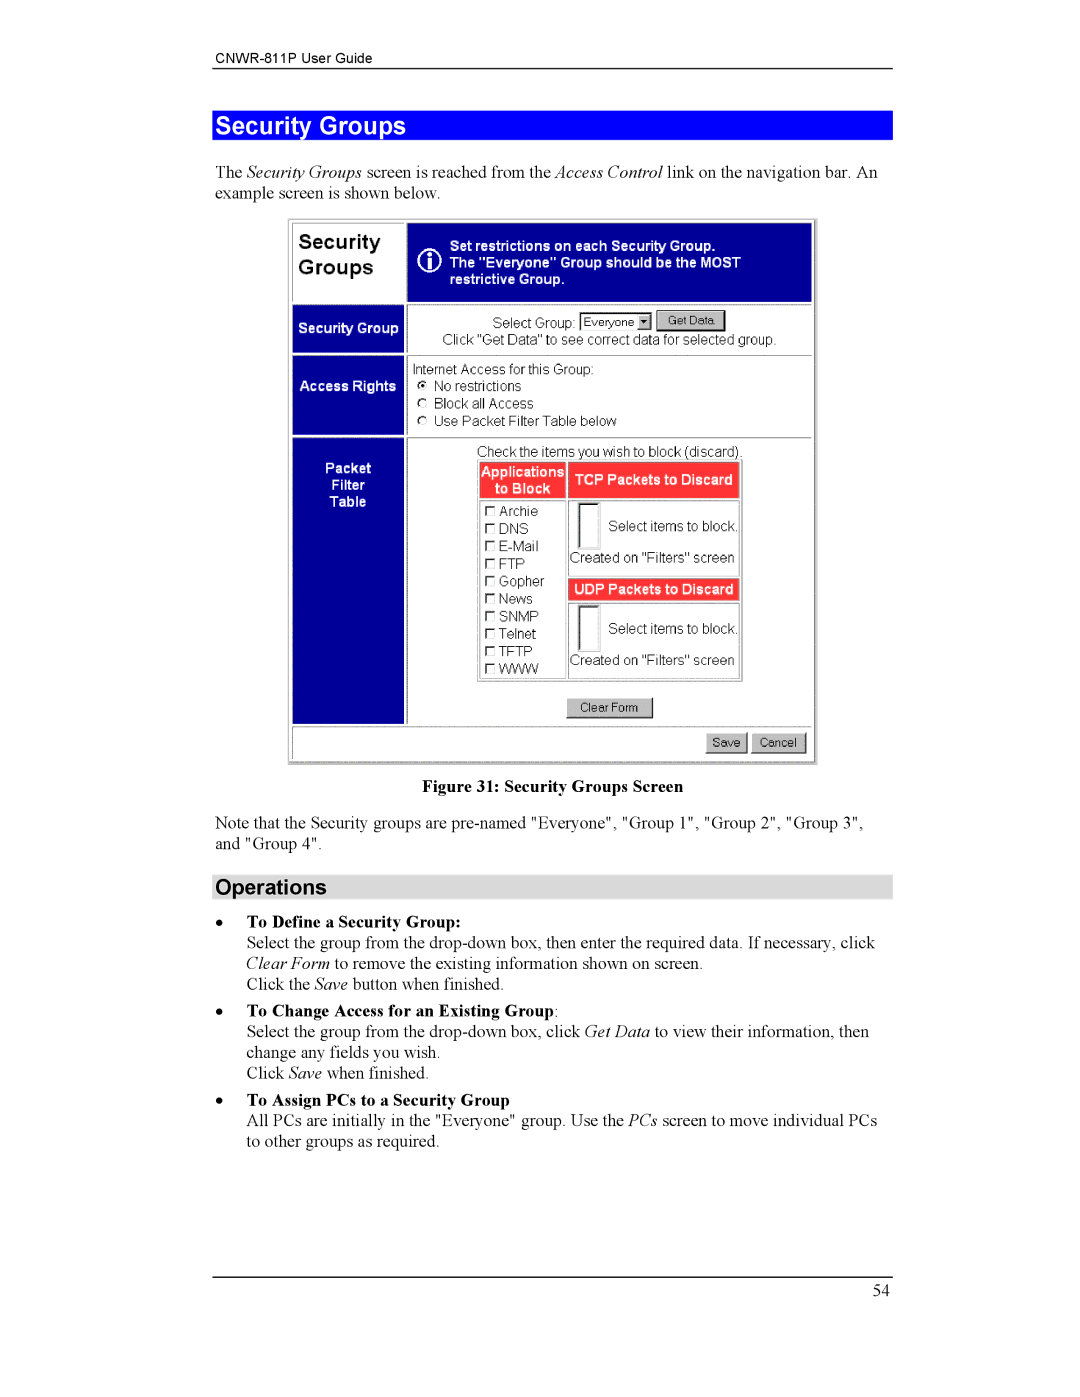
The Security Groups screen is reached from the Access Control link on the navigation bar. An example screen is shown below.
Figure 31: Security Groups Screen
Note that the Security groups are
Operations
•To Define a Security Group:
Select the group from the
Click the Save button when finished.
•To Change Access for an Existing Group:
Select the group from the
Click Save when finished.
•To Assign PCs to a Security Group
All PCs are initially in the "Everyone" group. Use the PCs screen to move individual PCs to other groups as required.
54