Cooper Bussmann Wireless Ethernet & Device Server
Method 1 - Set PC to same network as BU-945U-E
Connect the Ethernet cable between unit and the PC configuring the module.
•Set the Factory Default Switch to the SETUP position. This will always start the
•Power up the BU-945U-E module.
•Open “Network Settings” on your PC under Control Panel. The following description is for Windows XP - earlier Windows operating systems have similar settings.
•Open “Properties” of Local Area Connection.
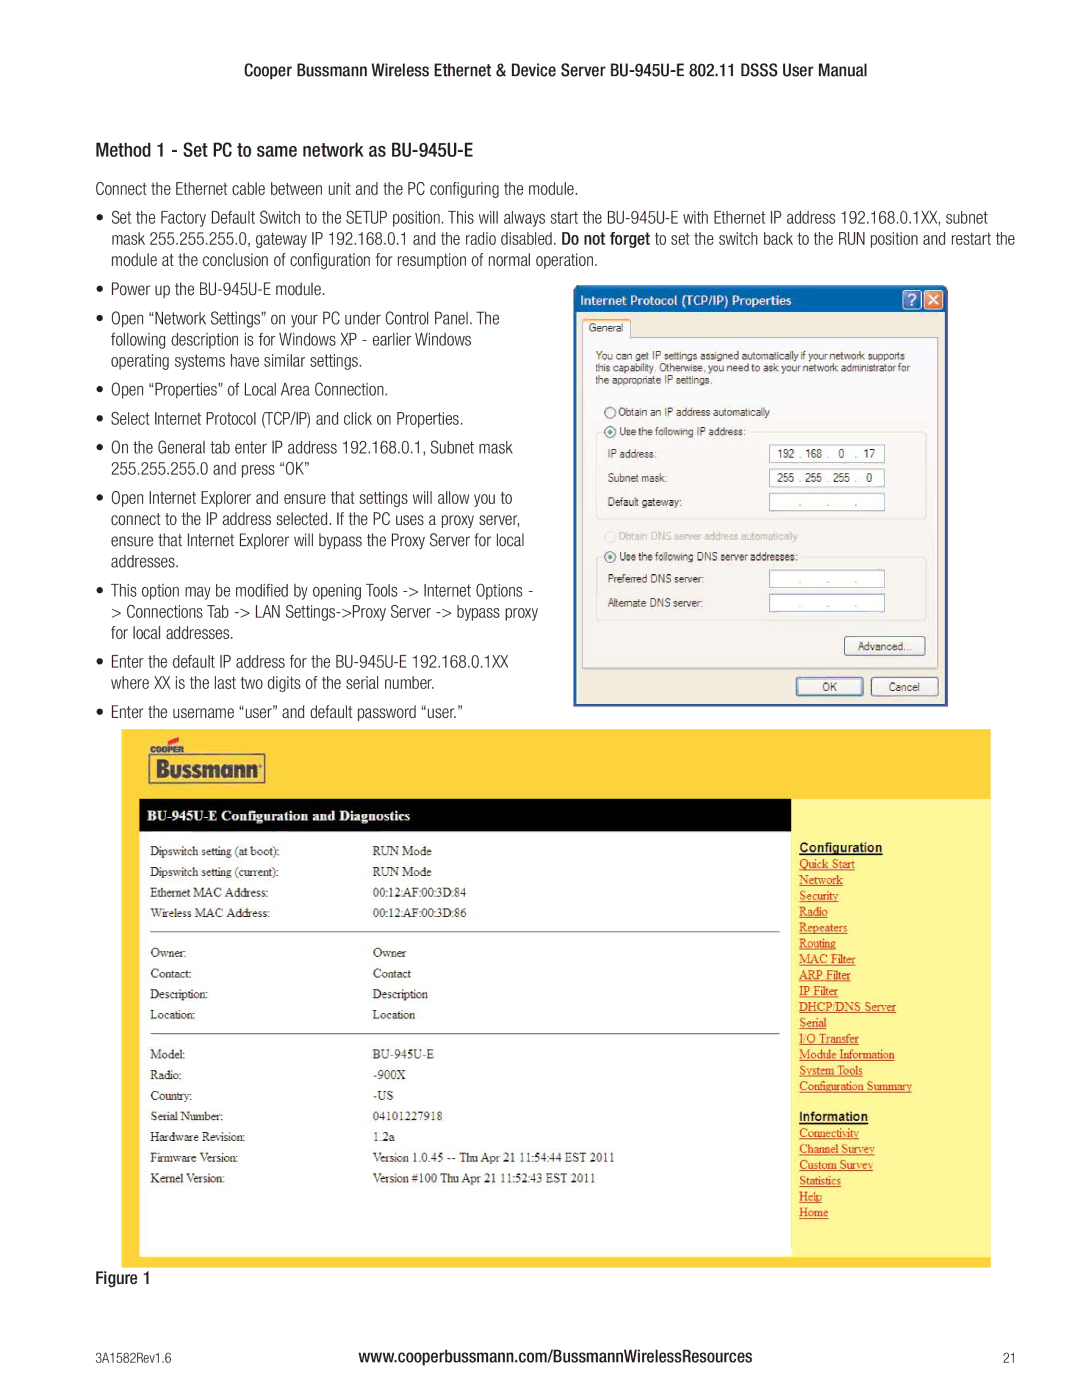
•Select Internet Protocol (TCP/IP) and click on Properties.
•On the General tab enter IP address 192.168.0.1, Subnet mask 255.255.255.0 and press “OK”
•Open Internet Explorer and ensure that settings will allow you to connect to the IP address selected. If the PC uses a proxy server, ensure that Internet Explorer will bypass the Proxy Server for local addresses.
•This option may be modified by opening Tools
for local addresses.
•Enter the default IP address for the
•Enter the username “user” and default password “user.”
Figure 1
3A1582Rev1.6 | www.cooperbussmann.com/BussmannWirelessResources | 21 |