DI-304/DI-304M ISDN Remote Router
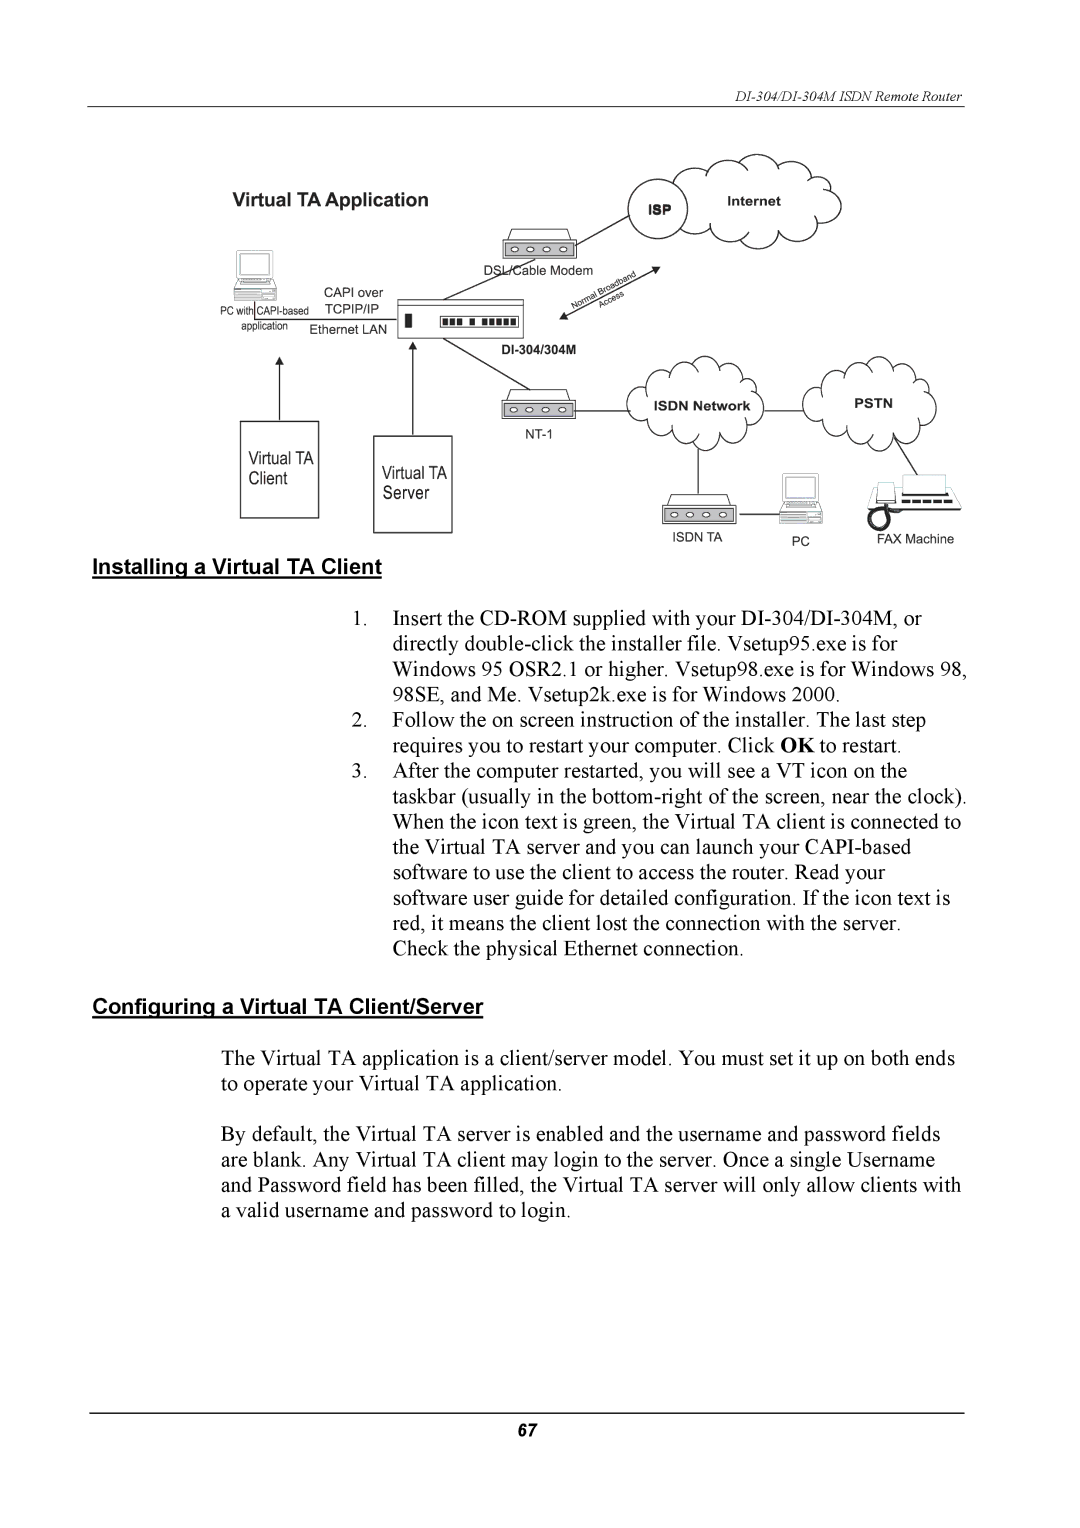
Installing a Virtual TA Client
1.Insert the
2.Follow the on screen instruction of the installer. The last step requires you to restart your computer. Click OK to restart.
3.After the computer restarted, you will see a VT icon on the taskbar (usually in the
Configuring a Virtual TA Client/Server
The Virtual TA application is a client/server model. You must set it up on both ends to operate your Virtual TA application.
By default, the Virtual TA server is enabled and the username and password fields are blank. Any Virtual TA client may login to the server. Once a single Username and Password field has been filled, the Virtual TA server will only allow clients with a valid username and password to login.
67