Setting Up the Scanner
Removing the Interface Cable
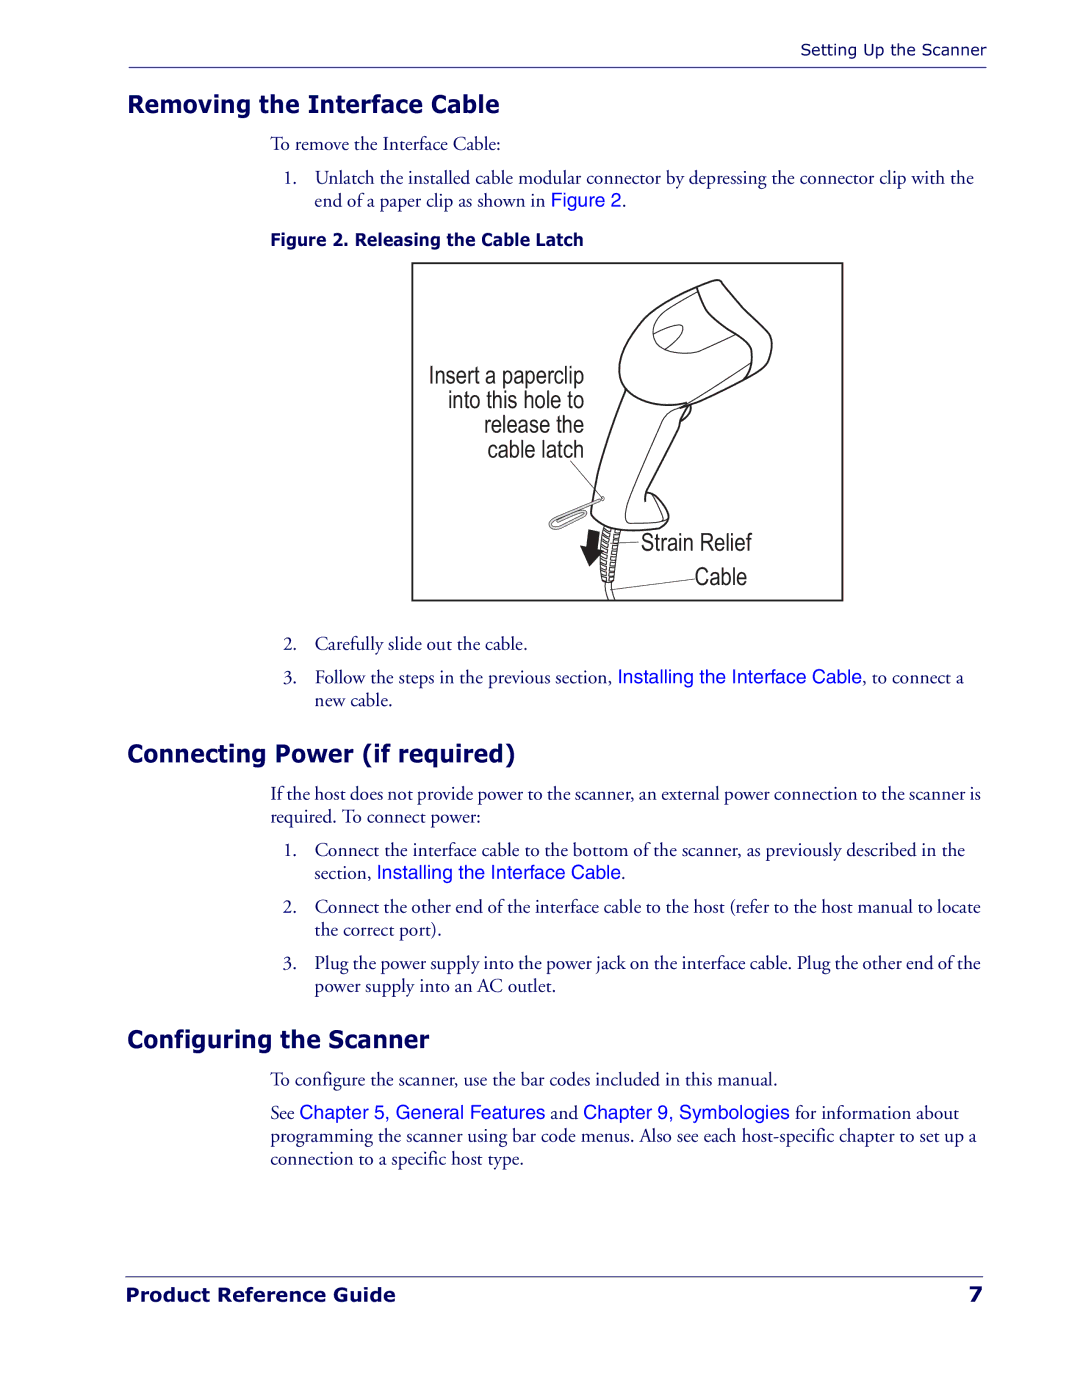
To remove the Interface Cable:
1.Unlatch the installed cable modular connector by depressing the connector clip with the end of a paper clip as shown in Figure 2.
Figure 2. Releasing the Cable Latch
Insert a paperclip into this hole to release the cable latch
Strain Relief
Cable
2.Carefully slide out the cable.
3.Follow the steps in the previous section, Installing the Interface Cable, to connect a new cable.
Connecting Power (if required)
If the host does not provide power to the scanner, an external power connection to the scanner is required. To connect power:
1.Connect the interface cable to the bottom of the scanner, as previously described in the section, Installing the Interface Cable.
2.Connect the other end of the interface cable to the host (refer to the host manual to locate the correct port).
3.Plug the power supply into the power jack on the interface cable. Plug the other end of the power supply into an AC outlet.
Configuring the Scanner
To configure the scanner, use the bar codes included in this manual.
See Chapter 5, General Features and Chapter 9, Symbologies for information about programming the scanner using bar code menus. Also see each
Product Reference Guide | 7 |