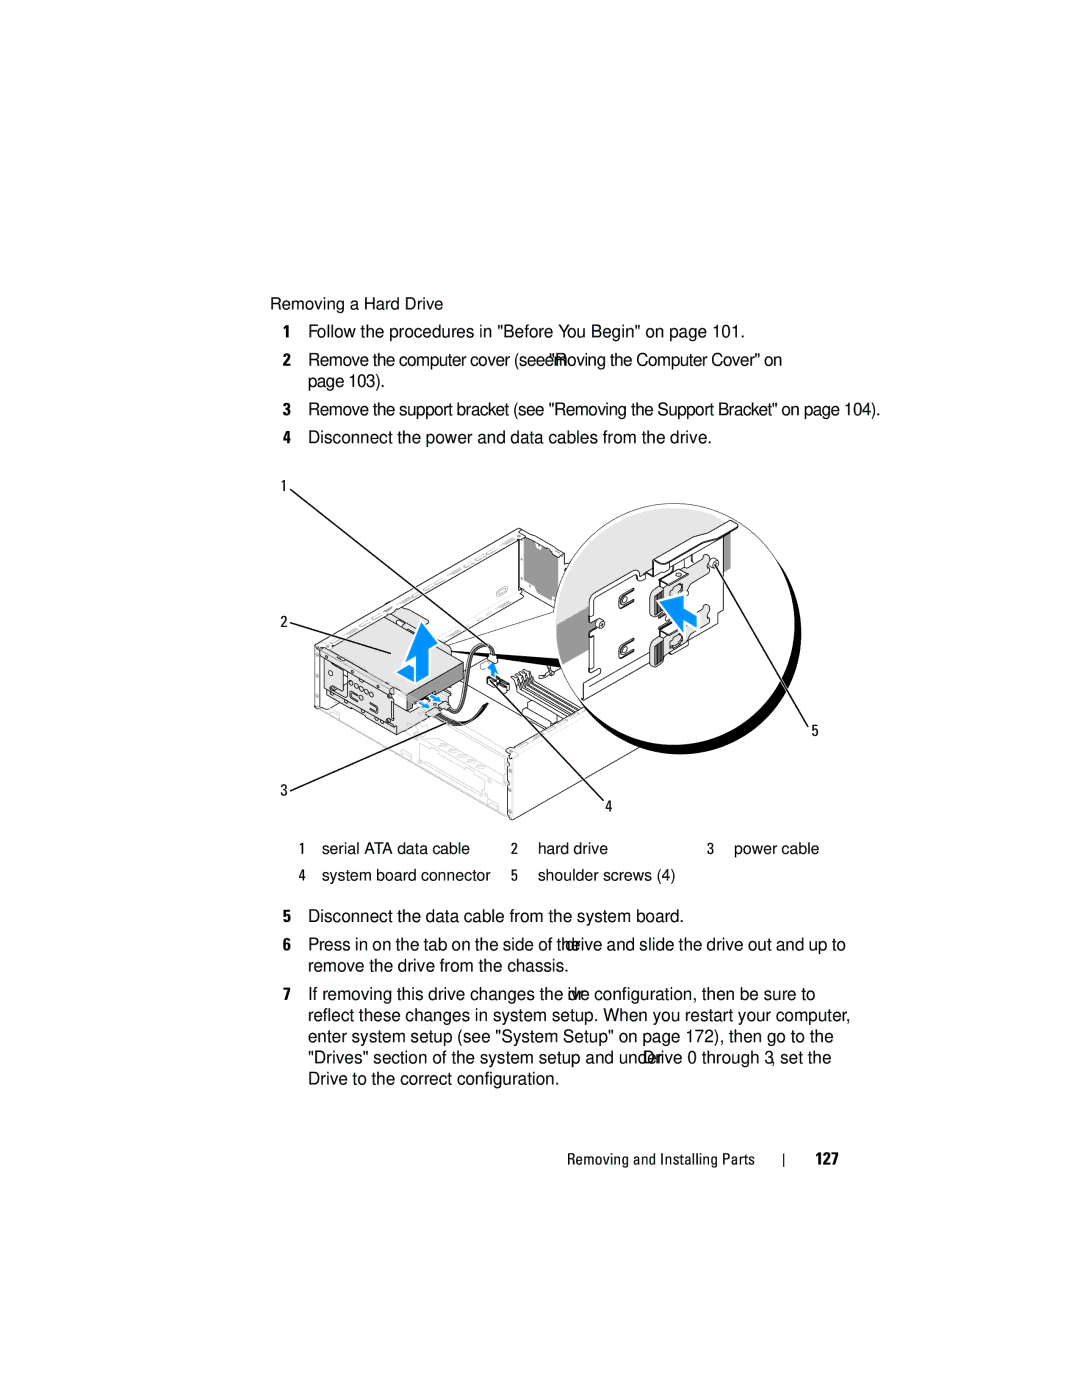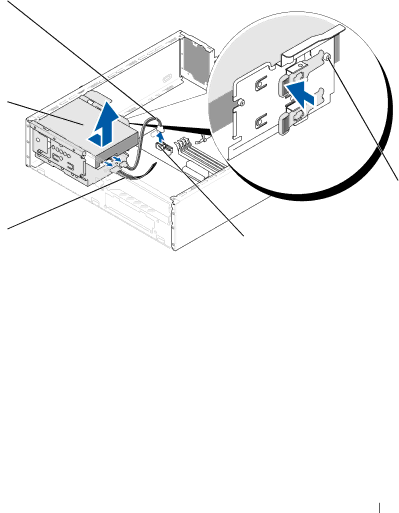
Removing a Hard Drive
1Follow the procedures in "Before You Begin" on page 101.
2Remove the computer cover (see "Removing the Computer Cover" on page 103).
3Remove the support bracket (see "Removing the Support Bracket" on page 104).
4Disconnect the power and data cables from the drive.
1
2 |
5
3
|
|
| 4 |
|
1 | serial ATA data cable | 2 | hard drive | 3 power cable |
4 | system board connector | 5 | shoulder screws (4) |
|
5Disconnect the data cable from the system board.
6Press in on the tab on the side of the drive and slide the drive out and up to remove the drive from the chassis.
7If removing this drive changes the drive configuration, then be sure to reflect these changes in system setup. When you restart your computer, enter system setup (see "System Setup" on page 172), then go to the "Drives" section of the system setup and under Drive 0 through 3, set the Drive to the correct configuration.