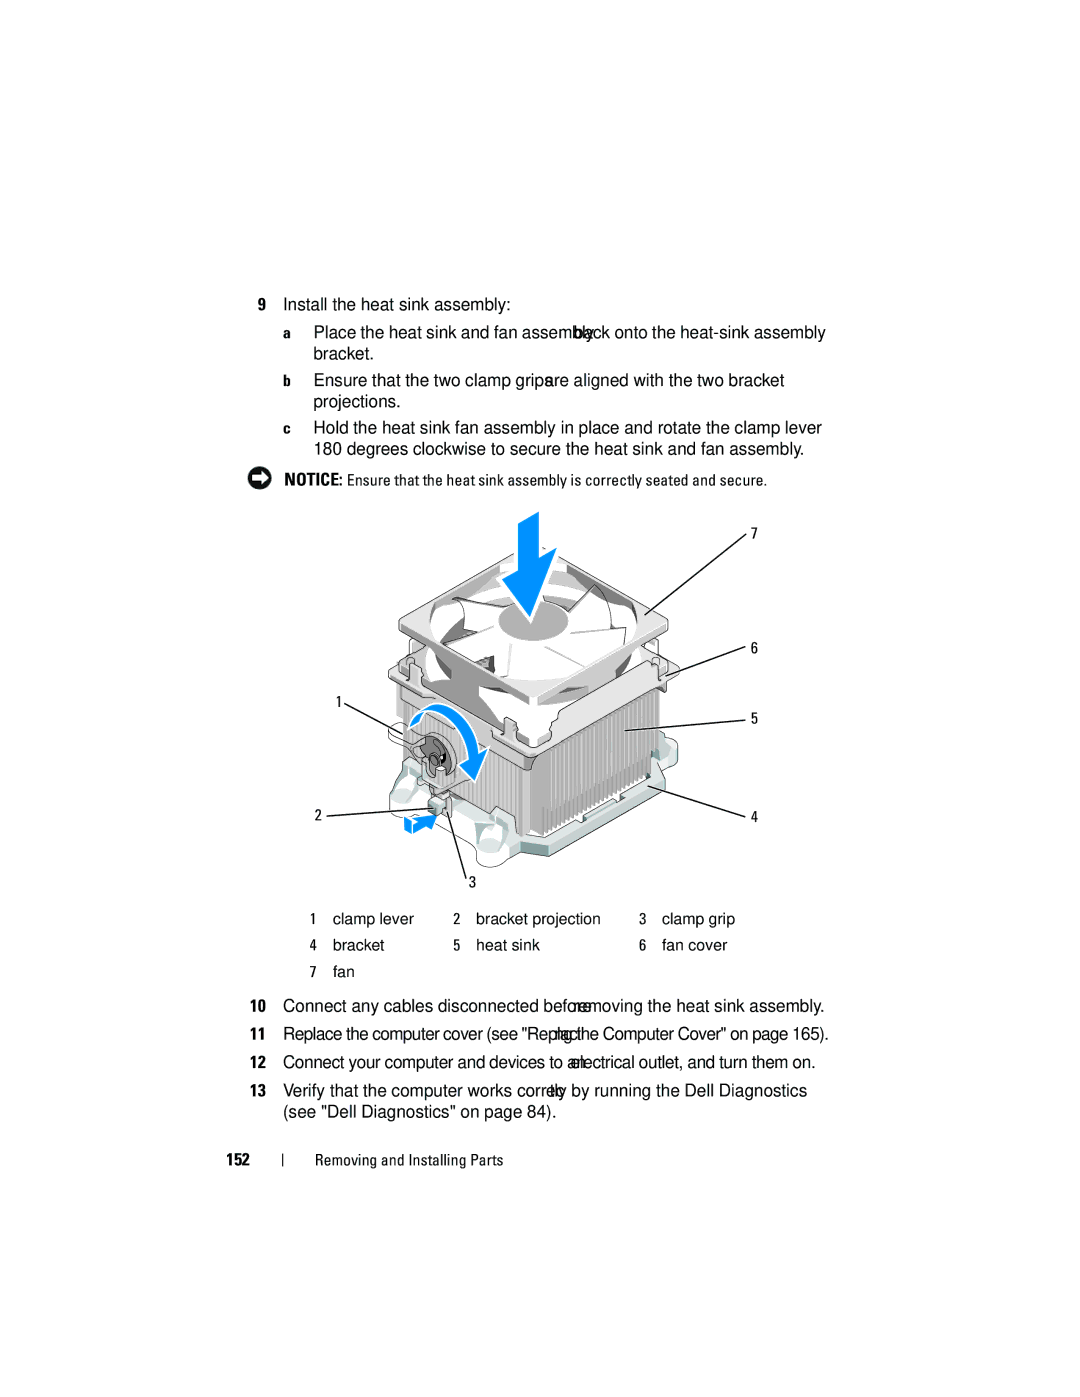
9Install the heat sink assembly:
a Place the heat sink and fan assembly back onto the
b Ensure that the two clamp grips are aligned with the two bracket projections.
c Hold the heat sink fan assembly in place and rotate the clamp lever
180 degrees clockwise to secure the heat sink and fan assembly.
NOTICE: Ensure that the heat sink assembly is correctly seated and secure.
7
![]()
![]()
![]()
![]()
![]()
![]()
![]()
![]()
![]() 6
6
1
|
|
|
|
| 5 |
2 |
|
|
|
| 4 |
|
|
| 3 |
|
|
1 | clamp lever | 2 | bracket projection | 3 | clamp grip |
4 | bracket | 5 | heat sink | 6 | fan cover |
7fan
10Connect any cables disconnected before removing the heat sink assembly.
11Replace the computer cover (see "Replacing the Computer Cover" on page 165).
12Connect your computer and devices to an electrical outlet, and turn them on.
13Verify that the computer works correctly by running the Dell Diagnostics (see "Dell Diagnostics" on page 84).
152