1
2
3
4
5
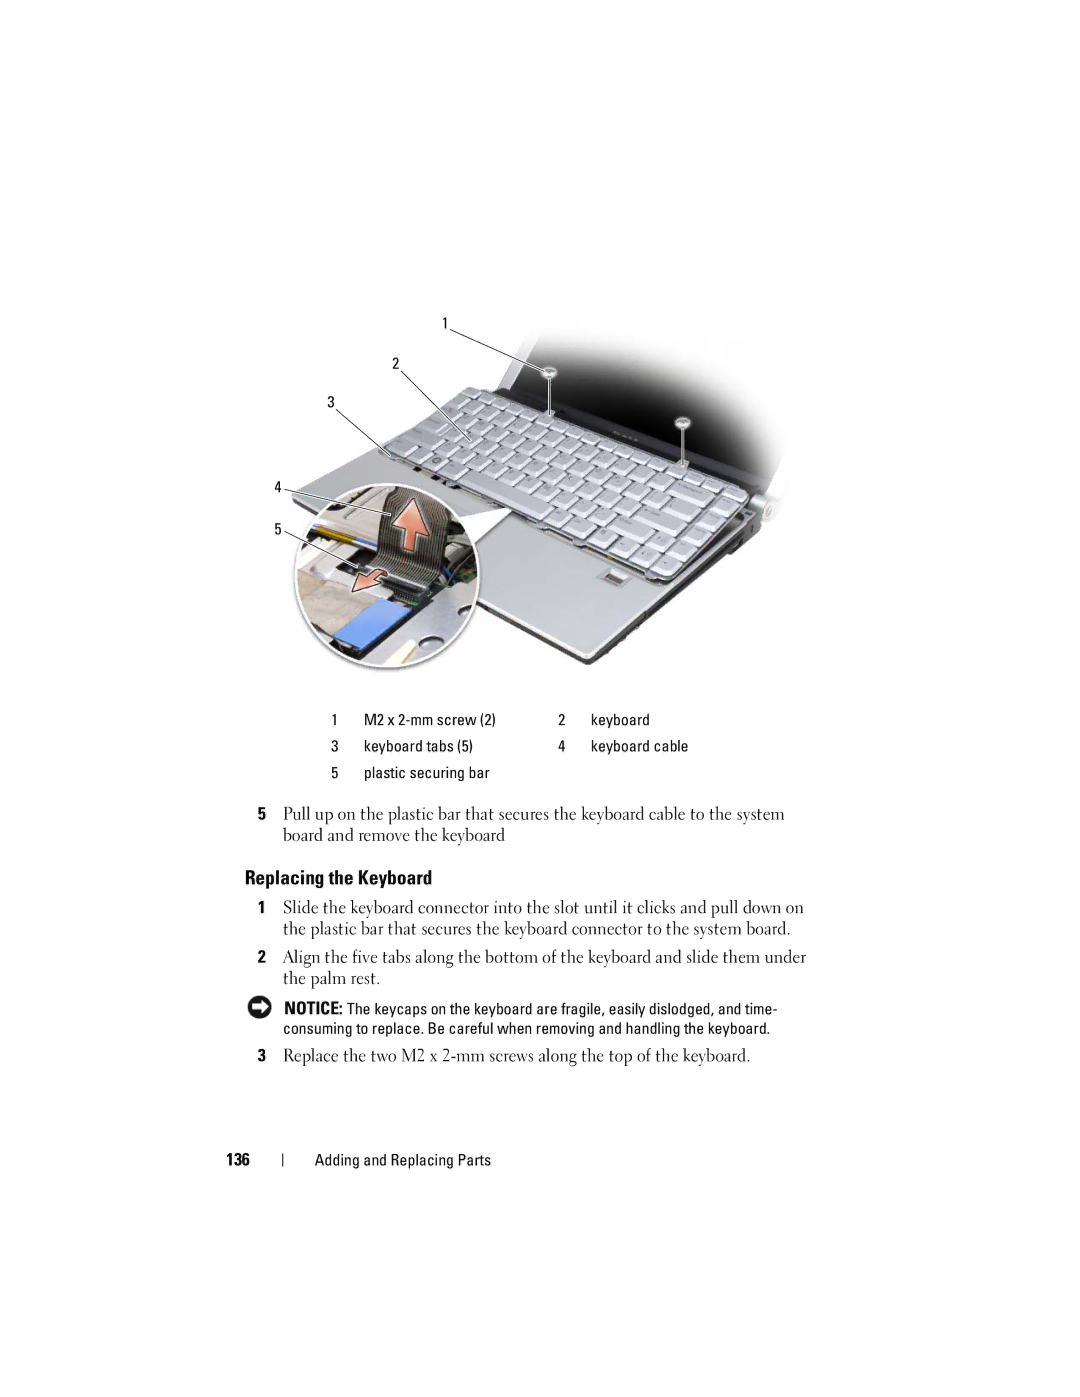
1 | M2 x | 2 | keyboard |
3 | keyboard tabs (5) | 4 | keyboard cable |
5 | plastic securing bar |
|
|
5Pull up on the plastic bar that secures the keyboard cable to the system board and remove the keyboard
Replacing the Keyboard
1Slide the keyboard connector into the slot until it clicks and pull down on the plastic bar that secures the keyboard connector to the system board.
2Align the five tabs along the bottom of the keyboard and slide them under the palm rest.
NOTICE: The keycaps on the keyboard are fragile, easily dislodged, and time- consuming to replace. Be careful when removing and handling the keyboard.
3Replace the two M2 x
136
Adding and Replacing Parts
