1
2
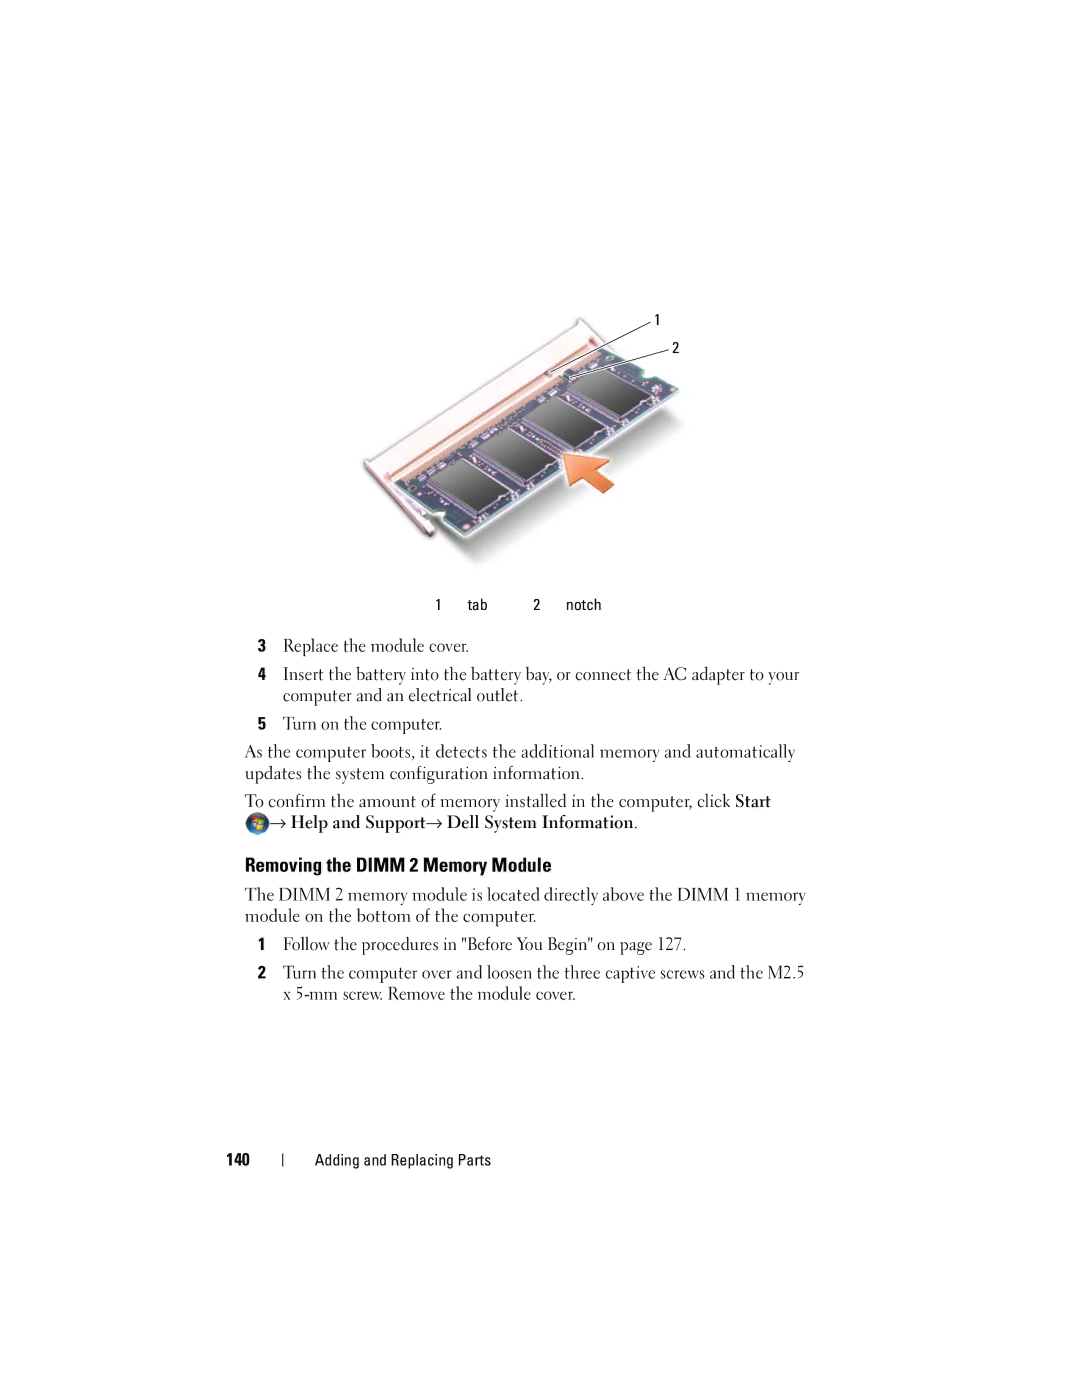
1 | tab | 2 | notch |
3Replace the module cover.
4Insert the battery into the battery bay, or connect the AC adapter to your computer and an electrical outlet.
5Turn on the computer.
As the computer boots, it detects the additional memory and automatically updates the system configuration information.
To confirm the amount of memory installed in the computer, click Start
![]() → Help and Support→ Dell System Information.
→ Help and Support→ Dell System Information.
Removing the DIMM 2 Memory Module
The DIMM 2 memory module is located directly above the DIMM 1 memory module on the bottom of the computer.
1Follow the procedures in "Before You Begin" on page 127.
2Turn the computer over and loosen the three captive screws and the M2.5 x
140
Adding and Replacing Parts