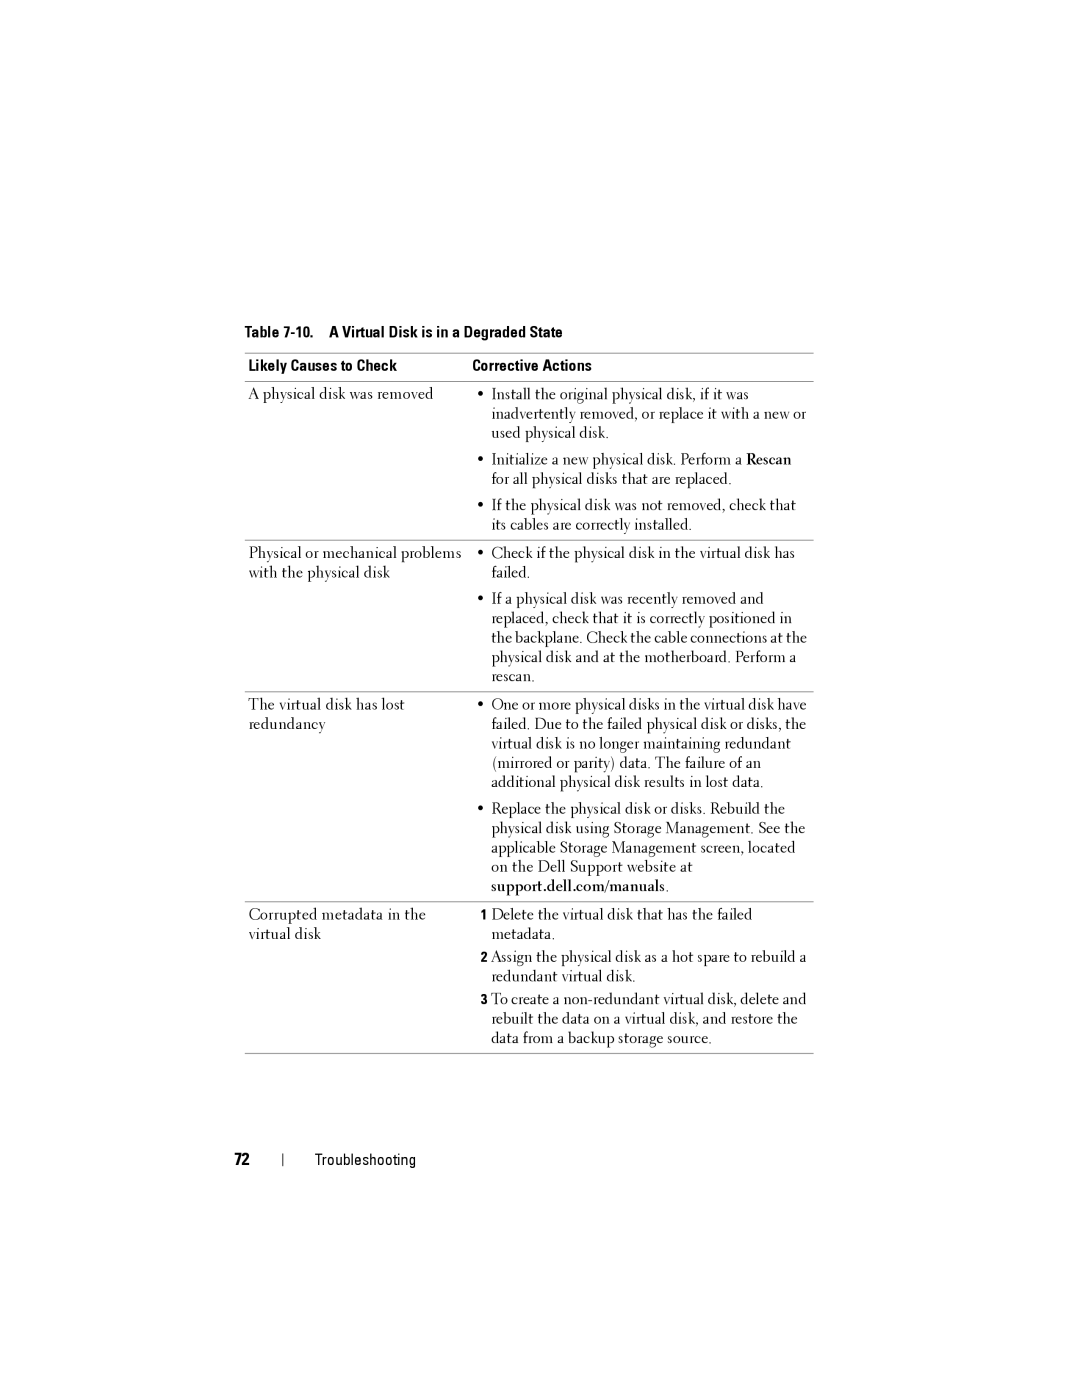
Table
Likely Causes to Check | Corrective Actions |
|
|
A physical disk was removed | • Install the original physical disk, if it was |
| inadvertently removed, or replace it with a new or |
| used physical disk. |
| • Initialize a new physical disk. Perform a Rescan |
| for all physical disks that are replaced. |
| • If the physical disk was not removed, check that |
| its cables are correctly installed. |
|
|
Physical or mechanical problems | • Check if the physical disk in the virtual disk has |
with the physical disk | failed. |
| • If a physical disk was recently removed and |
| replaced, check that it is correctly positioned in |
| the backplane. Check the cable connections at the |
| physical disk and at the motherboard. Perform a |
| rescan. |
|
|
The virtual disk has lost | • One or more physical disks in the virtual disk have |
redundancy | failed. Due to the failed physical disk or disks, the |
| virtual disk is no longer maintaining redundant |
| (mirrored or parity) data. The failure of an |
| additional physical disk results in lost data. |
| • Replace the physical disk or disks. Rebuild the |
| physical disk using Storage Management. See the |
| applicable Storage Management screen, located |
| on the Dell Support website at |
| support.dell.com/manuals. |
|
|
Corrupted metadata in the | 1 Delete the virtual disk that has the failed |
virtual disk | metadata. |
| 2 Assign the physical disk as a hot spare to rebuild a |
| redundant virtual disk. |
| 3 To create a |
| rebuilt the data on a virtual disk, and restore the |
| data from a backup storage source. |
|
|
72
Troubleshooting