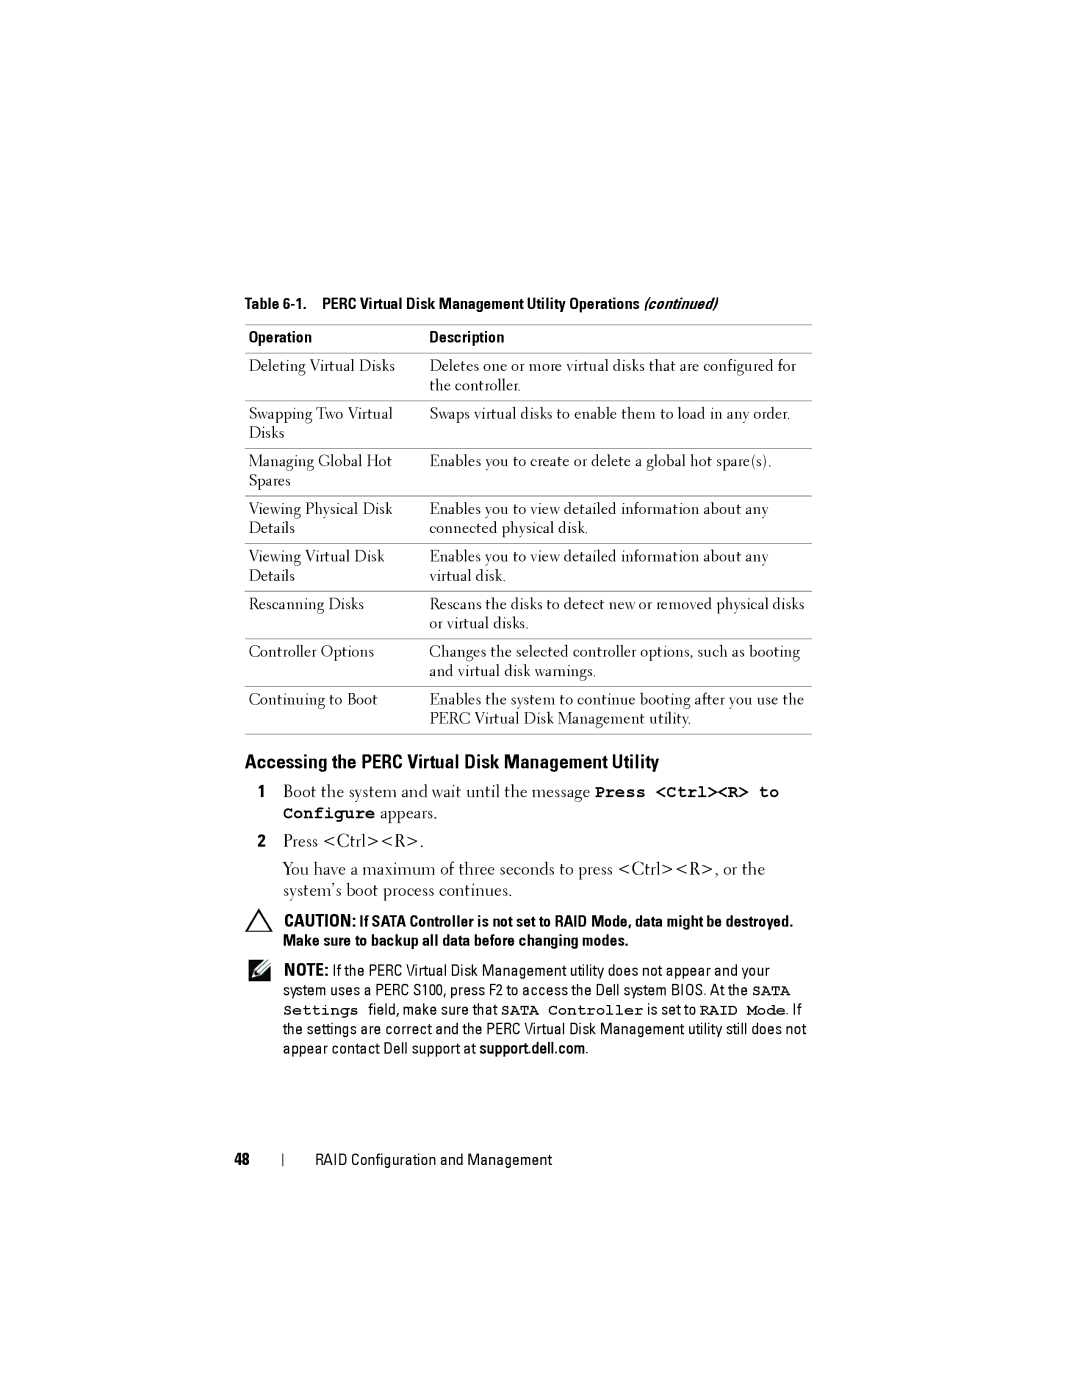
Table 6-1. PERC Virtual Disk Management Utility Operations (continued)
Operation | Description |
|
|
Deleting Virtual Disks | Deletes one or more virtual disks that are configured for |
| the controller. |
|
|
Swapping Two Virtual | Swaps virtual disks to enable them to load in any order. |
Disks |
|
|
|
Managing Global Hot | Enables you to create or delete a global hot spare(s). |
Spares |
|
|
|
Viewing Physical Disk | Enables you to view detailed information about any |
Details | connected physical disk. |
|
|
Viewing Virtual Disk | Enables you to view detailed information about any |
Details | virtual disk. |
|
|
Rescanning Disks | Rescans the disks to detect new or removed physical disks |
| or virtual disks. |
|
|
Controller Options | Changes the selected controller options, such as booting |
| and virtual disk warnings. |
|
|
Continuing to Boot | Enables the system to continue booting after you use the |
| PERC Virtual Disk Management utility. |
|
|
Accessing the PERC Virtual Disk Management Utility
1Boot the system and wait until the message Press <Ctrl><R> to Configure appears.
2Press <Ctrl><R>.
You have a maximum of three seconds to press <Ctrl><R>, or the system’s boot process continues.
CAUTION: If SATA Controller is not set to RAID Mode, data might be destroyed. Make sure to backup all data before changing modes.
NOTE: If the PERC Virtual Disk Management utility does not appear and your system uses a PERC S100, press F2 to access the Dell system BIOS. At the SATA Settings field, make sure that SATA Controller is set to RAID Mode. If the settings are correct and the PERC Virtual Disk Management utility still does not appear contact Dell support at support.dell.com.
48
RAID Configuration and Management