Switching the INPUT Mode
Select the appropriate input mode for the con- nected equipment.
Press ![]() ,
, ![]() ,
, ![]() or
or ![]() on the re- mote control to select the input mode.
on the re- mote control to select the input mode.
•When pressing ' or " on the projector, input mode switches in order of :
![]()
![]() INPUT 1
INPUT 1![]()
![]() INPUT 2
INPUT 2 ![]()
![]() INPUT 3
INPUT 3 ![]()
![]() INPUT 4
INPUT 4![]()
![]()
![]() Note
Note
•When no signal is received, “NO SIGNAL” will be displayed. When a signal that the projector is not preset to receive is received, “NOT REG.” will be displayed.
•The INPUT mode is not displayed when “OSD Display” of the “Options1” menu is set to “![]() ” (OFF). (See page 51.)
” (OFF). (See page 51.)
About the INPUT mode
INPUT 1/ | Used for projecting images from |
INPUT 2 | equipment that sends RGB sig- |
(RGB/ | nals or component signals con- |
Component) | nected to the RGB input terminal. |
INPUT 3 | Used for projecting images |
(Video) | from equipment connected to |
| the VIDEO input terminal. |
INPUT 4 | Used for projecting images |
from equipment connected to | |
| the |
Adjusting the Volume
Press \ /on the projector or VOL ![]() /
/ ![]() on the remote control to ad- just the volume.
on the remote control to ad- just the volume.
![]() Note
Note
•Pressing ![]() or \ will lower the volume. Pressing
or \ will lower the volume. Pressing ![]() or will raise the volume.
or will raise the volume.

![]() /
/ ![]() /
/ ![]() /
/ ![]()
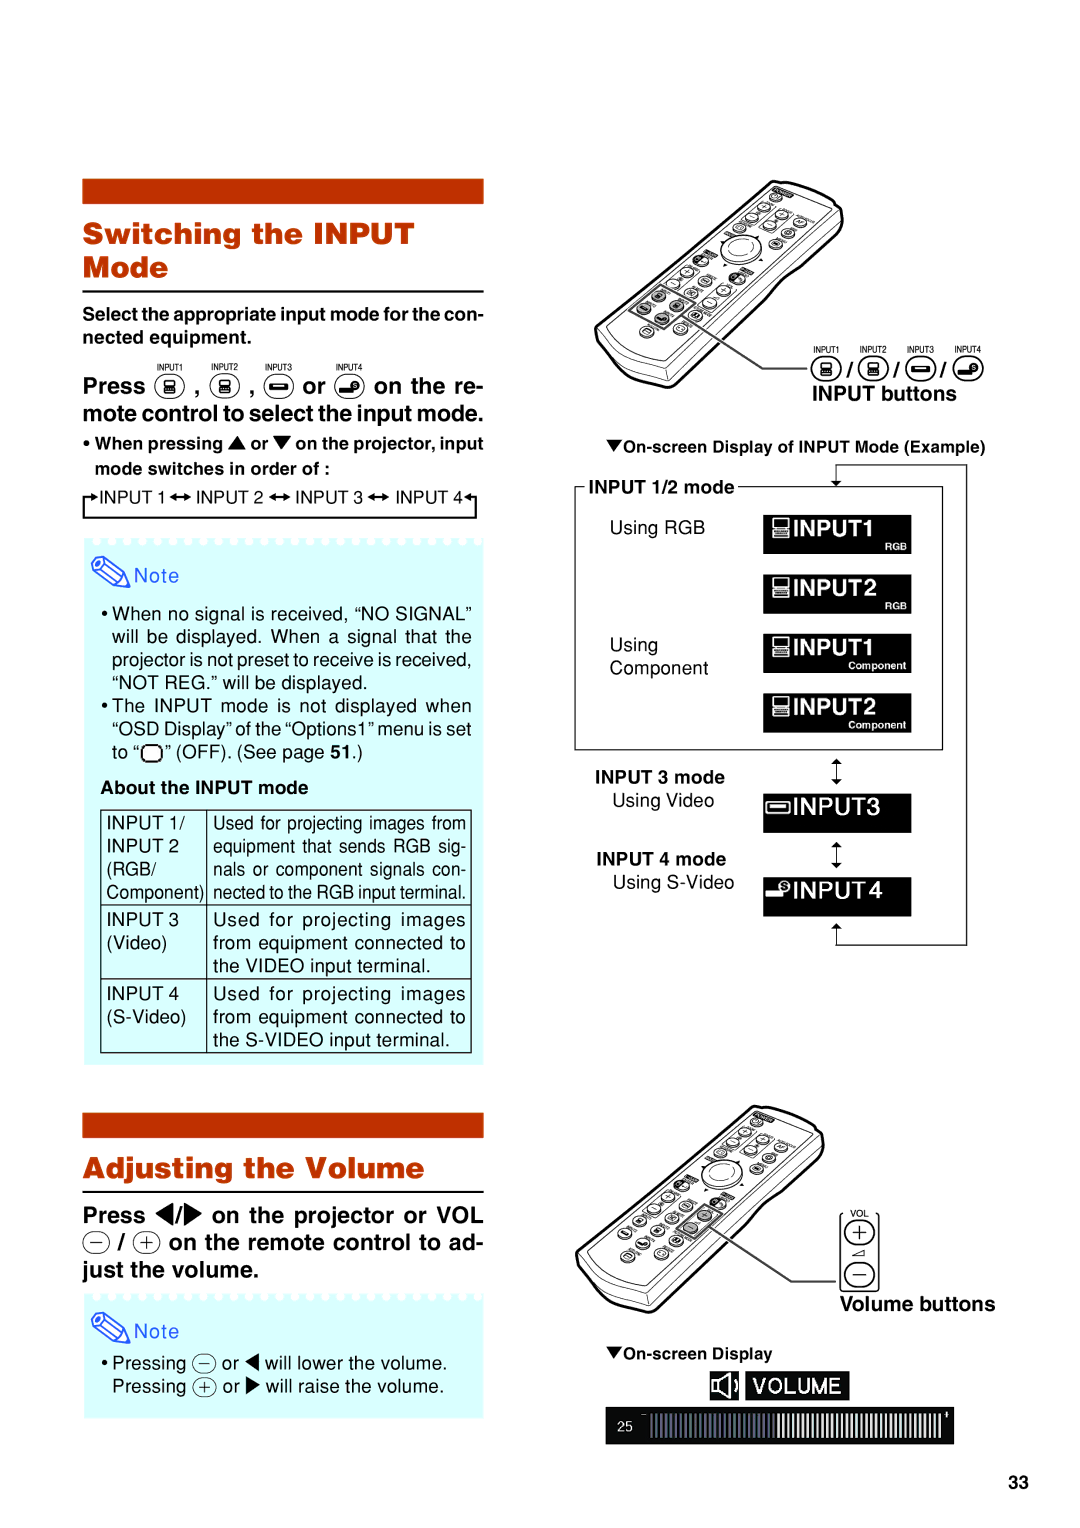
INPUT buttons
|
|
|
|
| ➝ |
| |
INPUT 1/2 mode |
| ||
|
|
| |
Using RGB |
|
|
|
Using
Component
INPUT 3 mode | ➝ | |
➝ | ||
Using Video |
|
|
INPUT 4 mode | ➝ | |
➝ | ||
Using |
|
|
| ➝ | |
|
|
|
Volume buttons
33