How to Read this Operation Manual
•In this operation manual, the illustrations and
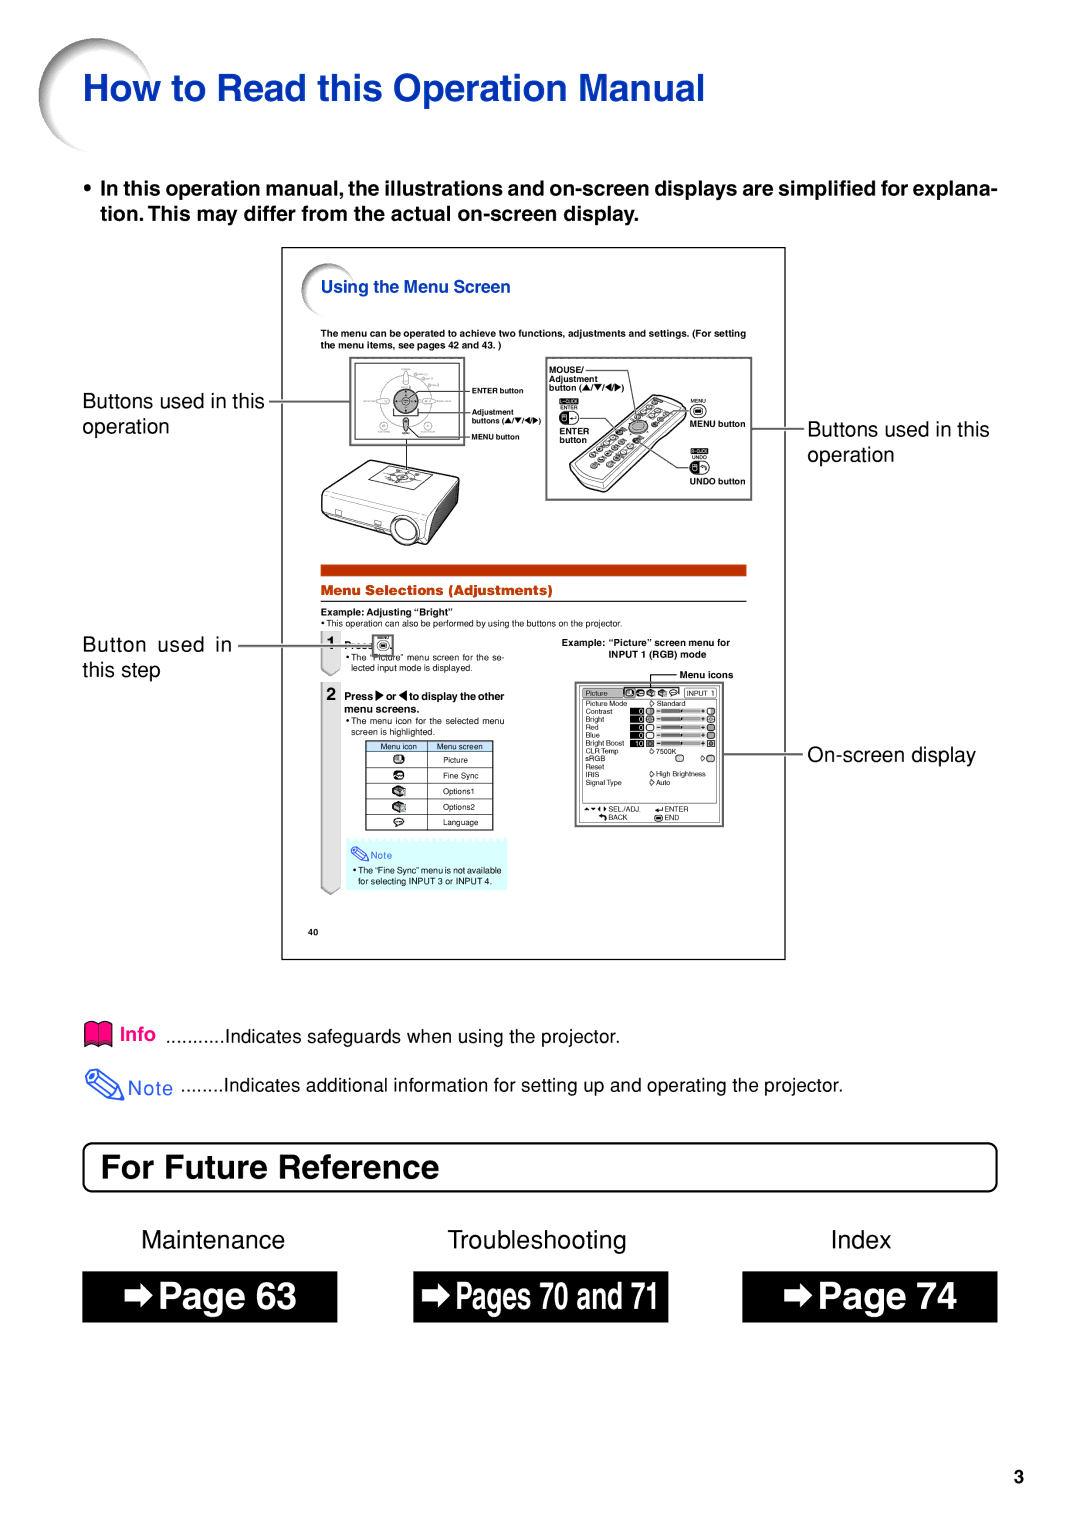
Using the Menu Screen
The menu can be operated to achieve two functions, adjustments and settings. (For setting the menu items, see pages 42 and 43. )
|
| MOUSE/ |
|
|
|
| Adjustment |
|
|
Buttons used in this | ENTER button | button ('/"/\/) |
|
|
|
|
| ||
Adjustment |
|
|
| |
operation |
|
|
| |
buttons ('/"/\/) | ENTER | MENU button | Buttons used in this | |
MENU button | ||||
|
|
|
| |
|
| button |
| operation |
|
|
|
| |
|
|
| UNDO button |
|
Menu Selections (Adjustments)
Example: Adjusting “Bright”
•This operation can also be performed by using the buttons on the projector.
Button used in | 1 | Press . | Example: “Picture” screen menu for | ||||||||||||
|
|
|
|
|
| ||||||||||
this step |
| • The “Picture” menu screen for the se- |
| INPUT 1 (RGB) mode | |||||||||||
| lected input mode is displayed. |
|
|
|
|
|
| Menu icons | |||||||
|
|
|
|
|
|
|
|
|
|
|
| ||||
| 2 Press or \ to display the other |
|
|
|
|
|
|
|
|
|
| ||||
|
|
|
|
|
|
|
|
|
|
| |||||
|
|
|
|
|
|
|
|
|
|
| |||||
|
| menu screens. |
|
|
|
|
|
|
|
|
|
| |||
|
| • The menu icon for the selected menu |
|
|
|
|
|
|
|
|
|
| |||
|
| screen is highlighted. |
|
|
|
|
|
|
|
|
|
| |||
|
|
|
|
|
|
|
|
|
|
|
|
|
|
|
|
|
|
|
| Menu icon Menu screen |
|
|
|
|
|
|
|
|
|
|
|
|
|
|
| Picture |
|
|
|
|
|
|
|
|
| ||
|
|
|
|
|
|
|
|
|
|
|
|
| |||
Fine Sync
Options1
Options2
Language
![]() Note
Note
•The “Fine Sync” menu is not available for selecting INPUT 3 or INPUT 4.
40
Info | Indicates safeguards when using the projector. |
Note | Indicates additional information for setting up and operating the projector. |
For Future Reference
| Maintenance |
|
| Troubleshooting |
|
| Index | |||
|
|
|
|
|
|
|
|
|
|
|
|
| Page 63 |
|
|
| Pages 70 and 71 |
|
|
| Page 74 |
|
|
|
| |||||||
|
|
|
| |||||||
|
|
|
|
|
|
|
|
|
|
|
3