Connecting to a Computer
Before connecting, ensure the power cord of the projector from the AC outlet is unplugged, and that the devices to be connected are turned off. After making all connections, turn on the projector and then the other devices. When connecting a computer, ensure that it is the last device to be turned on after all the connections are made.
Ensure the operation manuals of the devices to be connected have been read before making connections.
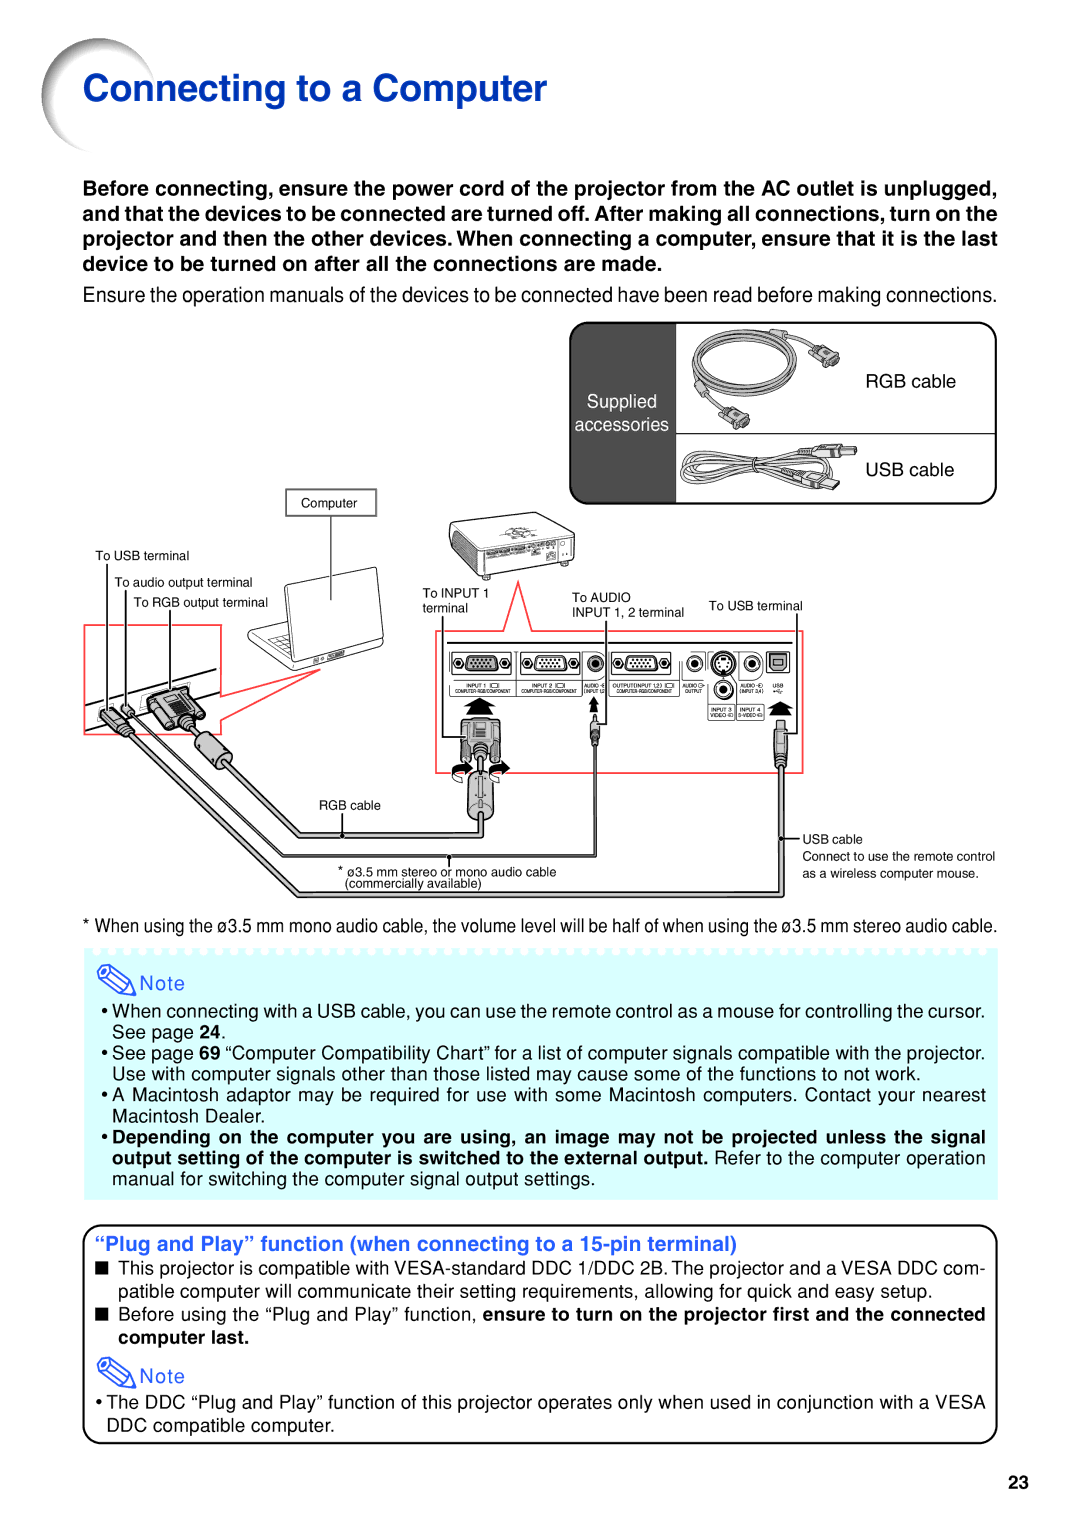
To USB terminal
To audio output terminal To RGB output terminal
Supplied
accessories
Computer
To INPUT 1 | To AUDIO | |||||||||
terminal | ||||||||||
INPUT 1, 2 terminal | ||||||||||
|
|
|
|
|
|
|
|
|
| |
|
|
|
|
|
|
|
|
|
| |
|
|
|
|
|
|
|
|
|
| |
|
|
|
|
|
|
|
|
|
| |
|
|
|
|
|
|
|
|
|
| |
|
|
|
|
|
|
|
|
|
| |
|
|
|
|
|
|
|
|
|
| |
RGB cable
*ø3.5 mm stereo or mono audio cable (commercially available)
RGB cable
USB cable
To USB terminal
![]() USB cable
USB cable
Connect to use the remote control as a wireless computer mouse.
* When using the ø3.5 mm mono audio cable, the volume level will be half of when using the ø3.5 mm stereo audio cable.
![]() Note
Note
•When connecting with a USB cable, you can use the remote control as a mouse for controlling the cursor. See page 24.
•See page 69 “Computer Compatibility Chart” for a list of computer signals compatible with the projector. Use with computer signals other than those listed may cause some of the functions to not work.
•A Macintosh adaptor may be required for use with some Macintosh computers. Contact your nearest Macintosh Dealer.
•Depending on the computer you are using, an image may not be projected unless the signal output setting of the computer is switched to the external output. Refer to the computer operation manual for switching the computer signal output settings.
“Plug and Play” function (when connecting to a 15-pin terminal)
■This projector is compatible with
■Before using the “Plug and Play” function, ensure to turn on the projector first and the connected computer last.
![]() Note
Note
•The DDC “Plug and Play” function of this projector operates only when used in conjunction with a VESA DDC compatible computer.
23