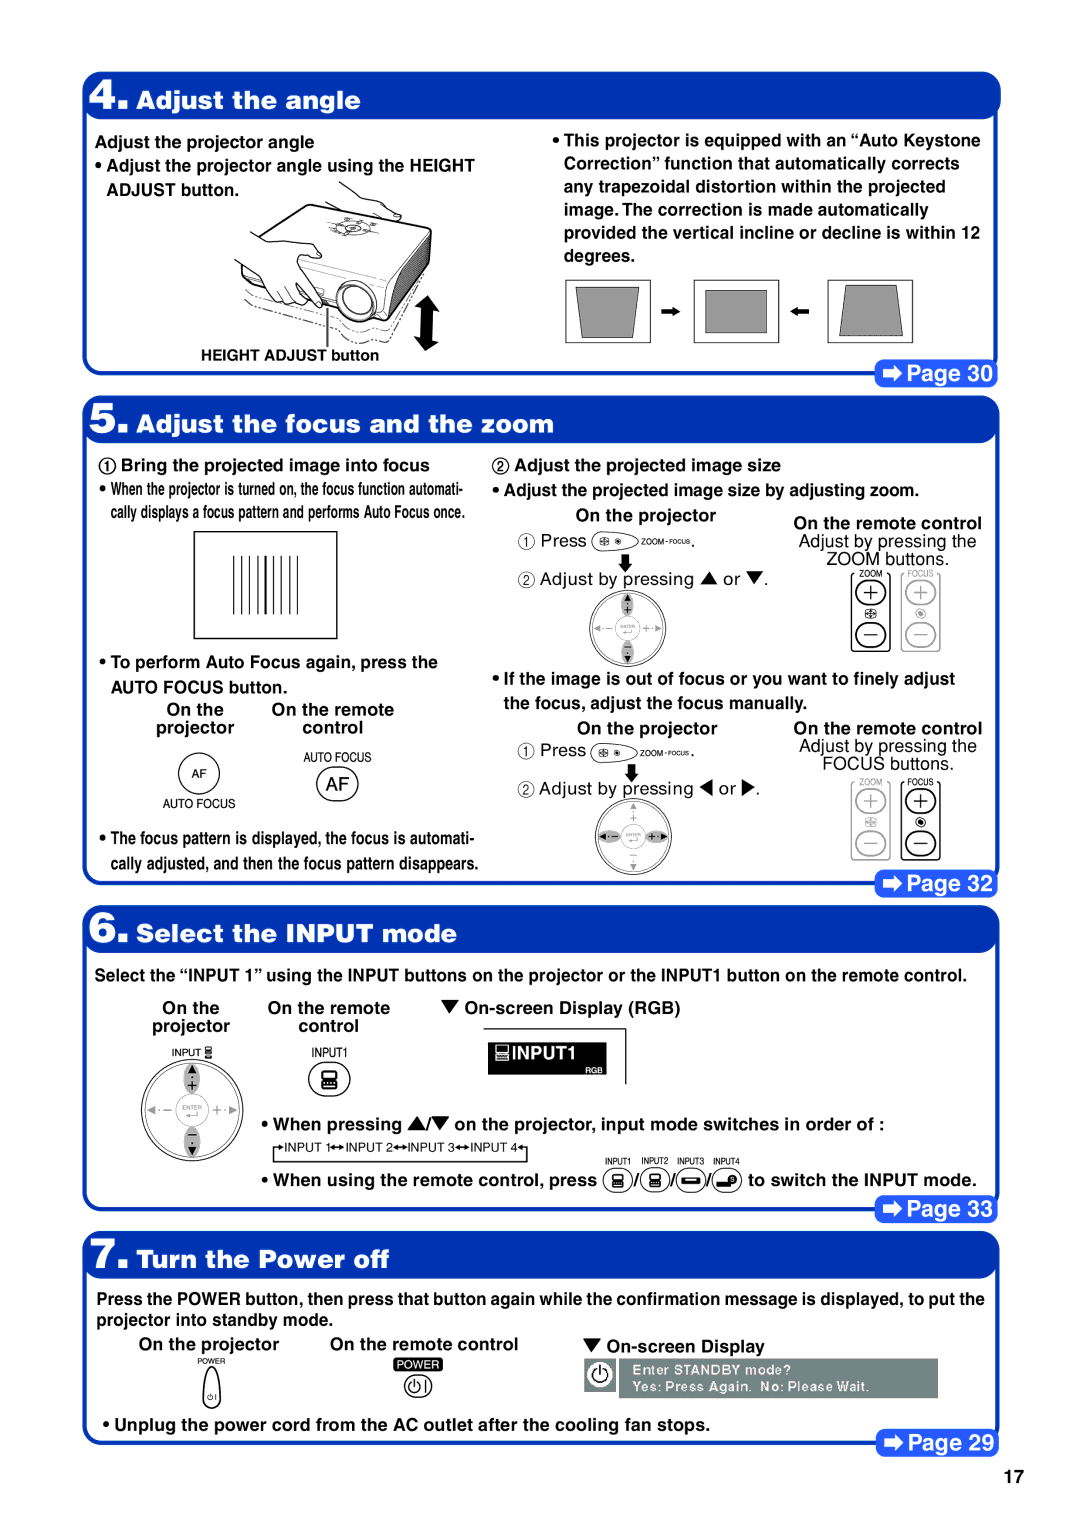
4. Adjust the angle
Adjust the projector angle
•Adjust the projector angle using the HEIGHT
ADJUST button.
HEIGHT ADJUST button
•This projector is equipped with an “Auto Keystone Correction” function that automatically corrects any trapezoidal distortion within the projected image. The correction is made automatically provided the vertical incline or decline is within 12 degrees.
![]() Page 30
Page 30
5. Adjust the focus and the zoom
1 Bring the projected image into focus
•When the projector is turned on, the focus function automati- cally displays a focus pattern and performs Auto Focus once.
•To perform Auto Focus again, press the
AUTO FOCUS button.
On the | On the remote |
projector | control |
•The focus pattern is displayed, the focus is automati- cally adjusted, and then the focus pattern disappears.
2 Adjust the projected image size
•Adjust the projected image size by adjusting zoom.
On the projector | On the remote control | ||
1 Press | . | ||
Adjust by pressing the | |||
|
| ZOOM buttons. | |
2 Adjust by pressing ' or ".
•If the image is out of focus or you want to finely adjust the focus, adjust the focus manually.
On the projector | On the remote control | |
1 Press | . | Adjust by pressing the |
|
| FOCUS buttons. |
2 Adjust by pressing \ or .
![]() Page 32
Page 32
6. Select the INPUT mode
Select the “INPUT 1” using the INPUT buttons on the projector or the INPUT1 button on the remote control.
On the | On the remote | " | ||||
projector | control |
|
|
| ||
|
|
| ||||
|
|
|
|
|
|
|
|
|
|
|
|
|
|
• When pressing '/" on the projector, input mode switches in order of :
![]()
![]() INPUT 1
INPUT 1![]() INPUT 2
INPUT 2![]()
![]() INPUT 3
INPUT 3![]()
![]() INPUT 4
INPUT 4![]()
![]()
•When using the remote control, press ![]() /
/![]() /
/![]() /
/![]() to switch the INPUT mode.
to switch the INPUT mode.
![]() Page 33
Page 33
7. Turn the Power off
Press the POWER button, then press that button again while the confirmation message is displayed, to put the projector into standby mode.
On the projector On the remote control
• Unplug the power cord from the AC outlet after the cooling fan stops.
![]() Page 29
Page 29
17