Auto Focus Setting
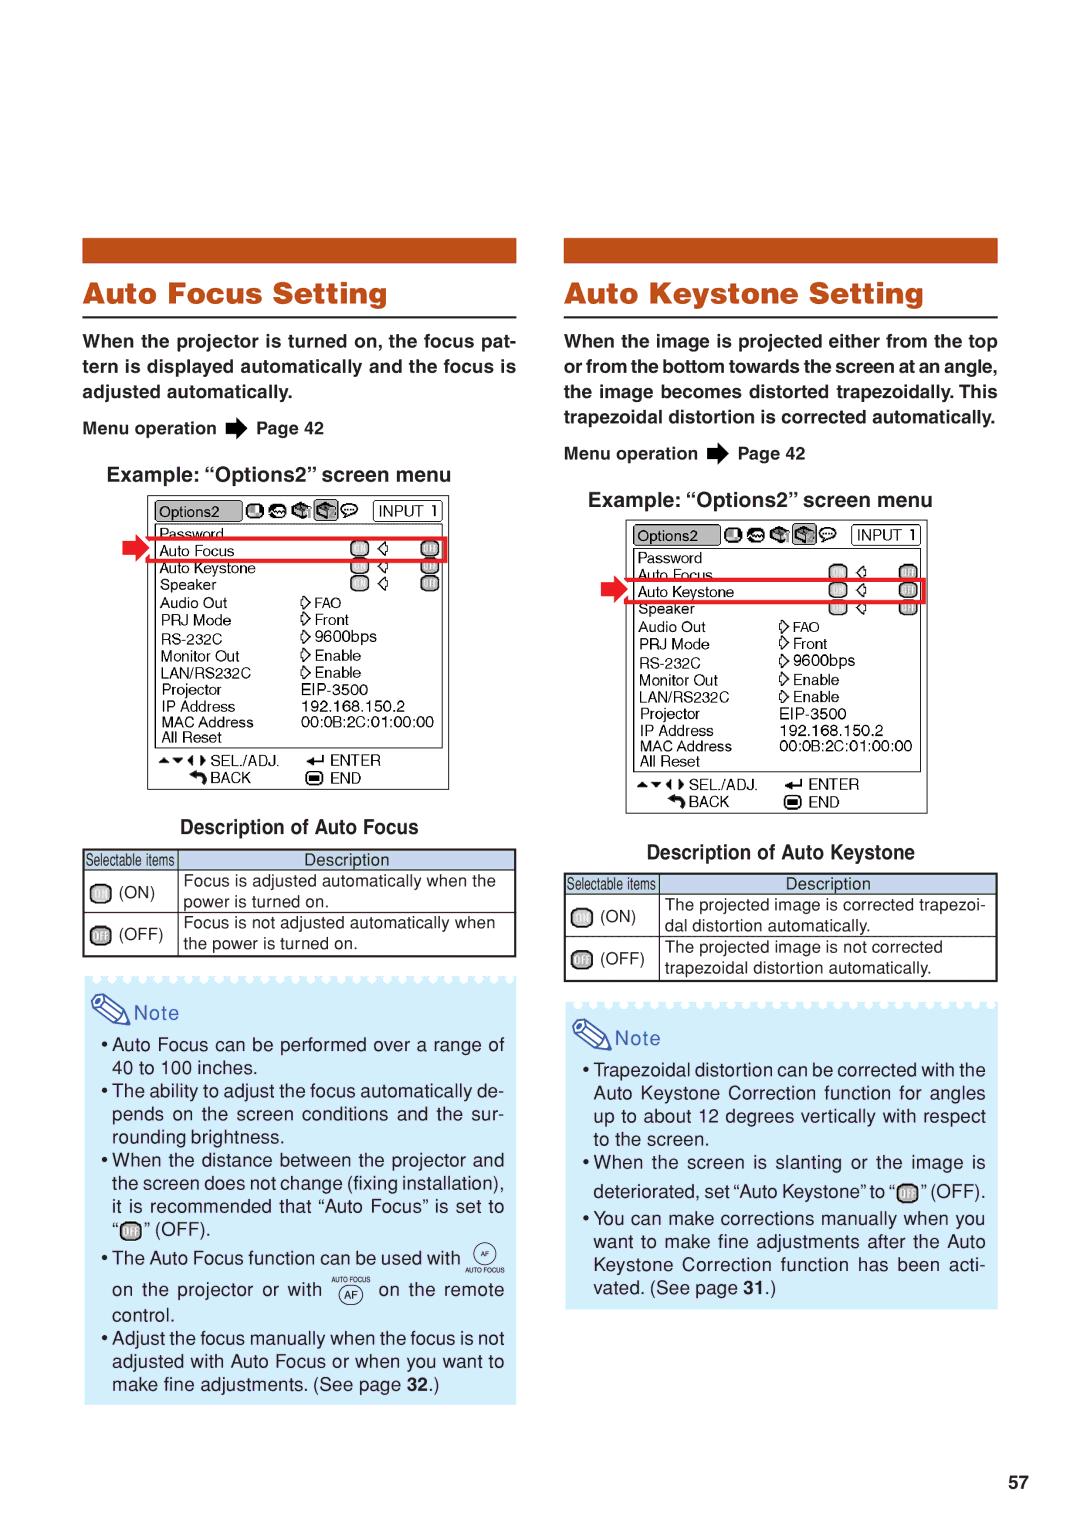
When the projector is turned on, the focus pat- tern is displayed automatically and the focus is adjusted automatically.
Menu operation ![]() Page 42
Page 42
Example: “Options2” screen menu
| Description of Auto Focus | |
|
| |
Selectable items | Description | |
(ON) | Focus is adjusted automatically when the | |
power is turned on. | ||
| ||
(OFF) | Focus is not adjusted automatically when | |
the power is turned on. | ||
| ||
|
|
![]() Note
Note
•Auto Focus can be performed over a range of 40 to 100 inches.
•The ability to adjust the focus automatically de- pends on the screen conditions and the sur- rounding brightness.
•When the distance between the projector and the screen does not change (fixing installation), it is recommended that “Auto Focus” is set to “![]() ” (OFF).
” (OFF).
•The Auto Focus function can be used with ![]()
on the projector or with ![]() on the remote control.
on the remote control.
•Adjust the focus manually when the focus is not adjusted with Auto Focus or when you want to make fine adjustments. (See page 32.)
Auto Keystone Setting
When the image is projected either from the top or from the bottom towards the screen at an angle, the image becomes distorted trapezoidally. This trapezoidal distortion is corrected automatically.
Menu operation ![]() Page 42
Page 42
Example: “Options2” screen menu
Description of Auto Keystone
Selectable items | Description | |
(ON) | The projected image is corrected trapezoi- | |
dal distortion automatically. | ||
| ||
(OFF) | The projected image is not corrected | |
trapezoidal distortion automatically. | ||
| ||
|
|
![]() Note
Note
•Trapezoidal distortion can be corrected with the Auto Keystone Correction function for angles up to about 12 degrees vertically with respect to the screen.
•When the screen is slanting or the image is deteriorated, set “Auto Keystone” to “![]() ” (OFF).
” (OFF).
•You can make corrections manually when you want to make fine adjustments after the Auto Keystone Correction function has been acti- vated. (See page 31.)
57
