Computer Image Adjustment (“Fine Sync” menu)
You can adjust the computer image, match the computer display mode, and confirm the input signal using the “Fine Sync” menu.
Adjusting the Computer Image
Use the Fine Sync function in case of irregulari- ties such as vertical stripes or flickering in por- tions of the screen.
Menu operation ![]() Page 40
Page 40
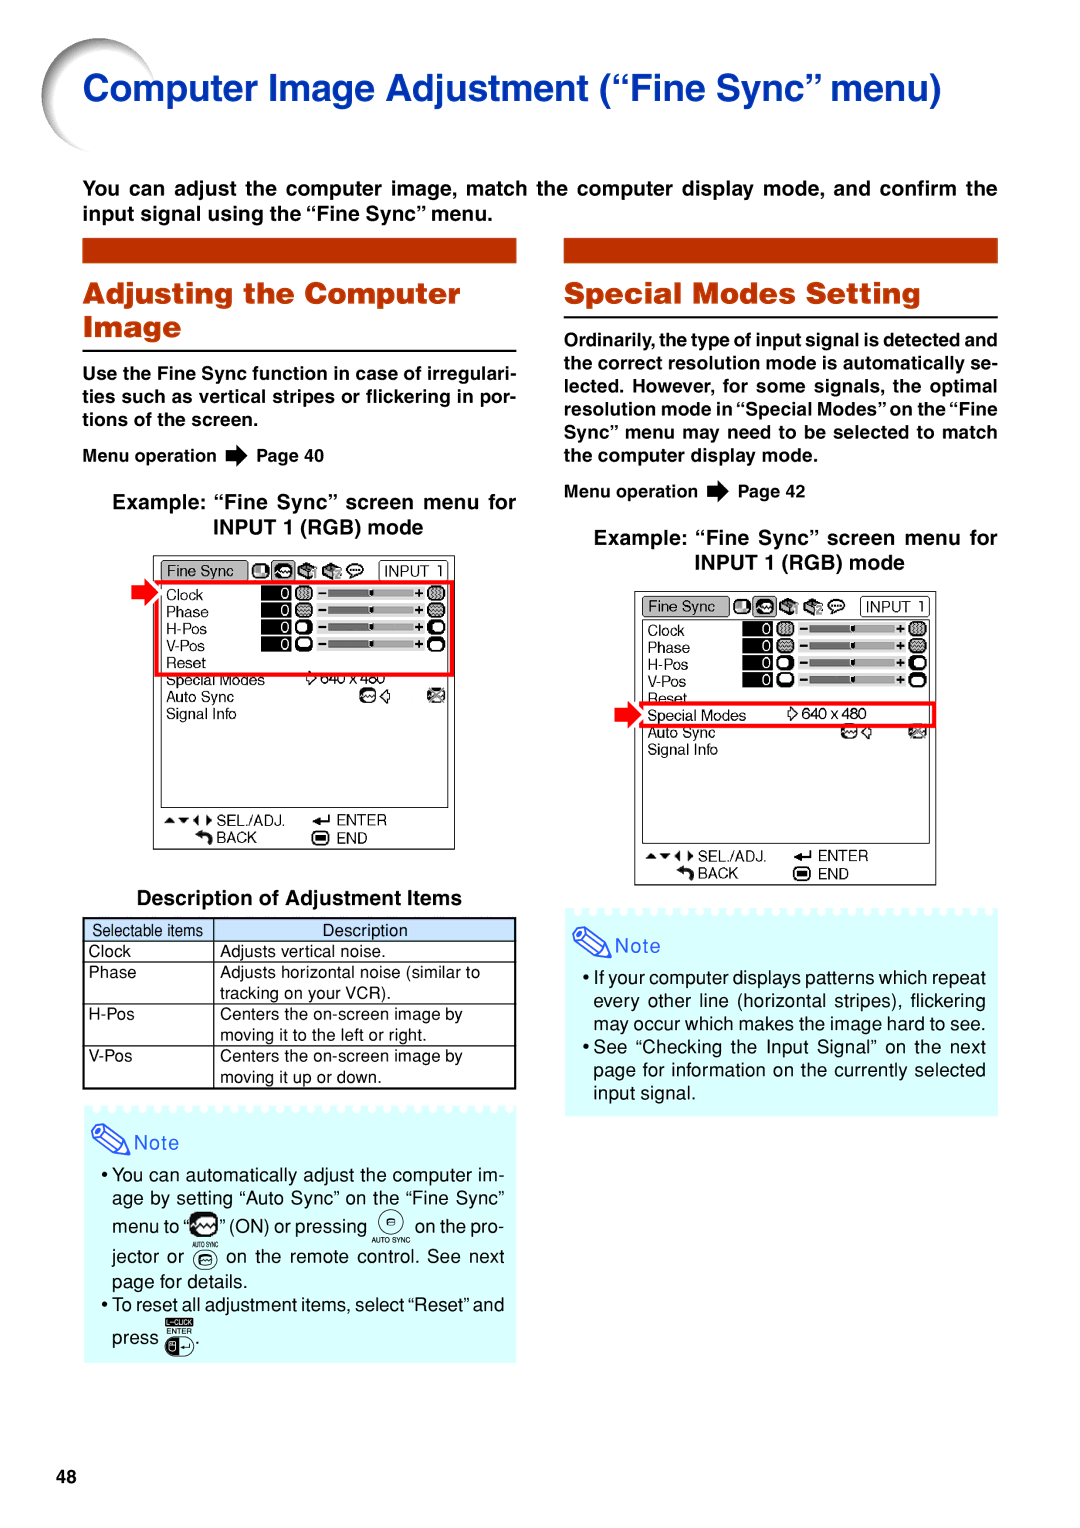
Example: “Fine Sync” screen menu for INPUT 1 (RGB) mode
Description of Adjustment Items
Selectable items | Description |
Clock | Adjusts vertical noise. |
Phase | Adjusts horizontal noise (similar to |
| tracking on your VCR). |
Centers the | |
| moving it to the left or right. |
Centers the | |
| moving it up or down. |
Special Modes Setting
Ordinarily, the type of input signal is detected and the correct resolution mode is automatically se- lected. However, for some signals, the optimal resolution mode in “Special Modes” on the “Fine Sync” menu may need to be selected to match the computer display mode.
Menu operation ![]() Page 42
Page 42
Example: “Fine Sync” screen menu for INPUT 1 (RGB) mode
![]() Note
Note
•If your computer displays patterns which repeat every other line (horizontal stripes), flickering may occur which makes the image hard to see.
•See “Checking the Input Signal” on the next page for information on the currently selected input signal.
![]() Note
Note
•You can automatically adjust the computer im-
age by setting “Auto Sync” on the “Fine Sync”
menu to “![]() ” (ON) or pressing
” (ON) or pressing ![]() on the pro-
on the pro-
jector or ![]() on the remote control. See next page for details.
on the remote control. See next page for details.
•To reset all adjustment items, select “Reset” and press ![]() .
.
48